Outlook 2010 - Windows
- Click on File > Account Settings > Account Settings...
- Click New to add an email address to Outlook.
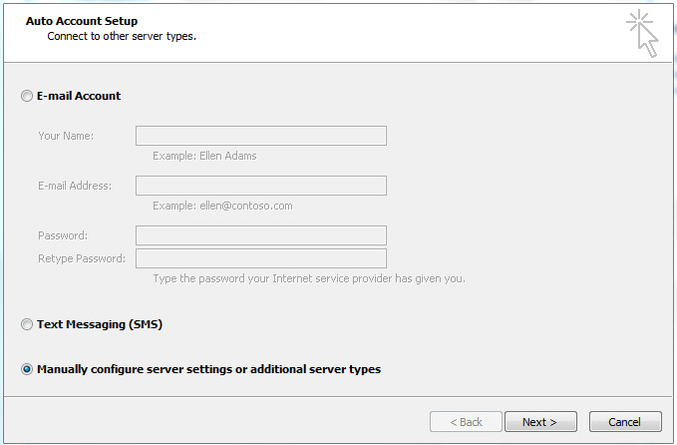
- If you are prompted with an Auto Account Setup window, select Manually configure server settings or additional server types and select Next to continue.
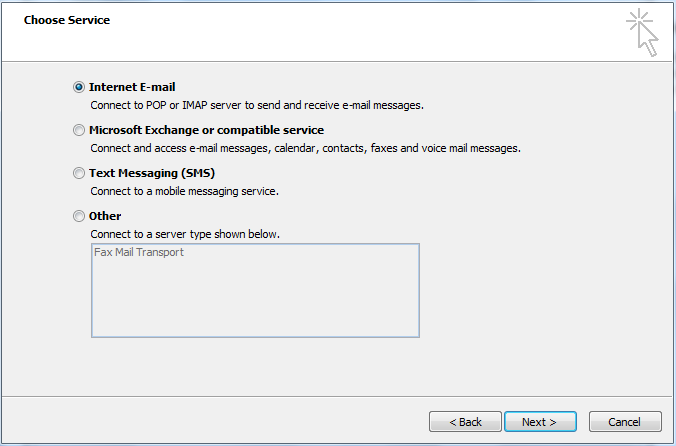
- Select Internet E-mail and click Next.
- Fill in the fields with the following details:
-
Your Name: Your full name (This is the name that will appear with all outgoing emails)
-
E-mail Address: Your full email address
-
Incoming mail server: email.barweb.com.au
-
Outgoing mail server (SMTP): email.barweb.com.au
-
User Name: Your full email address
-
Password: Your account password
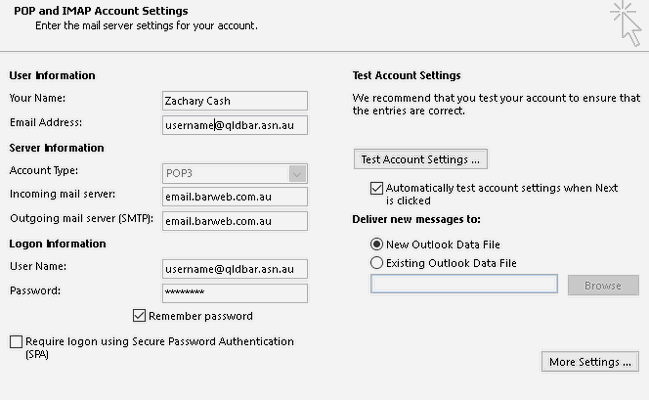
- Click More Settings
- In the Outgoing Server tab, select My outgoing server (SMTP) requires authentication

- In the Advanced tab, in the Outgoing server (SMTP) field, enter 587.
- Tick the checkbox (This server requires an encrypted connection (SSL/TLS)
- Change the Drop down Menu item to Auto for (Use the following type of encrypted connection)
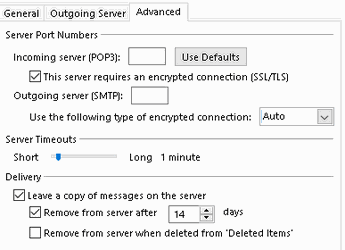
- Click OK
- Click Next, a test will be performed to confirm your settings are correct, once the test is complete, click Close then click on Finish on the following screen
