Apple Mail - MacOS
- Open Mail from the dock or from the Applications folder.
- If this is the first time opening the Mail application or the first account being added to the system, you may proceed to Step 4.
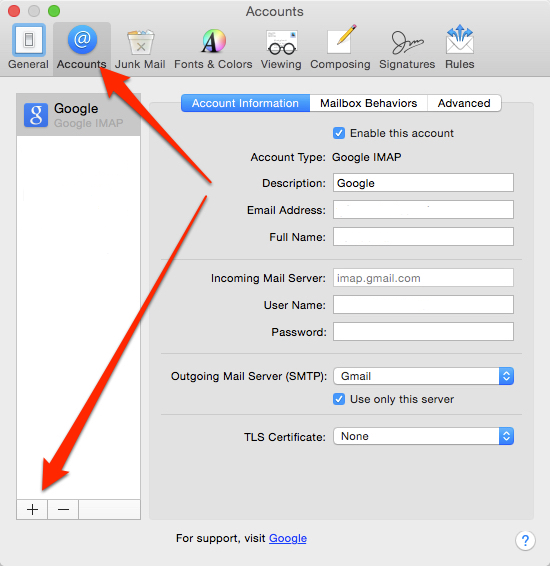
- Click Mail on the top left and select Preferences from the drop down menu (if Mail is not there, you may need to select the Mail icon in the dock to bring it to the top).
- Click the Accounts tab at the top of the new window, then click on the + icon at the bottom left-hand side of the window.
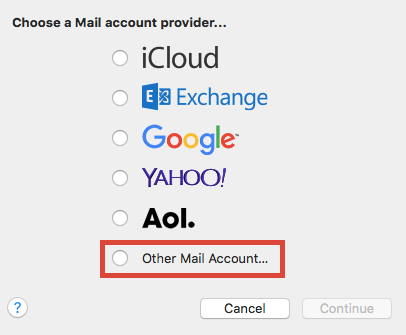
- On the following screen, choose Other Mail Account as the mail provider and click Continue.
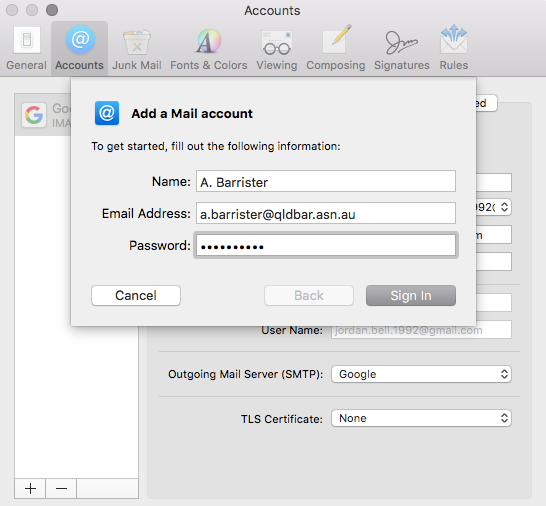
- On the Add Account screen, enter the following details:
-
Full name - This will appear on your emails
- Full QLD Bar email address
- Password for the account
- Click Sign In when all fields are filled in.
- On the following screen, configure the options to reflect the settings below:
-
Email Address:Full QLD Bar email address
-
User Name: Full QLD Bar email address
-
Password: Password for the account
-
Account Type: POP
-
Incoming Mail Server: email.barweb.com.au
-
Outgoing Mail Server: email.barweb.com.au
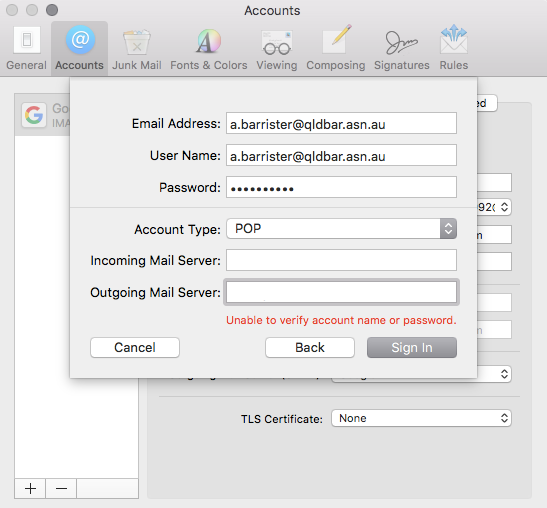
- Click Sign in
- Check that all the details are correct in the Account Information window (ensure the new account is selected in the left bar).
- Click the drop-down button next to Outgoing Mail Server (SMTP).
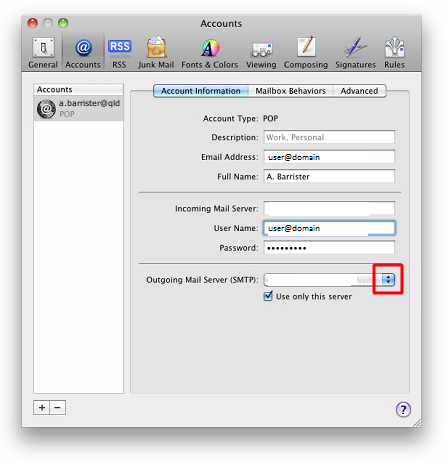
- Select Edit SMTP Server List...

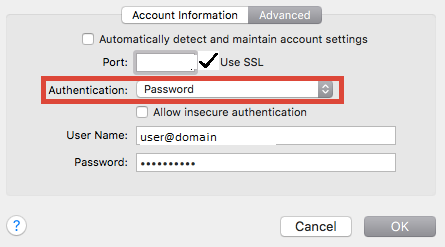
- In the following screen, make sure the email.barweb.com.au server name is highlighted, then click the Advanced tab.
-
Uncheck the setting to Automatically detect account settings.
- Change the port number to 465 (and make sure Use SSL is ticked).
- Change Authentication to password by selecting it in the dropdown menu.
- Type in your username (Your Email Address) and the password (Your Email Password)
- Your BarWeb Mail account has now been successfully set up. You can begin to send and receive mail as per usual.


