Other BarWeb Services
Contains guides and other information for any service offered by BarWeb not covered within another Book
- Posting a Classified
- Exporting a Guide
- Live Status Page
- Installing Nextcloud Desktop Synchronization Client
- Control a macOS session
Posting a Classified
How to post a classified on the BarWeb Classifieds
- Go to https://barweb.net.au/portal or http://barweb.com.au
- Click on Post an Ad in the centre navigation

-
Login with your classifieds credentials (Contact BarWeb support if you do not have a login)

-
Once logged in the form will change, Change the category to BarWeb Classified, fill out the details as required and click on Place Listing

- Your ad will appear once it has been reviewed by BarWeb Support staff.
Exporting a Guide
We allow users to export our guides to keep on file, steps on how to export a guide is as follows
- Open the required guide

-
Click on Export
(Located in the top right corner)

-
Select the required format
(We recommend PDF file, all attempts are made to have the PDF formatted as best as possible)

Live Status Page
About the Live Status Page
A page we recently added to the Barweb portal was a way to view real time status of Barweb services, the live stats that are displayed are extracted from our monitoring system every 60 seconds, this page also auto refreshes every 60 seconds so the latest information is always available.
Understanding the Graphs
Information about the graphs can be located HERE
Understanding the Live Status Page
The live status works like a traffic light system for core email services and internet services hosted by BarWeb.
- Green - Everything is working as expected
- Yellow - A warning has been triggered, this can be caused by a spike in activity or that a system is not working as expected, investigation by BarWeb technical staff is performed at this stage (an alert has been sent to BarWeb technical staff by email and IM)
- Red - A system has been in an extended warning state or the system has gone offline or a queue threshold has been hit to trigger immediate action required by BarWeb technical staff. (an alert has been sent to BarWeb technical staff by email, SMS and IM)
-
Blue - System is in maintenance mode and monitoring has been paused during this time, any system in maintenance mode has had its load and traffic redirected to another server


Things to Note
Exchange Servers C and A - These 2 servers run in a cluster, data is replicated between them and the load is split across both servers, in the event one goes down for any reason or has high load, the system will automatically migrate users between the servers to ensure all users remain online.
Both servers have the resources to hold a full load in the event a server needs to be removed from the cluster or failure occurs
New updates and any new features are applied to Exchange Server C then Exchange Server A after they have been applied and running stable on our testingExchange Server B
Exchange Server B - This Exchange Server is not listed in monitoring as it is not a 24/7 server, it is only brought online during testing of new patches/updates or any changes to be applied system wide by BarWeb Tech staff. Users are not automatically migrated to this server when it comes online.
Installing Nextcloud Desktop Synchronization Client
You can download the latest version of the Nextcloud Desktop Synchronization Client from the Nextcloud download page. There are clients for Linux, macOs, and Microsoft Windows.
Installation on Mac OS X and Windows is the same as for any software application: download the program and then double-click it to launch the installation, and then follow the installation wizard. After it is installed and configured the sync client will automatically keep itself updated; see The Automatic Updater for more information.
System Requirements
- Windows 7+
- macOS 10.7+ (64-bit only)
- CentOS 6 & 7 (64-bit only)
- Debian 8.0 & 9.0
- Fedora 25 & 26 & 27
- Ubuntu 16.04 & 17.04 & 17.10
- openSUSE Leap 42.2 & 42.3
Installation Wizard
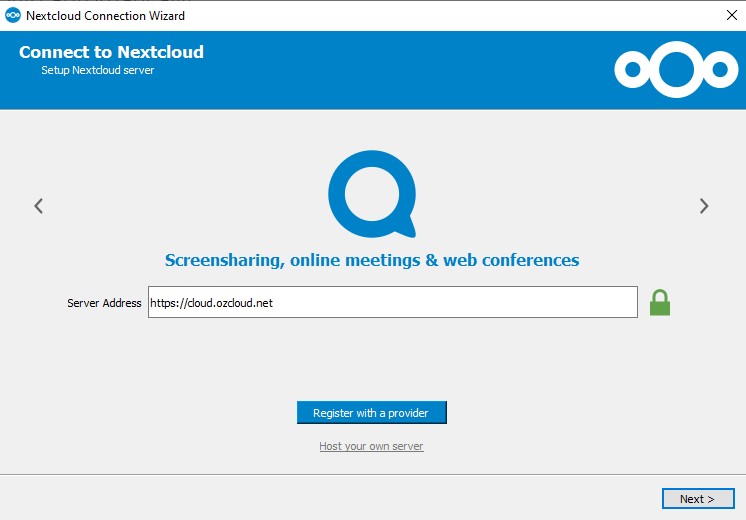
The installation wizard takes you step-by-step through configuration options and account setup.
First you click on Log in

Then you need to enter the URL of the Nextcloud server - https://cloud.ozcloud.net and click on Next
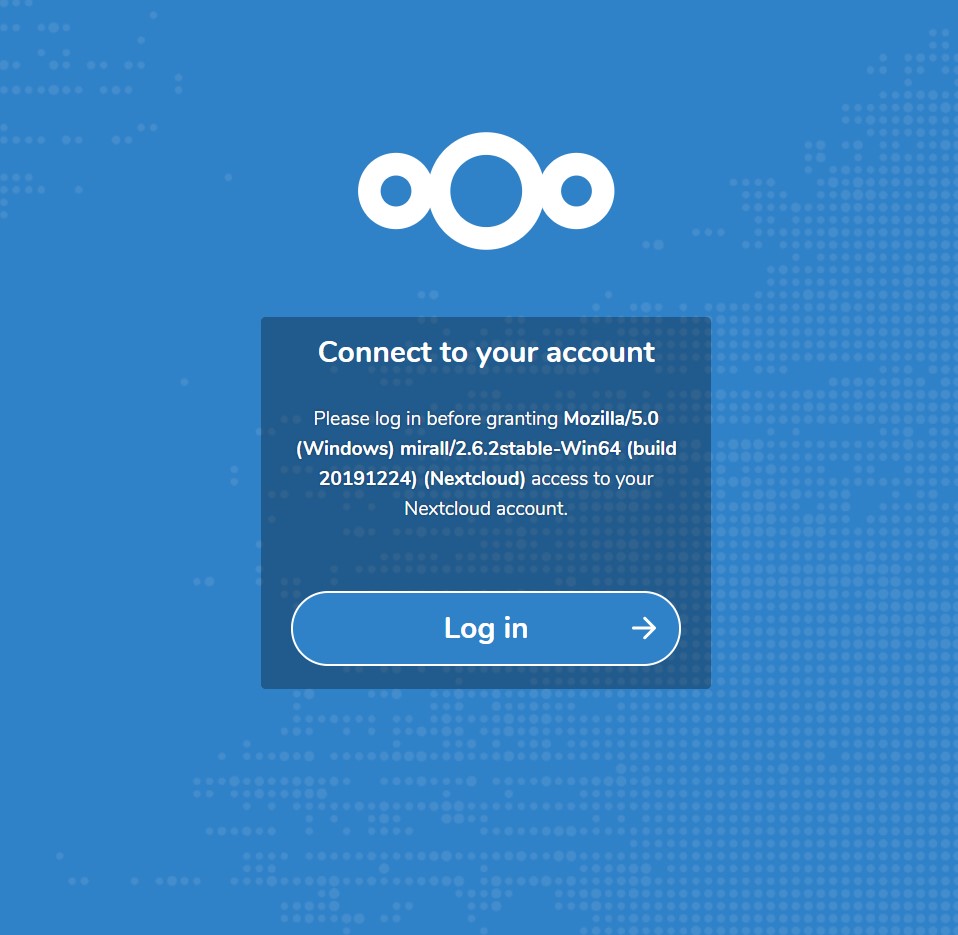
The authentication will need to be complete in a browser.
Click on Log in in the browser
Enter your Nextcloud login on the next screen.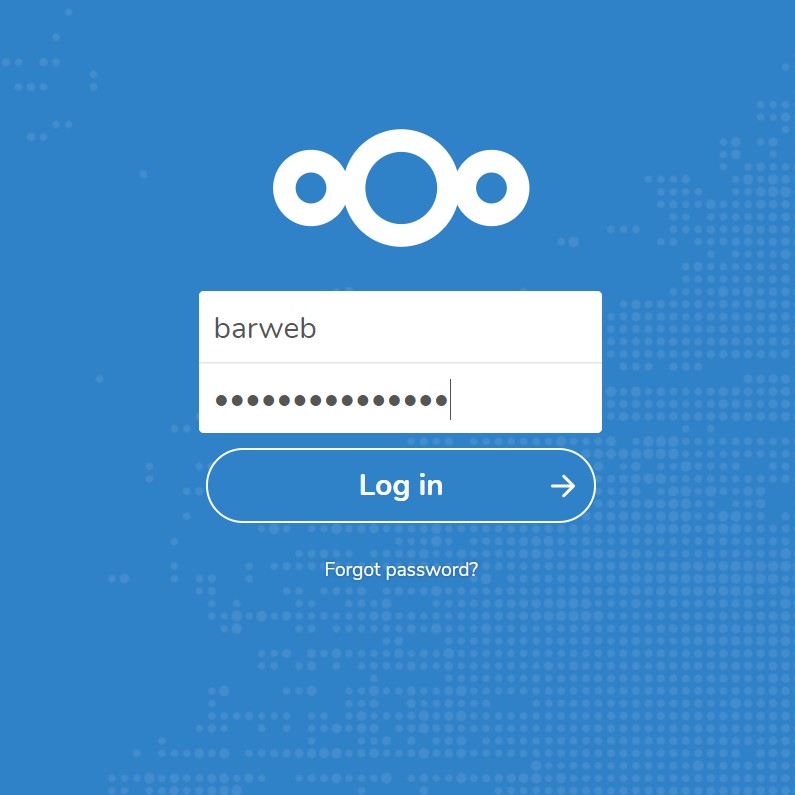
Click on Grant access

Once the access granted, please go back to the desktop application.
On the Local Folder Option screen you may sync all of your files on the Nextcloud server, or select individual folders. The default local sync folder is Nextcloud, in your home directory. You may change this as well.
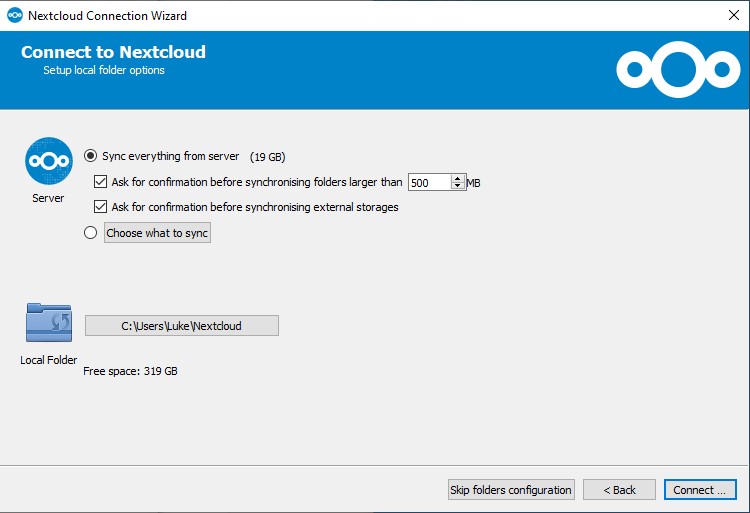
When you have completed selecting your sync folders, click the Connect button at the bottom right. The client will attempt to connect to your Nextcloud server, and when it is successful you will see the screen as below.
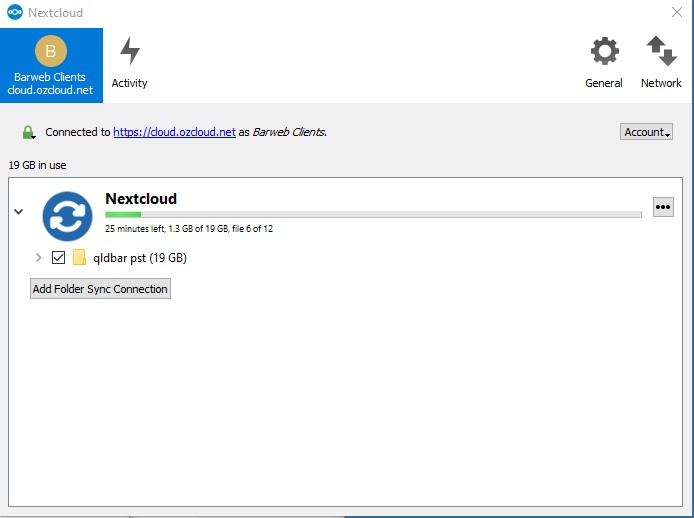
Now you’re all done.