Email Troubleshooting / Guides
Guides to perform troubleshooting on your BarWeb hosted email along with guides on how to manage your BarWeb Hosted email
- General
- POP3 (Standard Account) vs Hosted Exchange
- Message Rejected - Size Limit
- How to Identify Spam/Scam Emails
- Remove Auto-Complete entries - Outlook
- Enabling Cached Exchange Mode - Outlook
- Archive or back up your mailbox
- Fix the "Use Temporary Mailbox" Issue
- Exchange Accounts
- Forgot my Password - Exchange Account
- Change my password
- Change Sync Settings - Windows Mail
- Maximum allowed mobile phone partnerships
- Out of Office replies - Set via Webmail
- Add additional mailboxes - Outlook 2013/2016/2019
- Free space in a full mailbox
- Outlook (Windows and Mac) - Recover Deleted Items
- Add an Additional Shared Mailbox in Outlook
- Mail App Always Downloading on Mac? How-To Fix
- Standard Email Accounts
General
POP3 (Standard Account) vs Hosted Exchange
BarWeb offers two types of email accounts: POP3 (referred to as our Standard account) and Hosted Exchange Plans.
POP accounts have a smaller quota, so only the most current emails are stored on the web server. Emails are all downloaded by Mac Mail or Outlook, and stored on your computer.
Exchange Plans are a step up from POP email, enabling real-time access to your email, calendar and contacts, as well as important files and information.
There are a number of improvements that Exchange accounts offer over basic POP accounts:
- Larger quotas for online storage.
- Support for synced multiple device access - see sent items on all devices and deleting from one device deletes from all.
- Automatic syncing of email, rather than on a schedule.
- When your computer fails you don’t lose your emails, simply reconnect your email account and your email,
contacts and calendars will automatically download. - Full functionality of group scheduling and meeting requests.
- Share your calendar and email access with other team members.
- Schedule out-of-office replies
Keeping this in mind, if you have one of our Standard POP accounts, be sure to keep your computer backed up!
Message Rejected - Size Limit
BarWeb along with all other email providers have an email size limit, if you are attempting to send an email and it is rejected with a message about Size Limit, this is usually caused by a large attachment on the email.
BarWeb has a limit of 150MB for both Standard and Exchange accounts, our inbound email size limit from external servers (Office365, Gmail, etc...) is also 150MB.
To stop a message being rejected with a Size Limit message please ensure that the message you are attempting to send, or trying to receive is under 150MB.
How to Identify Spam/Scam Emails
If you are not sure, the email can be forwarded to isthisreal@barweb.com.au, a BarWeb technician will inspect the email along with the email log to ensure the email is safe.
Phishing is an attempt to scam or deceive you into disclosing personal and financial information in an email or online. A hoax email may look like it was sent from a reputable organisation, and may ask you to disclose personal information via return email or by clicking a link. These emails often look genuine, copying a company's branding and email layout, and using an address that's very similar to the real company's URL.
Hoax emails may:
- Be unaddressed, or addressed generically to Dear Customer
- Be badly written with broken sentences, spelling mistakes and grammatical errors
- Show a sender address that is very close to the real company's address
- Display a suspicious looking URL when you hover over links or buttons you're asked to click
- Contain an unexpected zip file or other attachment
- Ask for your credit card, account details or personal information
- Display account information that doesn't match your real details
Help protect personal information by following these steps:
- Never trust emails that ask for personal details
- Think twice before giving personal details online - instead, contact the sender using their publicly available contact details
- Visit trusted websites via their URL, rather than clicking a link in the email
- Only provide financial details on secure websites
- Carefully choose and change passwords regularly
- Read the privacy policies of websites and apps you use
- Upgrade your device's security software or apps
- Use a separate email account for subscribing to online services and groups
- Use a spam filter to help block unsolicited and hoax emails
If you receive a suspicious email:
- Don't click links or reply
- Don't provide any personal information
- Don't open any attachments
- If you click an email link which opens a website, don't enter any personal information
- You can report the incident to ACCC SCAMwatch
- Delete the email as soon as possible
- If you've already provided personal or banking details to a scammer, contact your bank or financial institution immediately (using their publicly available details, not the ones in the email you received) and monitor your bank statements for unauthorised transactions. If you've provided account information, change any passwords you may have disclosed for your account
- If you've already saved or clicked on an attachment, update your anti-virus software and run a complete scan of your computer. Repeat the anti-virus update/scan process again over the next few days. You may also wish to update any online passwords stored on your computer in case they've been accessed
Remove Auto-Complete entries - Outlook
- Open Outlook
- Start a New Email
- Type a few characters of the email address you wish to remove in the To... field
- Click the "X" next to the entry you wish to remove

Enabling Cached Exchange Mode - Outlook
- Click File -> Account Settings -> Account Settings.
-
Double click your account, then ensure the Use Cached Exchange Mode is checked.
Outlook 2010

Outlook 2013
Cached Exchange Mode is enabled by default in Outlook 2013.

Outlook 2016
Cached Exchange Mode is enabled by default in Outlook 2016

Archive or back up your mailbox
Use the Import and Export Wizard to back up (archive) your mailbox by exporting it to a file, and restore data by importing it from the file back to your mailbox.
The Import and Export Wizard
-
Outlook has a tool you can use to back up and restore your mailbox called the Import and Export Wizard.
-
To get to it, click the FILE tab > Open & Export > and Import/Export.
-
You back up your mailbox by exporting it to a file on your computer, and then restore data by importing it from the file back to your mailbox. The type of file you export to is an Outlook Data File with a .pst file extension.
-
If you decide you want to switch to manual archiving, you can turn off AutoArchive.
-
Click the FILE tab > Options > Advanced > AutoArchive Settings. Then, uncheck Run AutoArchive every and click OK.
Fix the "Use Temporary Mailbox" Issue
If you are being prompted with a message indicating "Your mailbox has been temporarily moved", with an option of "Use Temporary Mailbox", complete the following steps.
1. Click Cancel each time you receive the prompt, and close Outlook.

2. Restart your computer. If there is an option to "Update and restart", choose it to install your pending updates.
Or
3. When your computer has restarted and you are logged back in, open the Control Panel. The Control Panel can be found by searching for it by clicking the magnifying glass in the taskbar and then typing "Control Panel".
The Control Panel will open.
4. When the Control Panel is open, use the Control Panel search box to search for "mail", then click on Mail (32-bit).
5. Click on the Show Profiles button.
6. Click the Remove button until all listed profiles are removed.
7. When prompted with "Careful, if you remove this profile…", click on Yes.
8. Repeat this process until all profiles are removed, then click OK.
9. Open Outlook.
10. On the "Welcome to Outlook 2016" screen, click Next.
11. On the Microsoft Outlook Account Setup screen, select Yes when asked "Do you want to set up Outlook to connect to an email account."
12. On the Add Account screen, click Next.
13. You may be prompted to enter your password for your previous @campus.mnsu.edu account. Click on "Sign in with another account".
14. When prompted for an email address, enter your new username, then click Next.
Students: <Your StarID>@go.minnstate.edu
Faculty and Staff: <Your StarID>@minnstate.edu
15. Enter your password, then click Sign in.
16. When Outlook completes setup for your account click Finish.
Outlook will open and begin downloading your mail and folders. This process can take a while if you have a significant amount of email. You can see your synchronization status in the bottom bar of Outlook.
![]()
We suggest letting Outlook finish its initial download of mail before exiting. (You can minimize the window and continue using your machine while you wait.)
Exchange Accounts
Forgot my Password - Exchange Account
Currently there is no self service option for a forgotten Hosted Exchange password.
If you have forgotten the password for your Hosted Exchange account you will need to contact Barweb Support
Call us - (07) 3292 0219
Email - helpdesk@barweb.com.au
For verification purposes BarWeb staff will call back on a registered number to confirm the request, a confirmation will also be sent once the password has been reset.
Change my password
-
Go to https://hex.barweb.com.au/owa and login with your email address and current password

-
Click on the Settings cog in the top right hand corner of the page and select Options

-
Click on General in the top left hand corner of the page and click on My account

-
Click on Change your password (You may have to scroll down the page

-
Type in your current password, then a new password and confirm your new password, then click save

Change Sync Settings - Windows Mail
Change Sync Speed
- Open Windows Mail
- Right click on your account on the left side and select Account Settings
-
Click Change mailbox sync settings

-
To ensure mail mail arrives real time, change Download new content to "as items arrive"

- Click Done
Change amount of email downloaded
- Open Windows Mail
- Right click on your account on the left side and select Account Settings
-
Click Change mailbox sync settings
-
Change Download email from to "any time"
- Click Done
Maximum allowed mobile phone partnerships
"You have 25 phone partnerships out of the maximum allowed 25 partnerships. After you reach the maximum, you can't create additional partnerships until you delete existing ones from your account."
-
Log into https://hex.barweb.com.au/owa with your email account details.

-
Click the gear icon at the top of the right-hand side of the page and select 'Options'.

-
Click Mobile Devices in the left sidebar

- Underneath Mobile Devices, select any unused devices and click on the remove icon to delete. You should now be able to create new mobile partnerships.
Out of Office replies - Set via Webmail
To disable Out of Office replies, follow the steps below until Step 3, select Don't send automatic replies then click Save.
- Log into https://hex.barweb.com.au/owa with your email account details
-
Click the cog icon at the top right-hand side of the window, then click Set automatic replies.

-
Click Send automatic replies to enable automatic replies
- If you wish to specify a time period, click Send replies only during this time period: and specify the period below.
-
Fill the text box below with the automatic reply you wish to be sent to internal email addresses.

- If you only want senders in your contact list to receive automatic replies, click Send replies only to senders in my Contacts list, otherwise click Send replies to all external senders.
- Fill in the text box below with the automatic reply you wish to be sent to external email addresses. If you want the reply to be identical for all senders, copy the text in the internal text box and paste it into the external text box.Click Send automatic reply messages to senders outside my organization to enable automatic replies to mail received from external email addresses.

- Click Save
Add additional mailboxes - Outlook 2013/2016/2019
You can only add and open an additional mailbox that you have been granted access to.
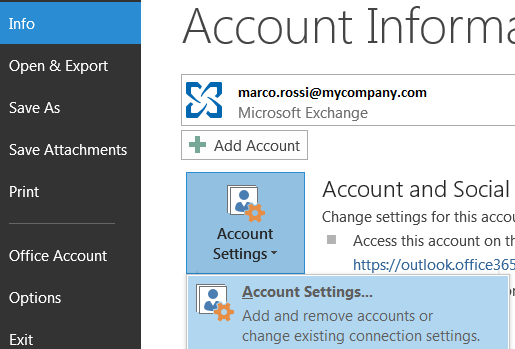
- Click on File
- Click on Account Settings then Account Settings...

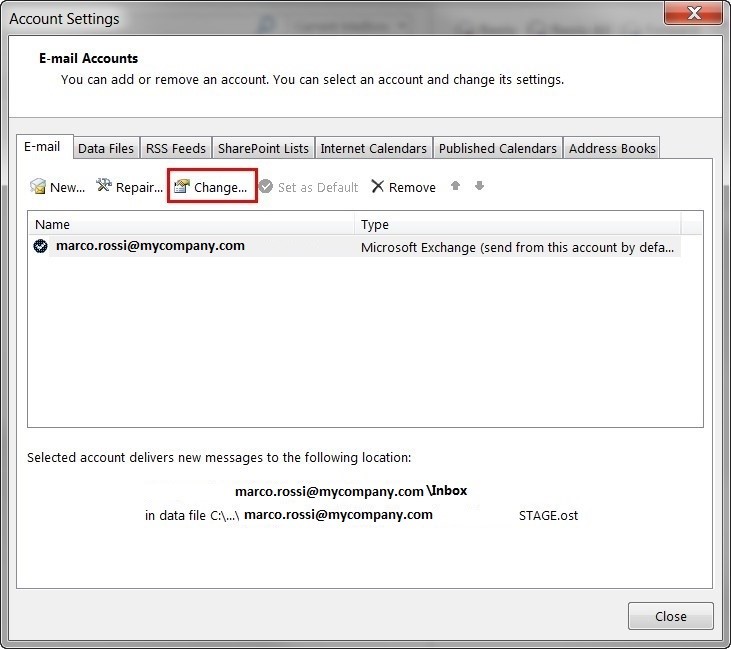
- Click on Change

- Click on More Settings

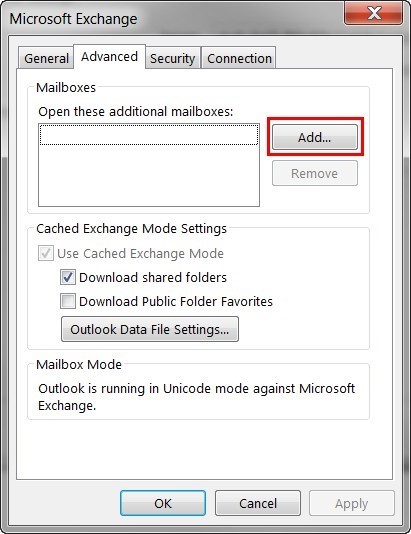
- Click on the Advanced tab
- Click on the Add... button

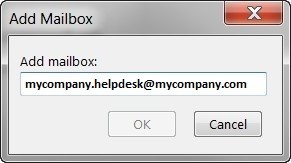
-
Type in the email address of the other mailbox and click OK

- Repeat Steps 6 and 7 for each additional mailbox required
-
Once all mailboxes have been added, click OK

- Click on Next

-
Click Finish

Free space in a full mailbox
Ensure that you have adequate backups of your emails, as once they are deleted from Webmail they are not recoverable. For any assistance with backing up your email please contact us at helpdesk@barweb.com.au
- Log into Webmail by entering in your email account details here https://hex.barweb.com.au/owa

-
Select the check box besides each email you wish to delete.
Click the drop down triangle next to Filter above your emails, then select Sort by, then Size to sort your inbox by emails that consume the most space to emails that consume the least.

-
- Click the Delete button at the top of the page after selecting the emails to be deleted.

- Click Deleted Items on the left of the screen.
- Click the Empty button at the top of the screen to remove all emails, or select the check boxes and click Delete to remove only selected emails, then click Yes on the prompt that appears.

Emails emptied from Trash are deleted permanently.
Outlook (Windows and Mac) - Recover Deleted Items
If your folder list looks like this, and you see the Deleted Items folder, see the steps below to recover deleted email, appointments, events, contacts, and tasks that have been removed from the Deleted Items folder.
If your folder list looks like this, and you see the Trash folder, you can move items from the Trash folder back into your other folders, but you can't recover items that have been deleted from the Trash folder.
Need to recover a deleted folder in Outlook 2013, Outlook 2016, or Outlook for Office 365? You can recover a deleted folder (with all of its messages) if it's still in your Deleted Items folder. Unfortunately, you can't recover a folder that's been permanently deleted. But you can use the steps in this topic to recover messages from the from the folder you deleted.
Recover an item that's no longer in your Deleted Items folder
If you can't find an item in the Deleted Items folder, the next place to look is the Recoverable Items folder. This is a hidden folder, and it's the place where items are moved when you do one of the following things:
-
Delete an item from the Deleted Items folder.
-
Empty the Deleted Items folder.
-
Permanently delete an item from the inbox or from another folder by selecting it and pressing Shift+Delete.
Watch the video or follow the steps listed below the video to recover items from the Recoverable Items folder.
-
In Outlook, go to your email folder list, and then click Deleted Items.
Important: If you don't see the Deleted Items folder, but instead see the Trash folder, then your account doesn't support recovering an item that's no longer in your Deleted Items folder.
-
On the Home menu, select Recover Deleted Items From Server.
Important: If Recover Deleted Items From Server isn't there, your account doesn't support recovering an item that's no longer in your Deleted Items folder.
-
Select the item or items you want to recover, click Restore Selected Items, and then click OK.
Where do recovered items go? When you recover items from the Recoverable Items folder, they are moved to the Deleted Items folder. So after you recover an item, you can find it in your Deleted Items folder and then move it to another folder.
Add an Additional Shared Mailbox in Outlook
You should keep in mind, however, that there are different methods to do this. Depending on the infrastructure Exchange Servers are relying on, a shared mailbox added using a different method than the one shown below might not work as expected, or might produce error messages.
In Outlook, go to File > Account Settings > Account Settings.
Select your profile and click on Change.
Click on More Settings.

On the Advanced tab, click Add.
Type the email address or name of the shared mailbox, then click OK.
Once configured, the shared mailbox will be automatically available in the left folder pane in Outlook.

Mail App Always Downloading on Mac? How-To Fix
If you start noticing that your Mac’s Mail app always downloading and is continuously or frequently showing a message that it’s “Downloading Messages,” you are not alone.
Both OSX and macOS users report this problem with their Mail app. Luckily, some fixes do the trick and get your Mac’s Mail App up and working normally with no more “downloading messages” errors.
- Relaunch the Mail app while holding the Shift key on your keyboard
- Change your mail account’s setting for storing the Drafts Mailbox Behaviors to On My Mac
- Take your Mail Account offline temporarily and then take them back online
- Remove the Mail Account and then add it back
- Try rebuilding and reindexing your Mailbox
First, if you’re observing this downloading message at the bottom left of your Mail app’s sidebar and it’s only there for a relatively short time, this is normal.
This message means your Mail app is syncing across your various email accounts.
Even though it uses the term downloading it’s actually checking for any syncing between accounts. So, the words of wisdom here are: IGNORE IT.
Mail App Always Downloading: Housekeeping
Before you troubleshoot, perform these steps. These might fix your issue, and if not, they prepare your Mail for fixing.
Prep Tips
- Delete all messages inside your Deleted Items and Junk (Spam) folders
- Delete any messages you no longer need from your Inbox and other mailboxes
- Update to the latest version of Mail, if possible
Change Where Email Stores Your Drafts
Quite a few of our readers noted that if they changed the location of where email accounts store their drafts that the Mail App started working normally.
Change Draft Settings for Apple’s Mac Mail App
- Open Mail
- Go to Apple Menu > Preferences > Accounts
- Select a mail account
- Choose the tab Mailbox Behaviors
Change Drafts Mailbox to On My Mac and choose Drafts from the drop-down menu options 
Troubleshoot Mail App Always Downloading
-
Reload Mail App
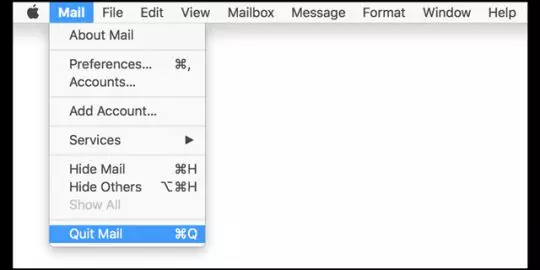
Quit the Mail app by select Mail > Quit Mail. Then, relaunch the Mail app while holding the Shift key on your keyboard. This action forces Mail to open without displaying any problematic messages.
-

Take Account Offline
But if your problem is more than just that message, you need to put your investigative skills to test. The first thing to try and rectify this situation is to take your Mail Account offline.
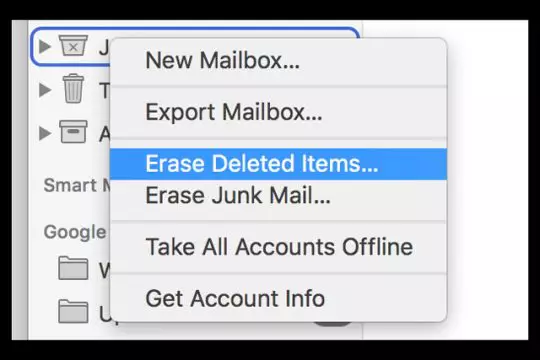
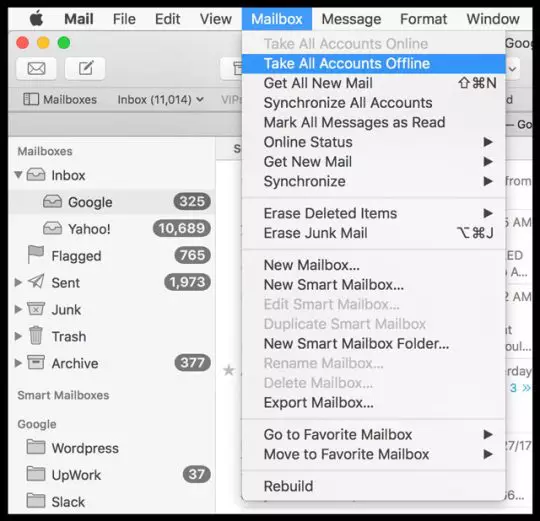
With your Mail App open, navigate to the Menu Bar and select Mailbox. From that drop-down menu choose to Take All Accounts Offline.
Once that completes, return to that menu and this time select Take All Accounts Online. See if that solves the problem.

Turn Off and Back On Problematic Account
If not, check and see if this problem is happening on one particular account or all of your mail accounts. If it’s only happening on one of your accounts, turn off that account and then add it back in again.
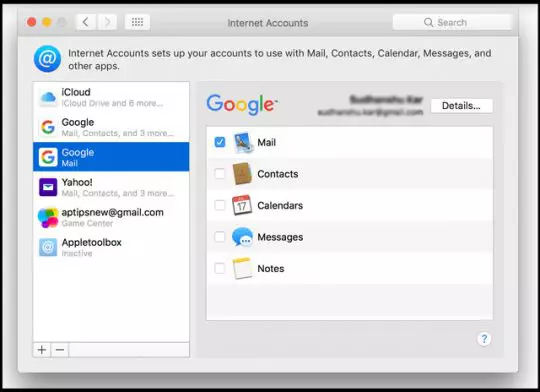
Do this by going to Mail > Accounts or Apple Menu > System Preferences > Internet Accounts.
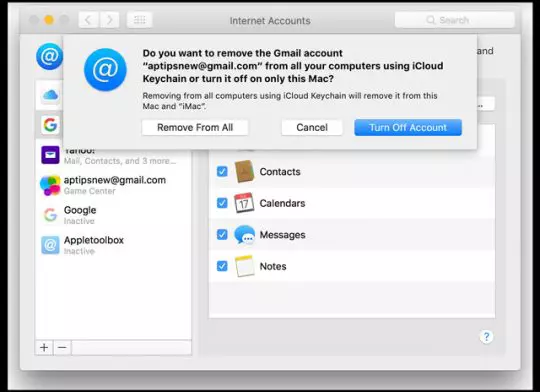
Then from the left pane, select your problematic account and choose the minus sign.
You’ll see a message asking if you want to delete this account from all computers using iCloud Keychain (if applicable), select “Turn Off Account.”

Once the account is off, turn it back on by selecting the account, now listed as Inactive and tick the box next to Mail (and anything else you want to sync such as Contacts, Calendars, etc.)

Look at Activity Monitor
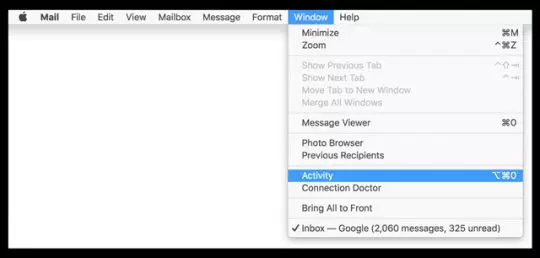
With your Mail app open, start by navigating to the Menu Bar and select Window. In the Window drop-down menu, choose Activity (or press Option+Command+0.)
Selecting Activity shows a small activity monitor that lists any messages currently downloading.
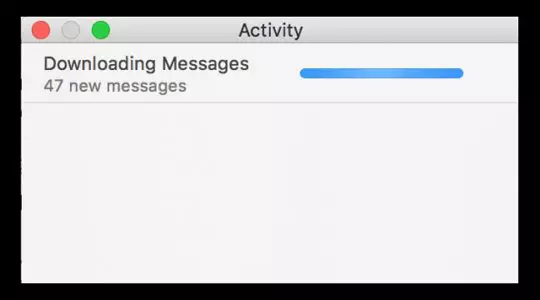
Sometimes, your MacBook pauses a large download to save energy when your MacBook is using battery power. If that’s the case, click the button in your Activity Monitor to resume downloading.
Rebuild It
If your problem wasn’t a paused download, try rebuilding and reindexing your Mailbox. It’s best first to delete any email that in your Trash and your Junk folders BEFORE you rebuild.
Rebuilding a mailbox updates the list of messages it contains. To rebuild:
- Select a mailbox in the Mail sidebar
- Choose Mailbox > Rebuild
Rebuilding Mailboxes takes a lot of time and once you start there is no pause or stop button, so proceed with caution.
Additionally, you must repeat these two steps for each one of your Mailboxes.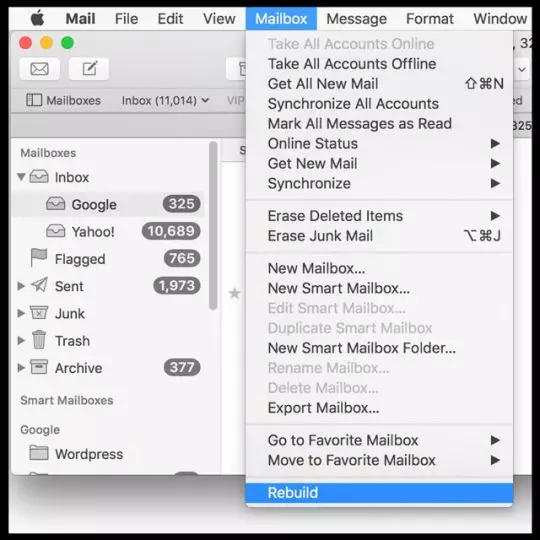
And when you rebuild mailboxes for IMAP or Exchange accounts, all the messages AND attachments stored locally on your computer are first removed and then downloaded again from your mail servers back to your Mac.
That means you’ll use a lot of your network’s bandwidth.
ALSO, your mailbox may appear empty until the download is complete–this is normal.
ReIndex Your Mail
Once you rebuild, take a look around your Mail app and mailboxes. If you are still having issues with downloading messages, Mail fails to launch, or any other problems, it’s time to try a manual reindexing.
The biggest difference between Reindexing and Rebuilding is that while rebuilding allows users to select individual mailboxes to be rebuilt, reindexing affects ALL Mailboxes.
Reindexing is indeed the nuclear option. It’s the last stop when Mail is so unresponsive that it barely works, the search function is not correctly working, or the Mail app won’t launch at all. So again, tread with care.
To ReIndex Mac Mail
- Quit Mail App
- On your Desktop create a folder named OLDMailData
- Go to Finder
- From Finder Menu Bar
- Press and Hold the Shift Key (or Option Key for some Macs)
- Select Go > Library
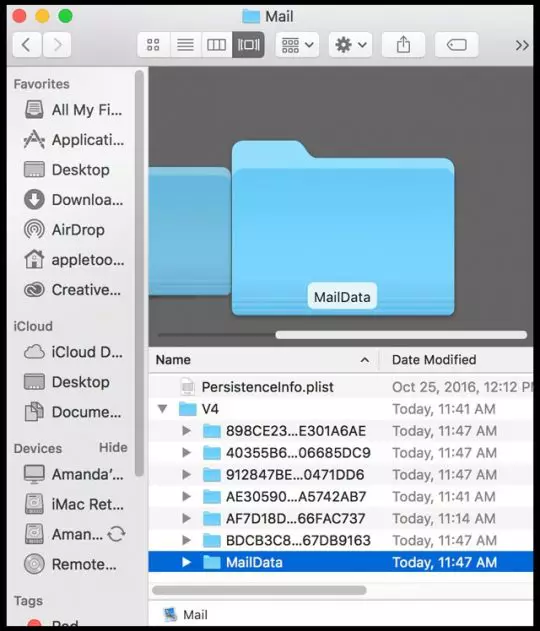
- Locate the Mail Folder
- Find a folder titled “V” followed by a number (V4 in my example)

- Locate the MailData folder
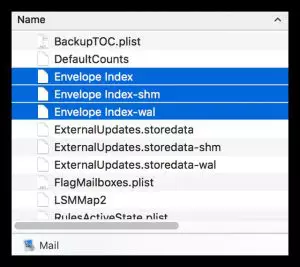
- Find any file beginning with Envelope Index and move these to your Desktop OLDMailData folder
5. Open the Mail app
- It builds new Envelope Index files but takes a lot of time
If you have thousands or more messages, reindexing takes time–potentially hours. But this process fixes a lot of Mail App problems, including constant downloading, Mail app not working or responsive, and other message and email problems.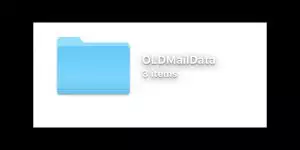
Once your Mail app works correctly, go ahead and delete the copies of the “Envelope Index” files from your Desktop OLDMailData folder by dumping it in the trash.
- Close Mail and go to User > Library > Mail to trash this file: MessageUidsAlreadyDownloaded
- Don’t store your email drafts on the server! Changing this to save drafts on your Mac and then restarting Mail fixed the problem for me. Go to Mail App > Preferences > Accounts > Mailbox Behaviours and change the Drafts Mailbox to On My Mac
- Delete all of your email accounts from Apple Mail and then reinstall them manually one-by-one. I did this, and it worked. You must delete ALL of your MAIL ACCOUNTS–not just the ones that have problems. So yeah, this one takes time
- Log into your email account’s web interface (use a browser) and clear all the draft messages there. Then relaunch your Mail app. It looks like it’s worked for my MacBook!
- Not an ideal solution but deleting my email accounts from my iPhone solved the problem for me
Standard Email Accounts
Change my password -Standard account
- Go to https://email.barweb.com.au/mail in your web browser of choice
- Login with your email address and password

-
Click on Setting along the top tab bar

- Click on Change Password on the left side navigation
-
Enter your Current Password then type in a New Password and confirm the new password

- Click on Save Settings
Checking your Quota
-
Login to Webmail using the following address - https://email.barweb.com.au/mail

-
Once logged in click on Settings

-
Your quota will be displayed below

Mailbox is Full
If you have multiple mail folders configured within your Email Account, within the folder settings overview each folder size is displayed, to access the folder settings follow these steps.
-
Click on the Folder Settings Icon

-
Folders will be displayed with the Quota

Deleting Emails from Server
Email deleted from the Standard Mail server is not recoverable, please delete with caution.
- Select the Checkbox next to each email you wish to delete
-
Click on Size to sort your inbox by email size, this will put the emails that consume the most space at the top

-
Click on Size to sort your inbox by email size, this will put the emails that consume the most space at the top
-
Click on the delete button in the top button menu

-
Go to Trash
-
Items in your Trash count towards your quota

-
Items in your Trash count towards your quota
-
Click on the Empty button

Remove copies from the server in Outlook
- Click on File > Account Settings > Account Settings...
-
Locate your account and double-click to open its settings.

-
Click More Settings ...

-
In the Advanced tab, under Delivery, make sure the settings are as follows. This will maintain a copy on the server for 14 days after it has been retrieved by your Outlook program. A copy of all emails will remain stored locally on your computer, until fully deleted within Outlook.

- Click OK.
- Click Next. A test will be run to confirm your settings are correct. Once the test is complete, click Close, then click Finish on the following screen.
Out of Office replies
-
Log in to the Webmail client with your email account details at the following address:
https://email.barweb.com.au/mail/

-
Click the Settings tab at the top of the page.

-
Click on Mail Options in the left-hand sidebar.

-
Turn Enable Autoreply on and enter your autoreply message in the text field below.

- Click Save Settings at the bottom of the page.