Email Configuration
Guides on how to configure BarWeb hosted email accounts
- Exchange Accounts
- Outlook - Windows
- Outlook 2013 - Windows
- Outlook for iOS
- Outlook 2010 - Windows
- Windows Mail
- Android
- iPhone/iPad
- Apple Mail - Mac
- Outlook for Mac
- Windows Phone
- Outlook for Android
- Standard Email Accounts
- Outlook 2016 / 2019 - Windows
- Outlook 2013 - Windows
- Outlook 2010 - Windows
- Windows Mail
- iPhone/iPad
- Apple Mail - MacOS
- Outlook for Mac 2016 / 2019
- ChromeBook
- Windows Phone
- Set up in Outlook for iOS
- Set up in Outlook for Android
- Microsoft 365 in Outlook
- Re-adding Microsoft 365 Account in Apple Mail After Migration MacOS
- Re-Adding a Microsoft 365 Account in Outlook on macOS
- How to re-add email account on iPhone (Apple Mail)
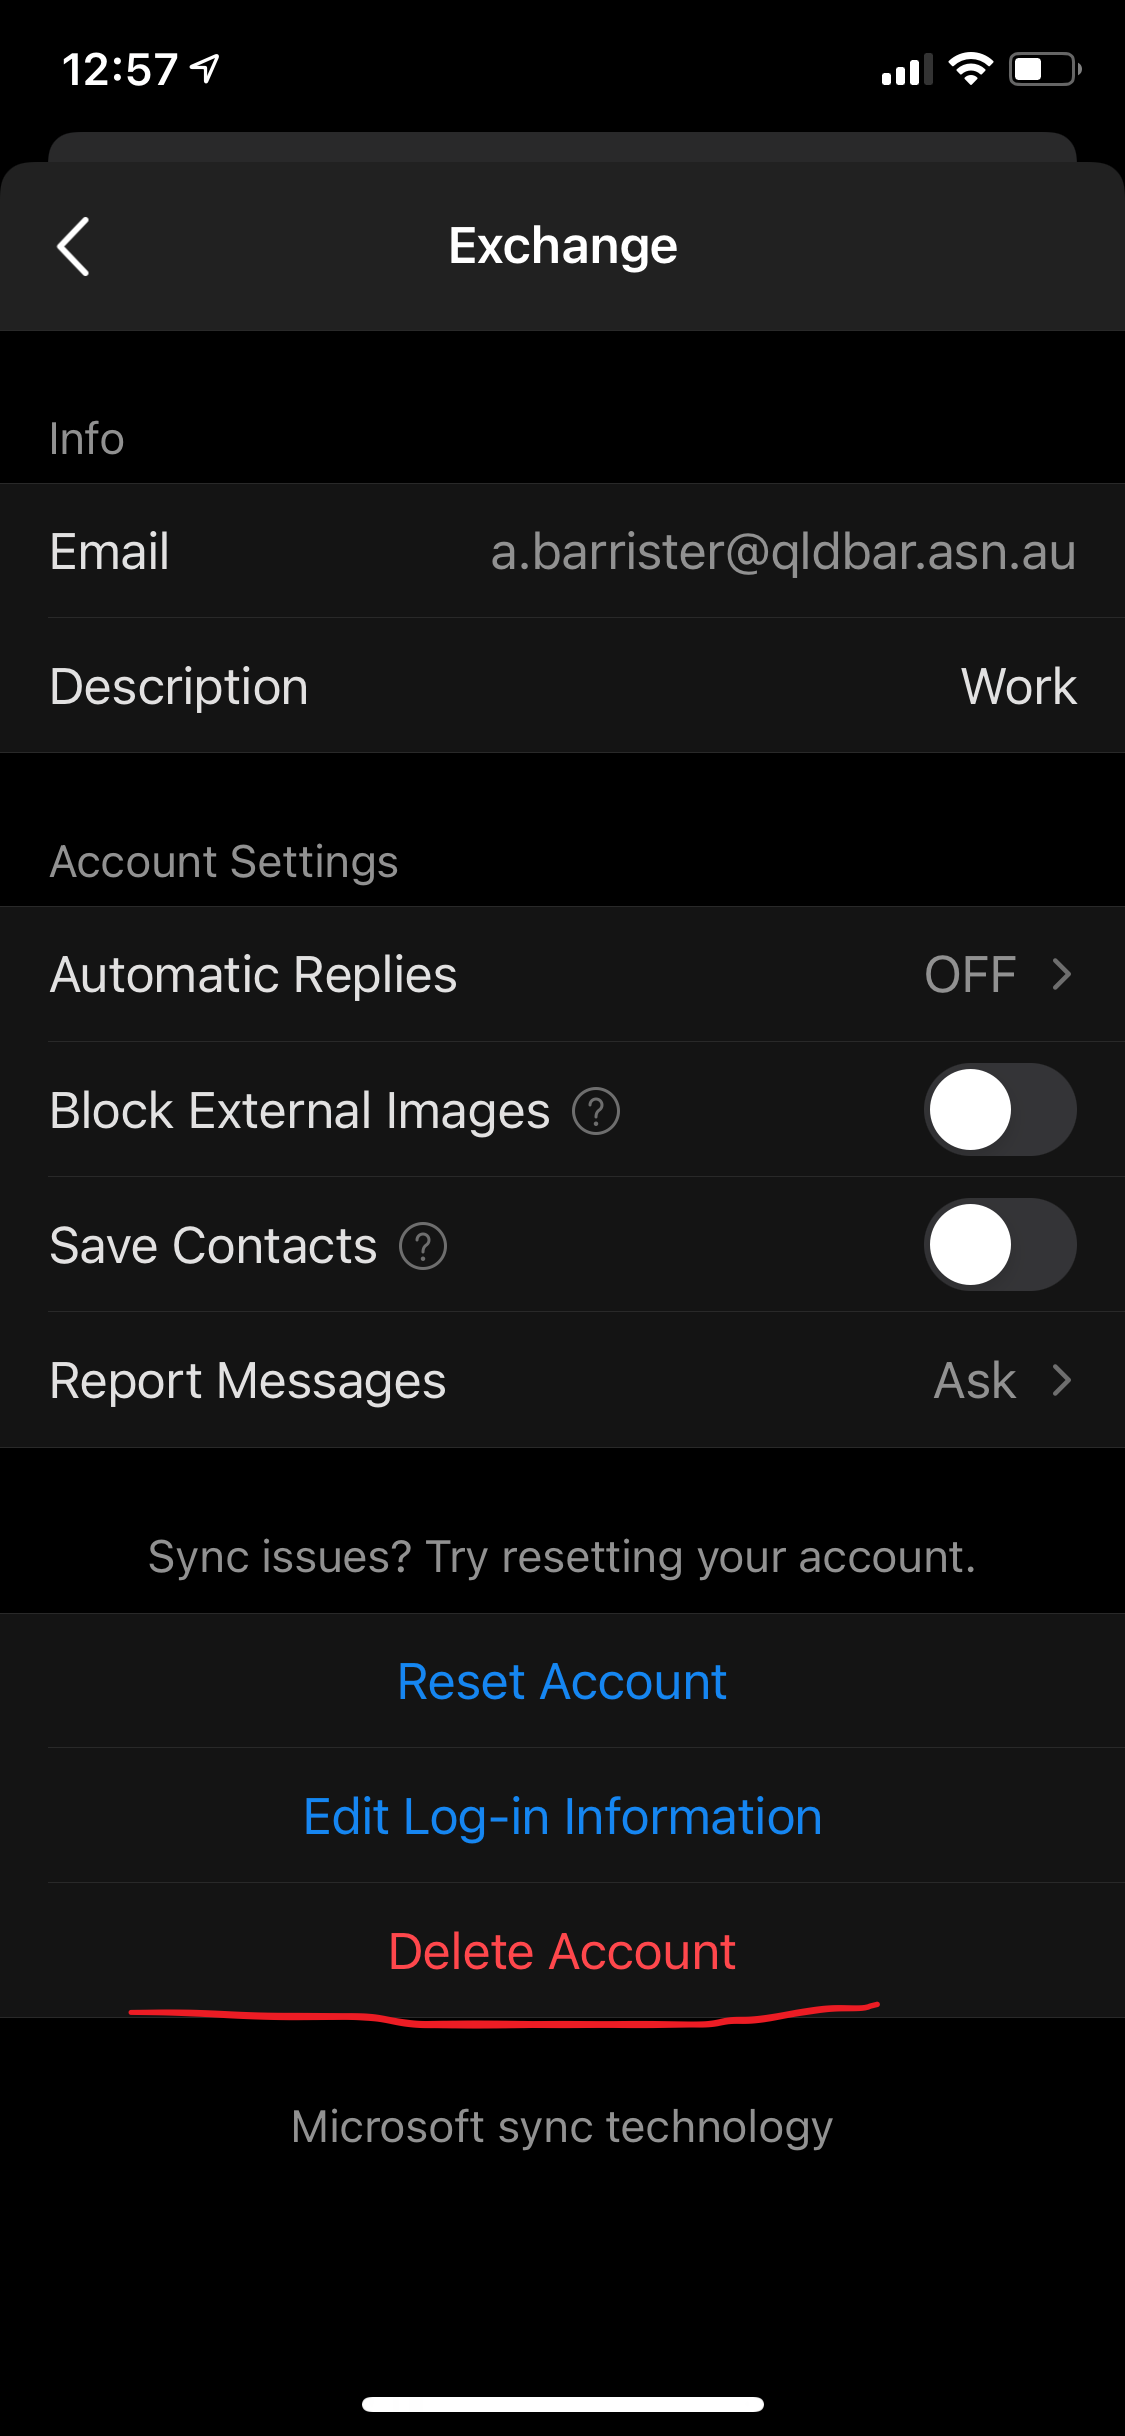
Exchange Accounts
Outlook - Windows
-
Click on File > Account Settings > Account Settings...
(If opening Outlook for the first time proceed from step 3) -
Click New to add an email address to Outlook.
-
Enter your email address and click Connect to continue.

- You will be prompted by the popup below, click Exchange

-
Type in your password. Check the box to Remember my credentials and click OK.

-
Click OK. Your BarWeb Hosted Exchange account is now set up in Outlook 2016.


Outlook 2013 - Windows
- Click on File > Account Settings > Account Settings...
(If opening Outlook for the first time proceed from step 3)
- Click New to add an email address to Outlook.
- Click on Next

- Select Yes and click on Next

- Enter your Email address and click on Next
(Don't worry about entering your password for now, you will be asked to enter it again on the next screen even if you have already typed it in)
- You will be prompted by the popup below. Check the Don't ask me about this website again option and click Allow

- Type in your password. Check the box to Remember my credentials and click OK.

- Click on Finish, your account is now setup and ready to go.

Outlook for iOS
1. Due to Microsoft changed how its Outlook for Mobile app authenticates in the latest update, please remove your Exchange account if you set it up before.
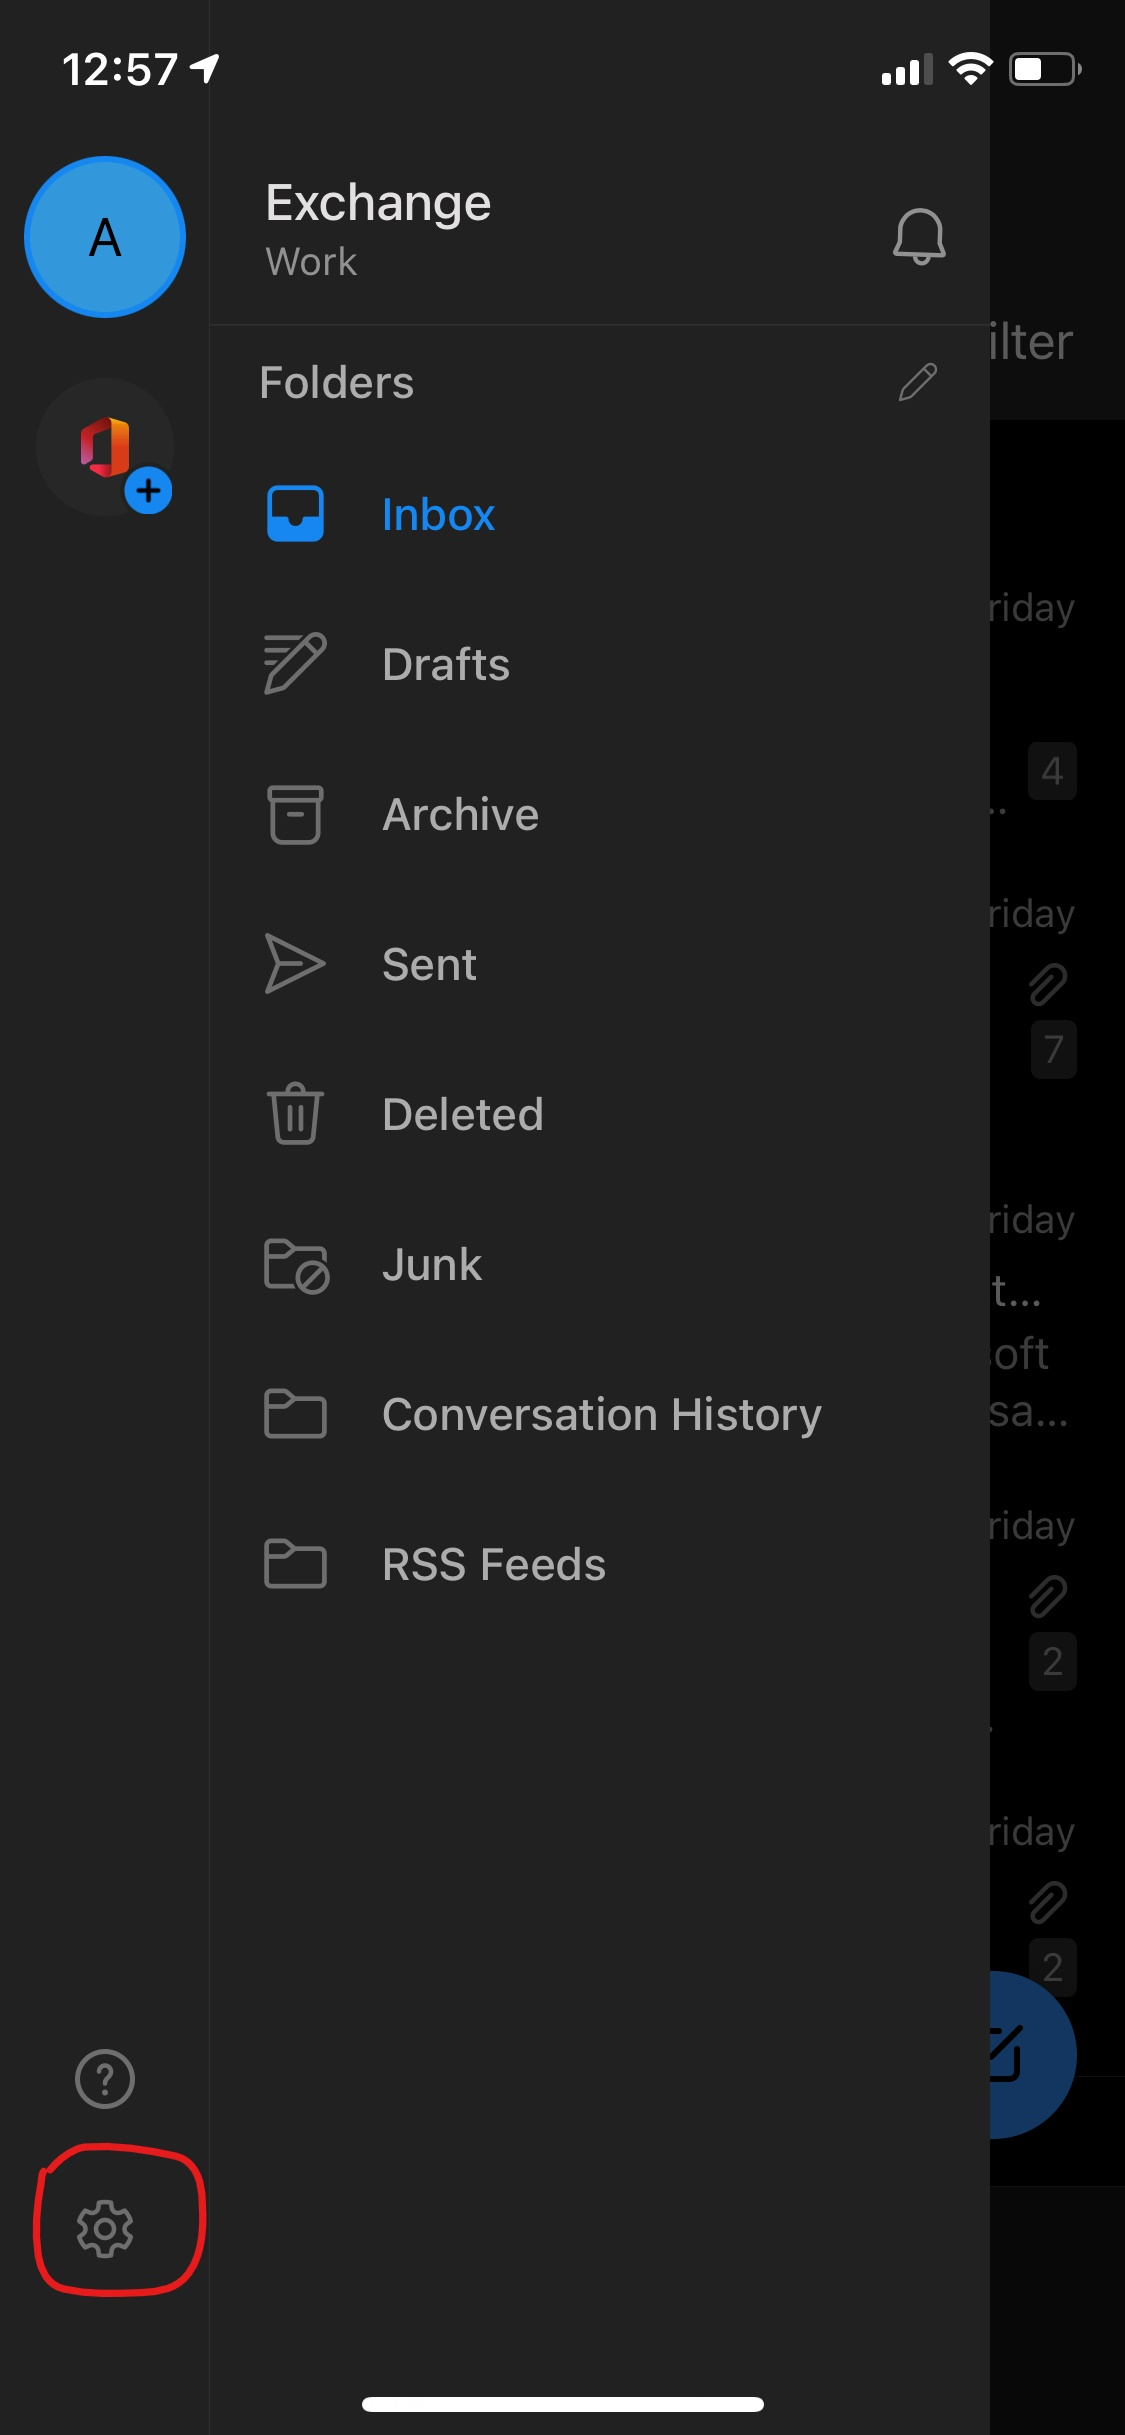

Then select Delete From This Device
2. After deleting the account you would be prompted to Add Account/Skip
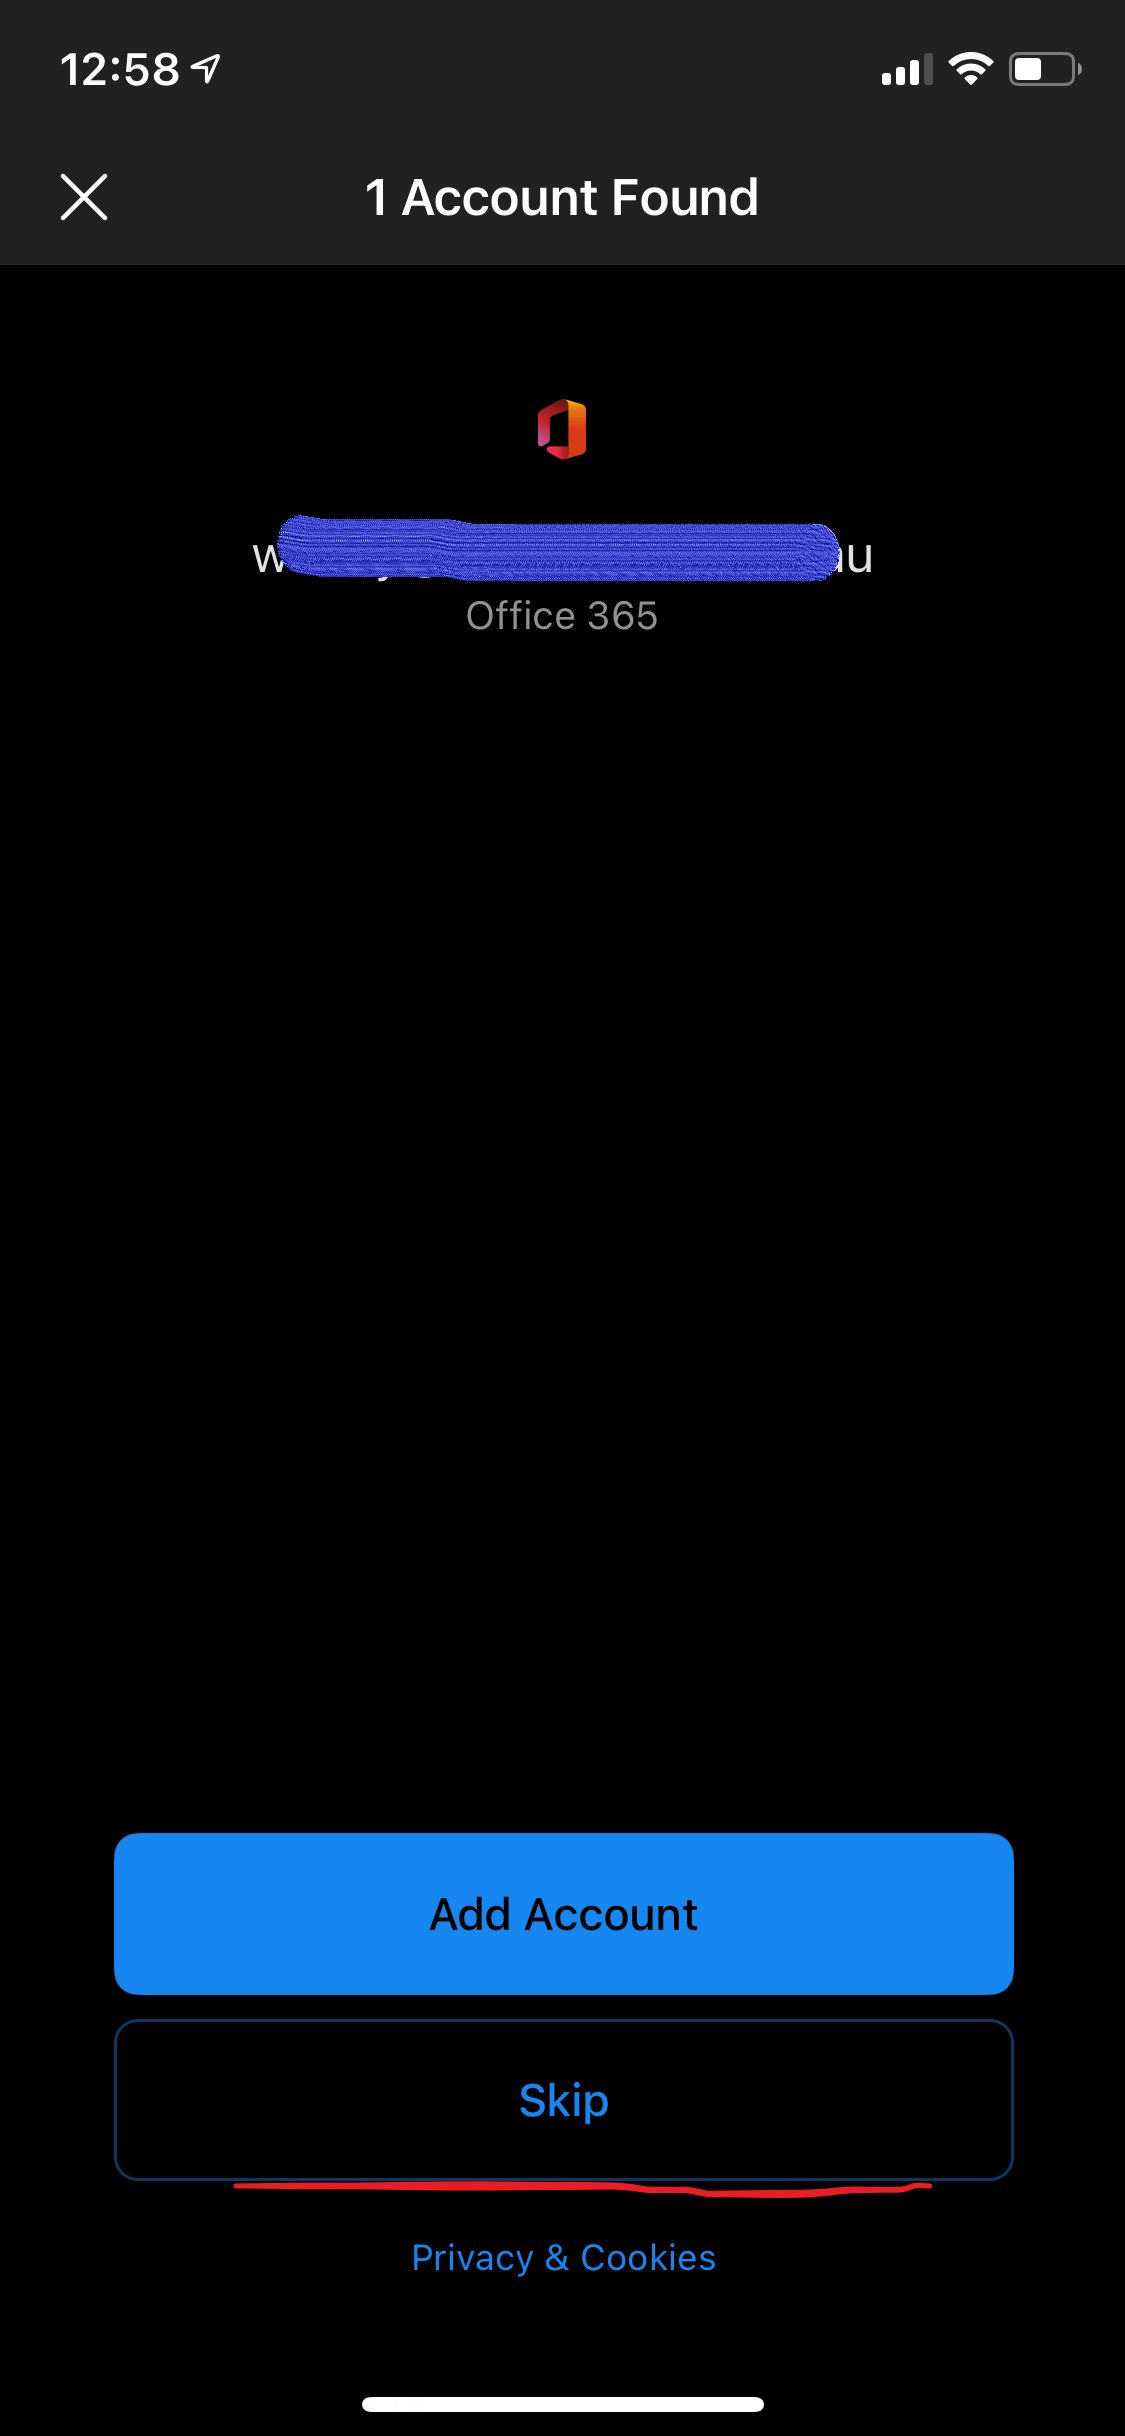
Please tap on Skip.
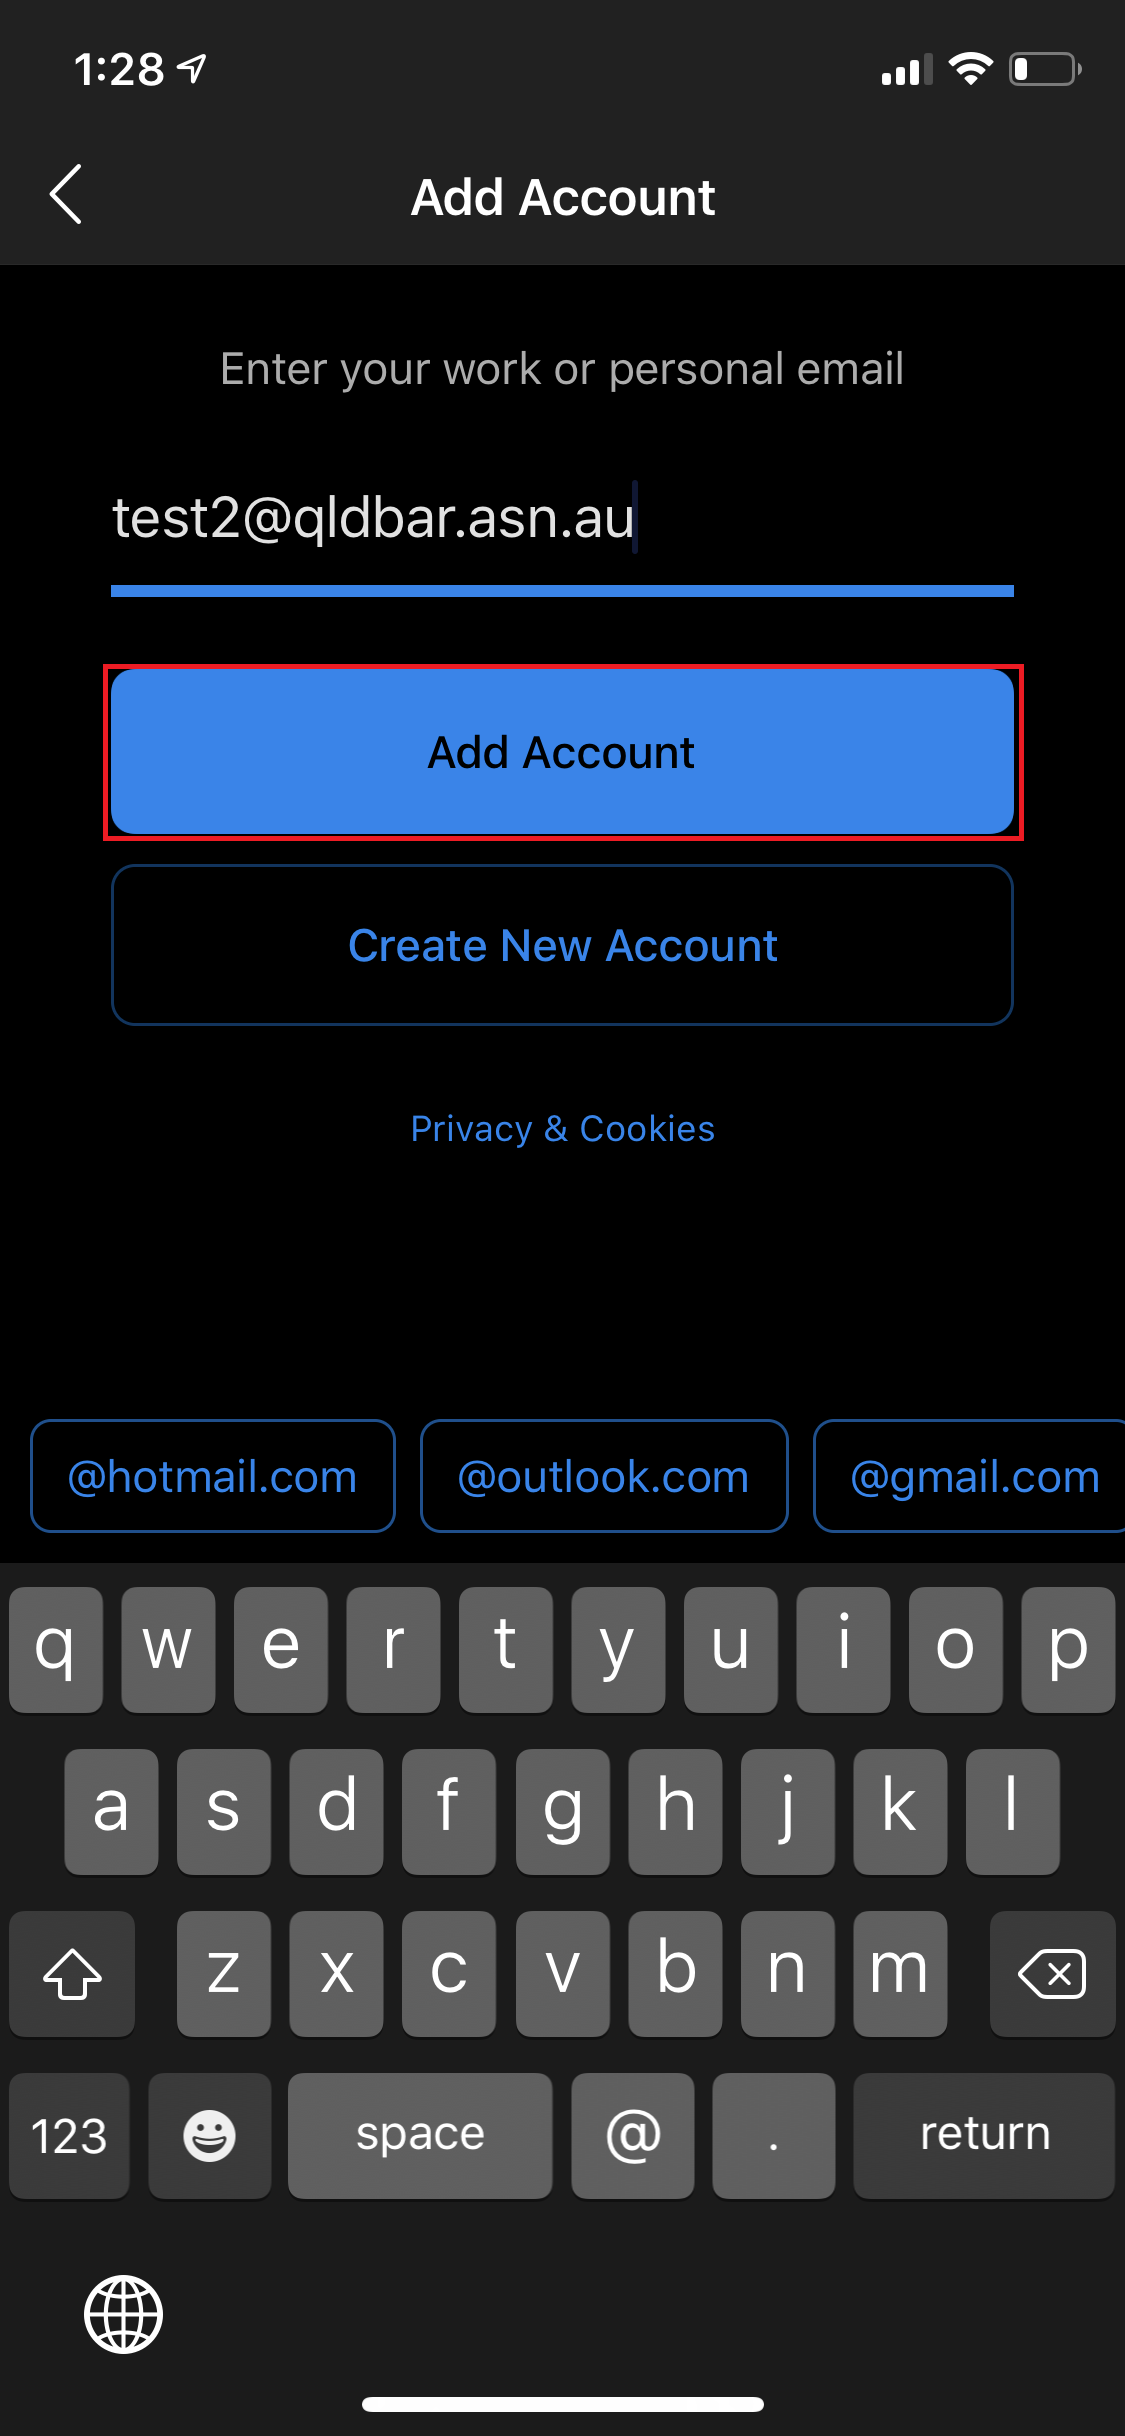
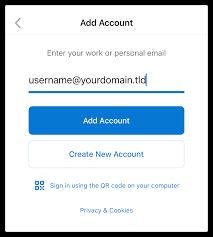
3. Enter your email address in the next screen and tap on Add Account
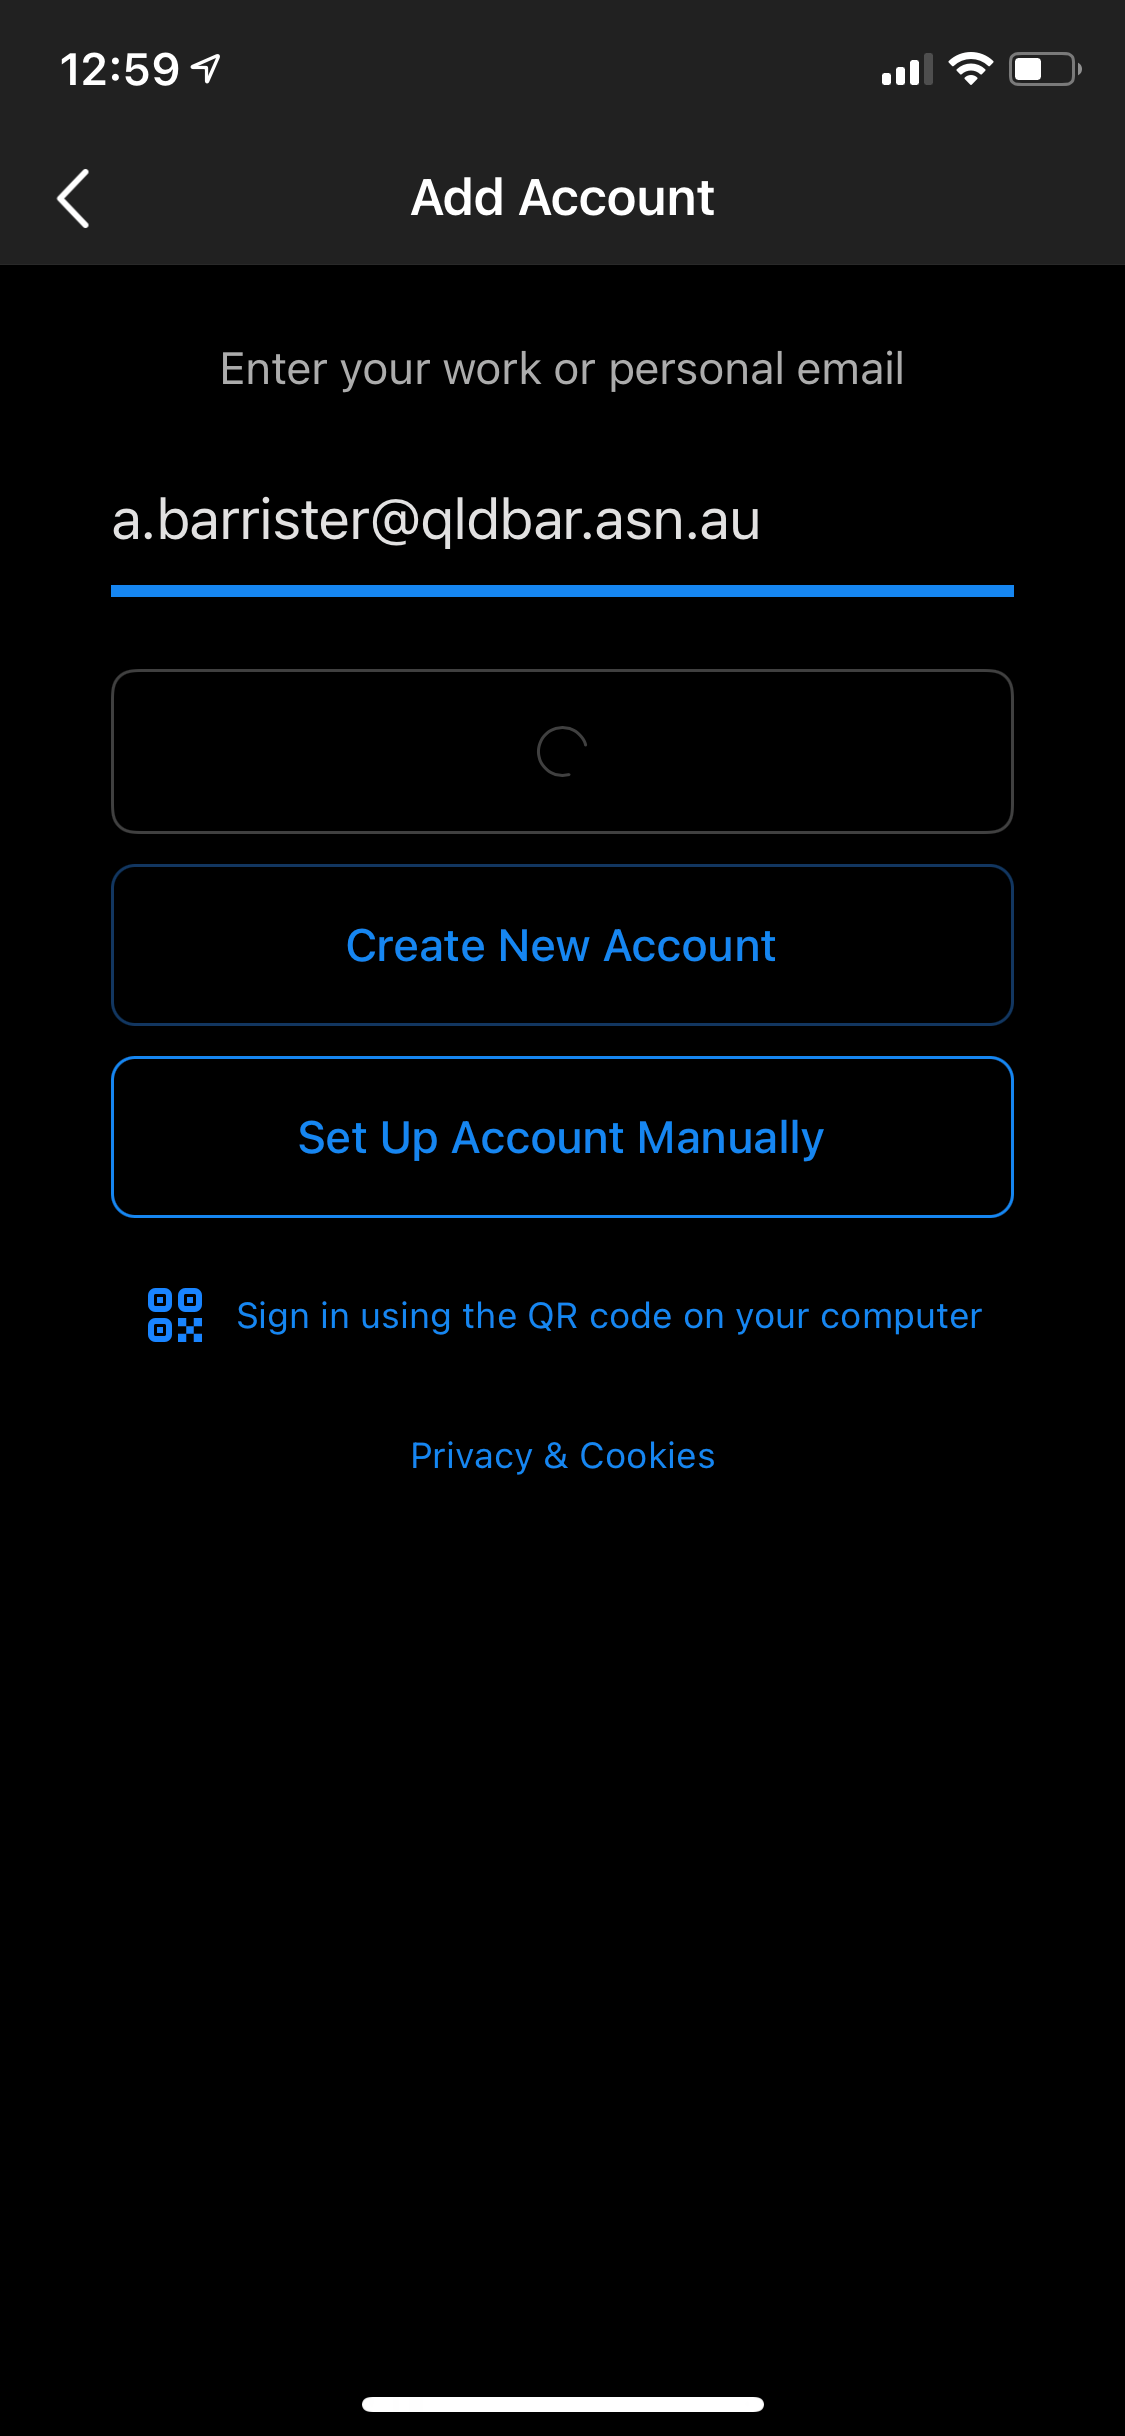
4. Enter your email address, password and description then tap Sign In:
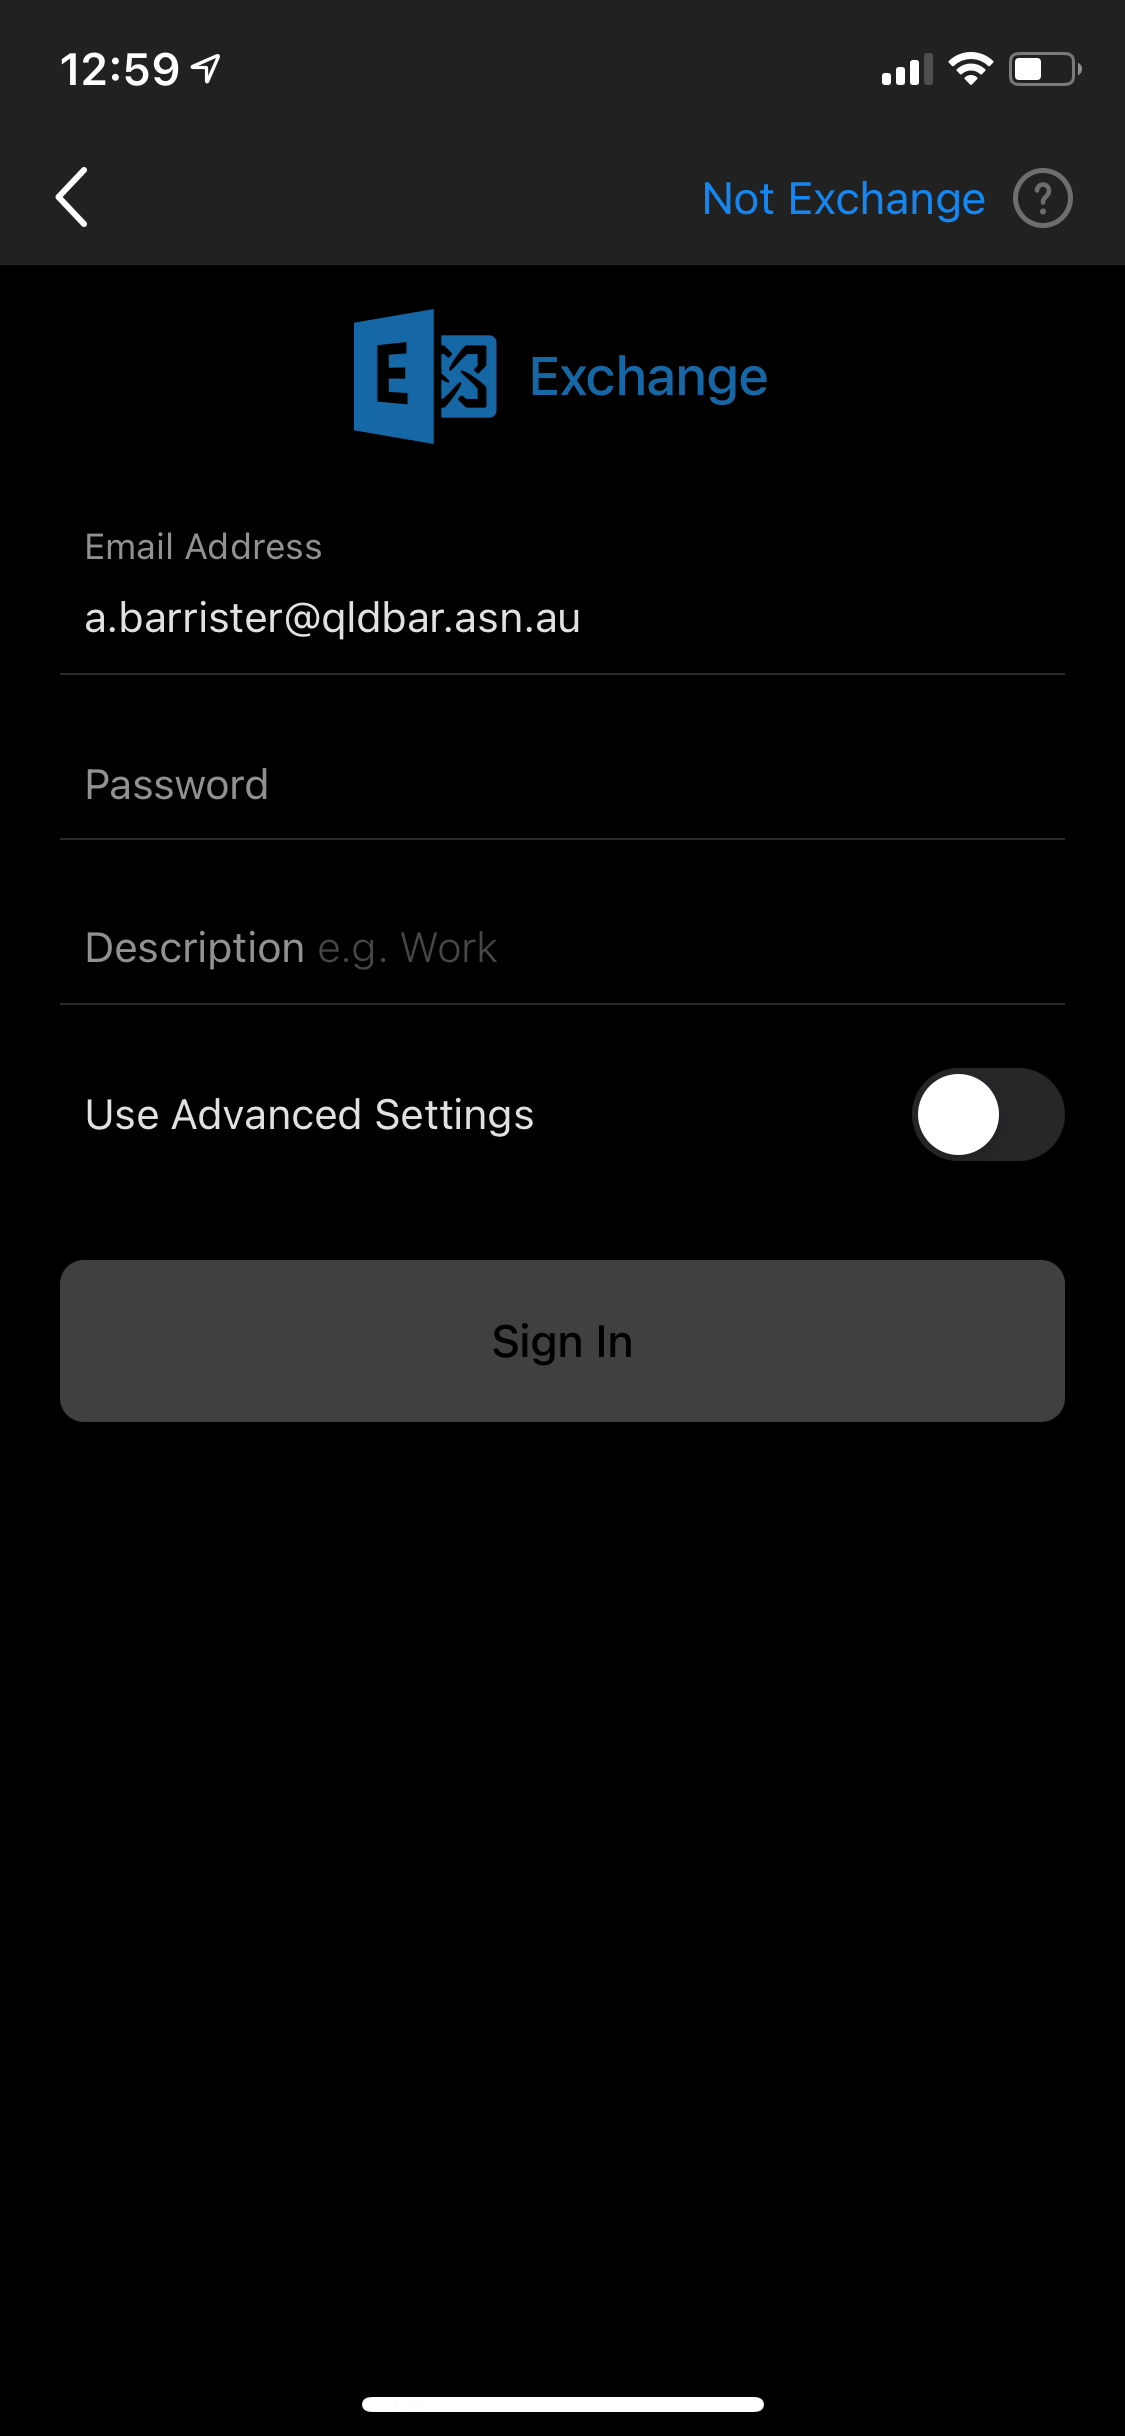
- Email Address: Your email address
- Password: Your password
- Description: qldbar
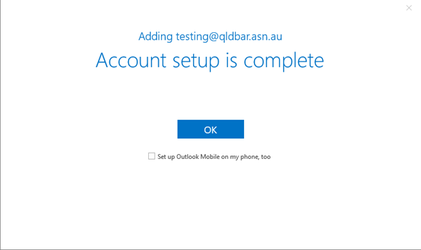
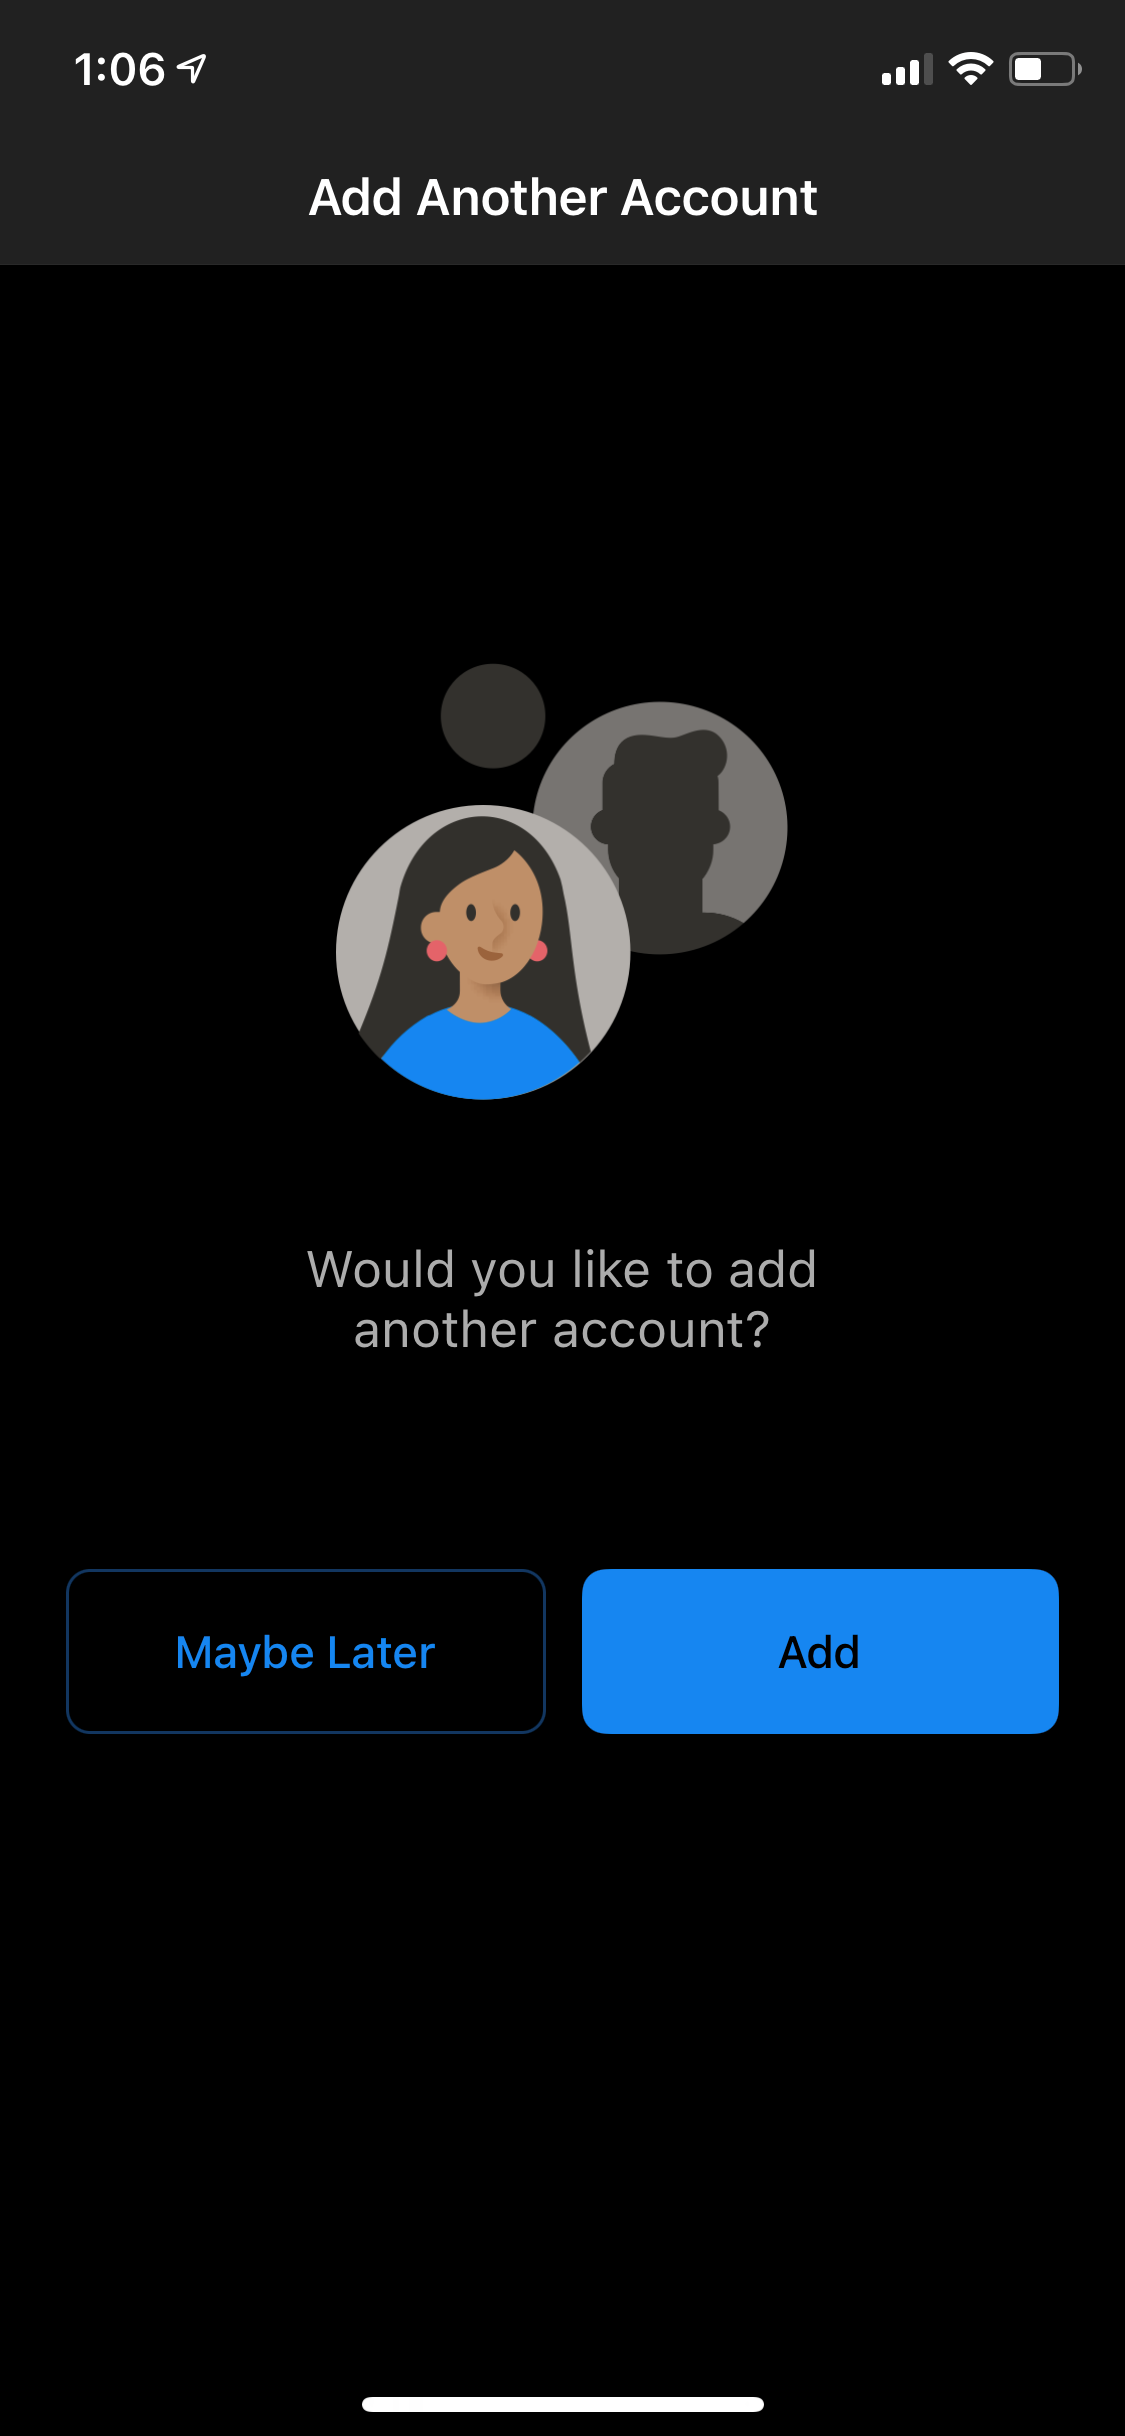
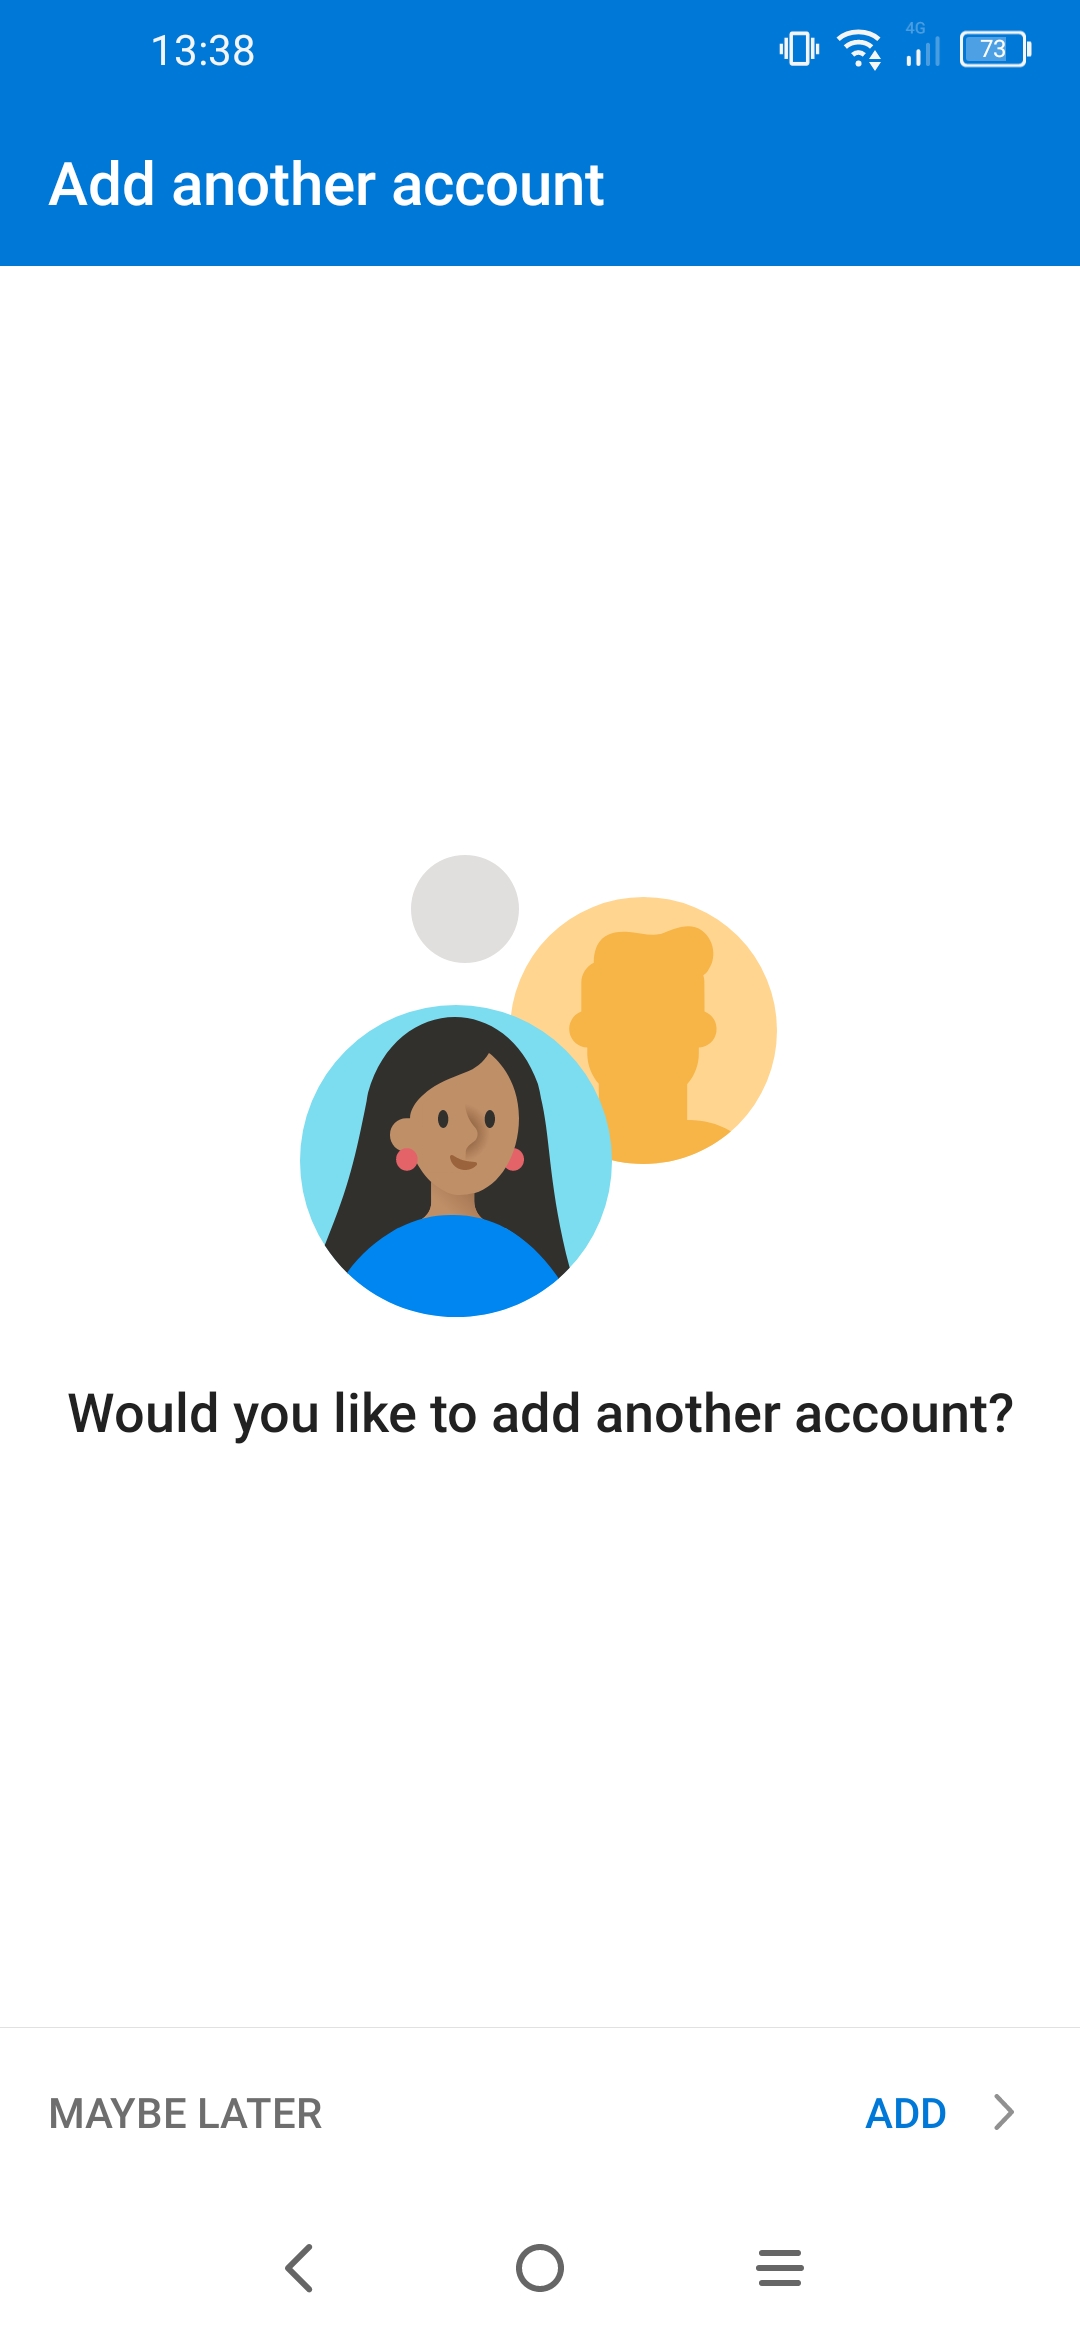
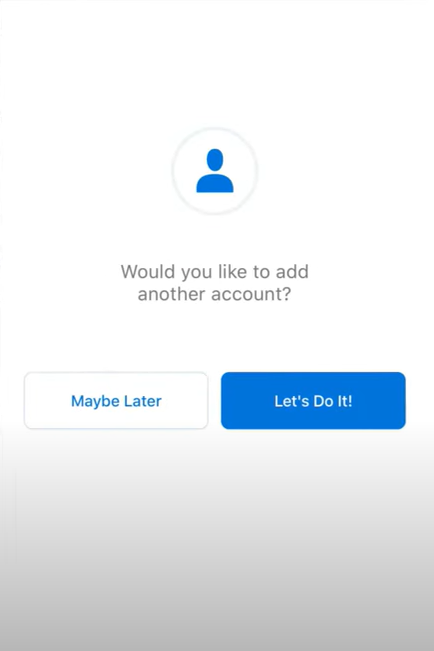
5. After you added the account, the screen below will show.
Outlook 2010 - Windows
- Click on File > Account Settings > Account Settings...
(If opening Outlook for the first time proceed from step 3)
- Click New to add an email address to Outlook.
- Click on Next

- Select Yes and click on Next

- Enter your email address and click on Next

-
You will be prompted by the popup below. Check the Don't ask me about this website again option and click Allow

- Type in your password. Check the box to Remember my credentials and click OK.

- Click Finish, your account is now setup and ready to go.

Windows Mail
- Open the Windows Mail app
- Click on Accounts on the left, then click on Add account on the right

- Scroll down and select Advanced setup

- Select Exchange ActiveSync

- Fill in the details as follows
- Email address - your email address
- Password - your account password
- Username - your email address
- Domain - Leave this blank
- Server - hex.barweb.com.au
- Server requires encrypted (SSL) connection - ticked
- Account Name - This is up to you, eg. Work Email
- Click Sign In

- Click yes to the pop up message (BarWeb does not enforce any security policies)

- Click Done

Android
- If this is the first mail account you are setting up, click Mail, otherwise Mail -> Menu -> Add Account -> Microsoft Exchange (or Microsoft Exchange ActiveSync).
- In the Account Setup screen, enter your full email address and password (if you wish this to be your default account, tick Send email from this account by default) and click Next.

- In the next page fill in the fields with the following details and hit Next:
- Domain\username: Your full email address
- Password: Your account password
- Exchange server: hex.barweb.com.au
-
Use secure connection (SSL): Tick this box

-
You may be prompted with a security warning. If so, click OK. - Tick the synchronized settings you wish to apply to your device and click Next.

iPhone/iPad
- From the Home Screen, tap Settings > Mail > Accounts
- Under the Accounts section, click Add Account.

- Tap Exchange.

- Enter your email address and click Next
-
Note: the 'Description' field is cosmetic and is the label for the email account on your device

-
Note: the 'Description' field is cosmetic and is the label for the email account on your device
- Tap Configure Manually on the following popup.

- Fill in the following fields with the details below then click Next:
- Server: hex.barweb.com.au
- Domain: leave blank
- Username: Your full email address
-
Password: Your password

- Enable the applications you would like to sync between your email account and iOS device, and click Save. Your iPhone/iPad device is now configured to use your email address.

Apple Mail - Mac
- Open Mail from the dock or from the Applications folder.If this is the first time opening the Mail application or the first account being added to the system, you may proceed to Step 4.
- Click Mail on the top left and select Preferences from the drop down menu.
- Click the Accounts tab at the top of the new window, then click the + icon at the bottom left-hand side of the window.

- On the following screen, choose Exchange as the mail provider and click continue.

- On the next screen, enter the following details:
- Full name
- Full QLD Bar email address
- Password for the account
- Click Continue when all fields are filled in.

- A summary of your account settings will follow as below. Click Continue.

- Tick the boxes next to the items you would like synced (ensure Mail is selected). Click Done to connect to the mail server and to finalise the account details.

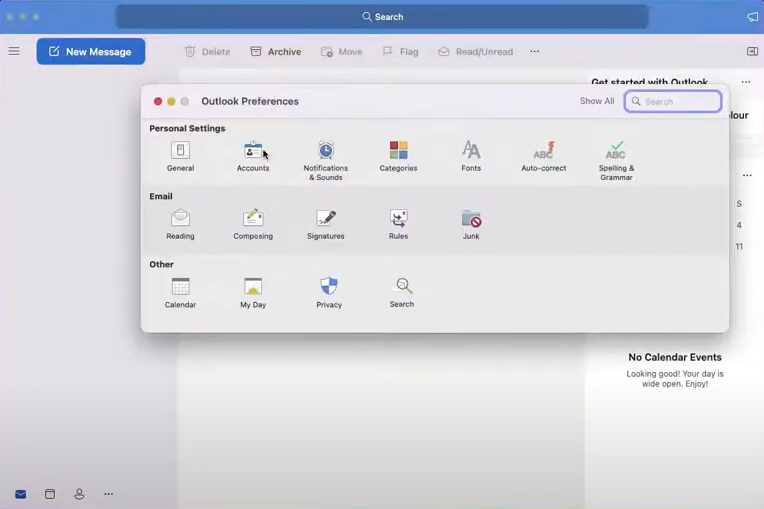
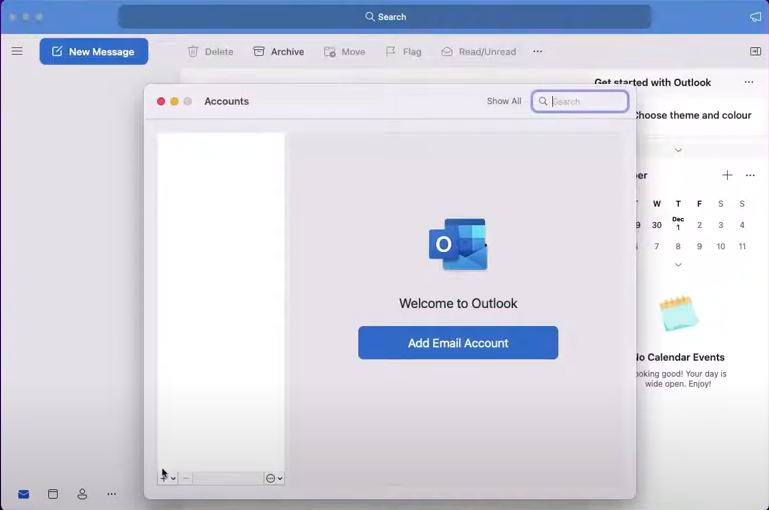
Outlook for Mac
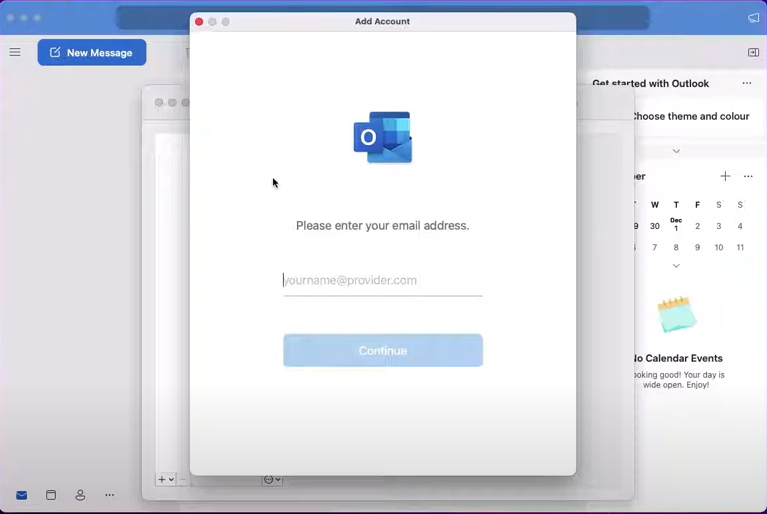
- Open Outlook for Mac 2016 / 2019
- Enter your email address and click Continue

- Click on Choose the Provider

- Select Exchange

- Enter the following details
- Method - Username and Password
- Email Address - your email address
- DOMAIN\Username or Email - your email address
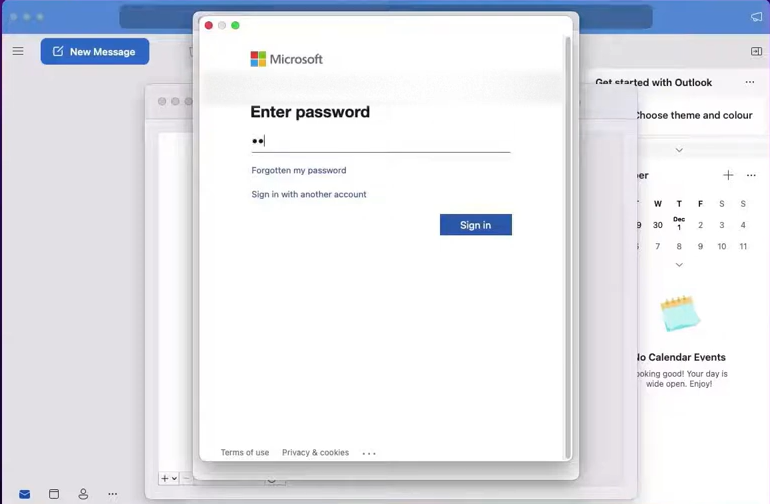
- Password - your password
- Server - hex.barweb.com.au
- Click Add Account

- Click Always use my response for this server and click Allow

- Click Done

Windows Phone
- Open Settings.
- Tap Email + Accounts.

- Tap Add an account.

- Tap Advanced Setup.

- Enter your full email address and password and hit Next.

- Select Exchange ActiveSync.

- Fill in the fields with the following details
- User Name: Full email address
- Domain: Leave blank
- Server: hex.barweb.com.au

- Click Sign In. Your Windows Phone is now configured to use your email address.
Outlook for Android
1. Due to Microsoft changed how its Outlook for Mobile app authenticates in the latest update, please remove your Exchange account if you set it up before.
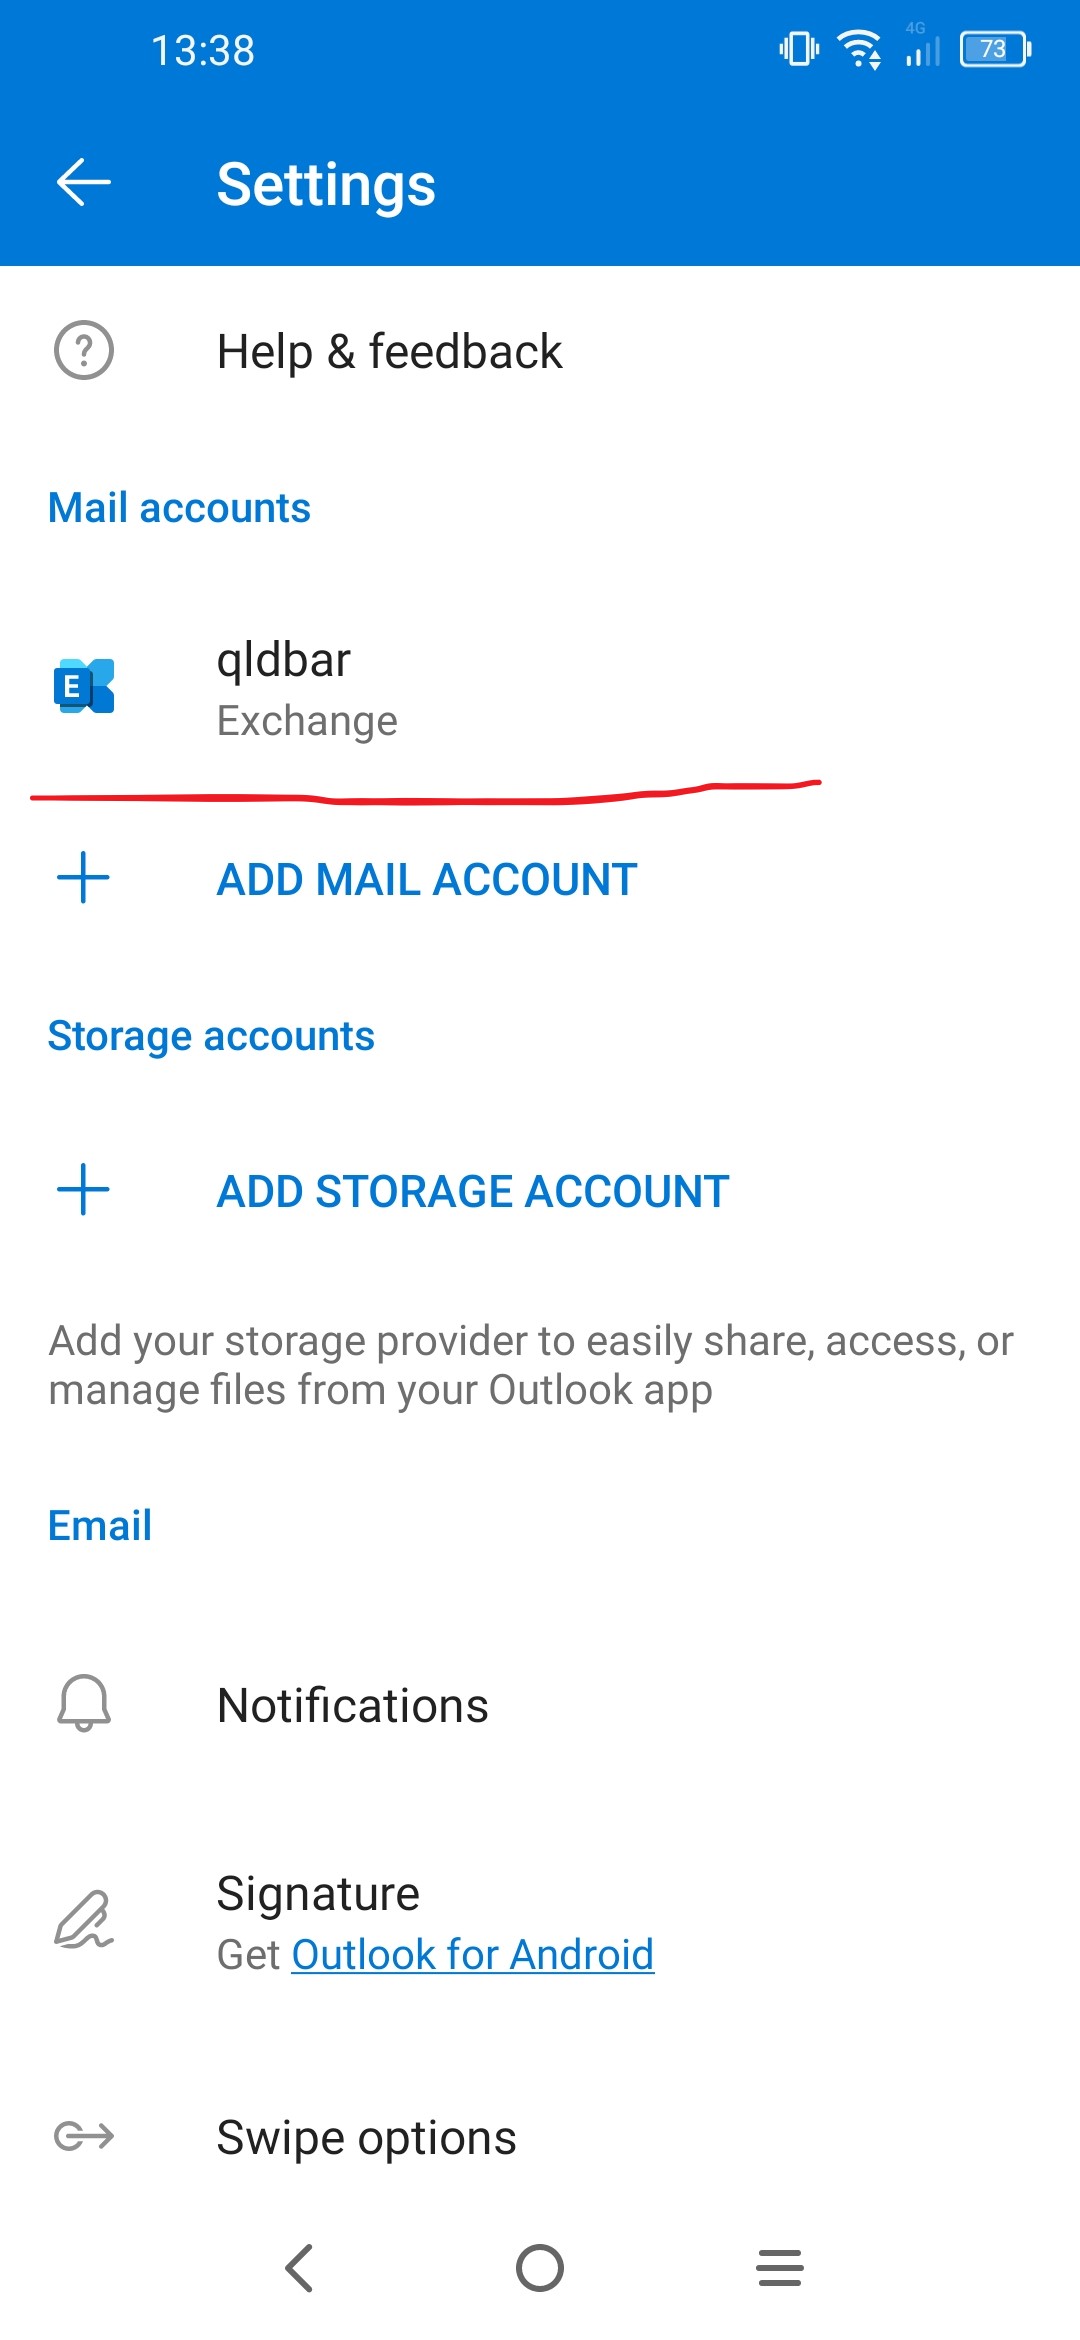
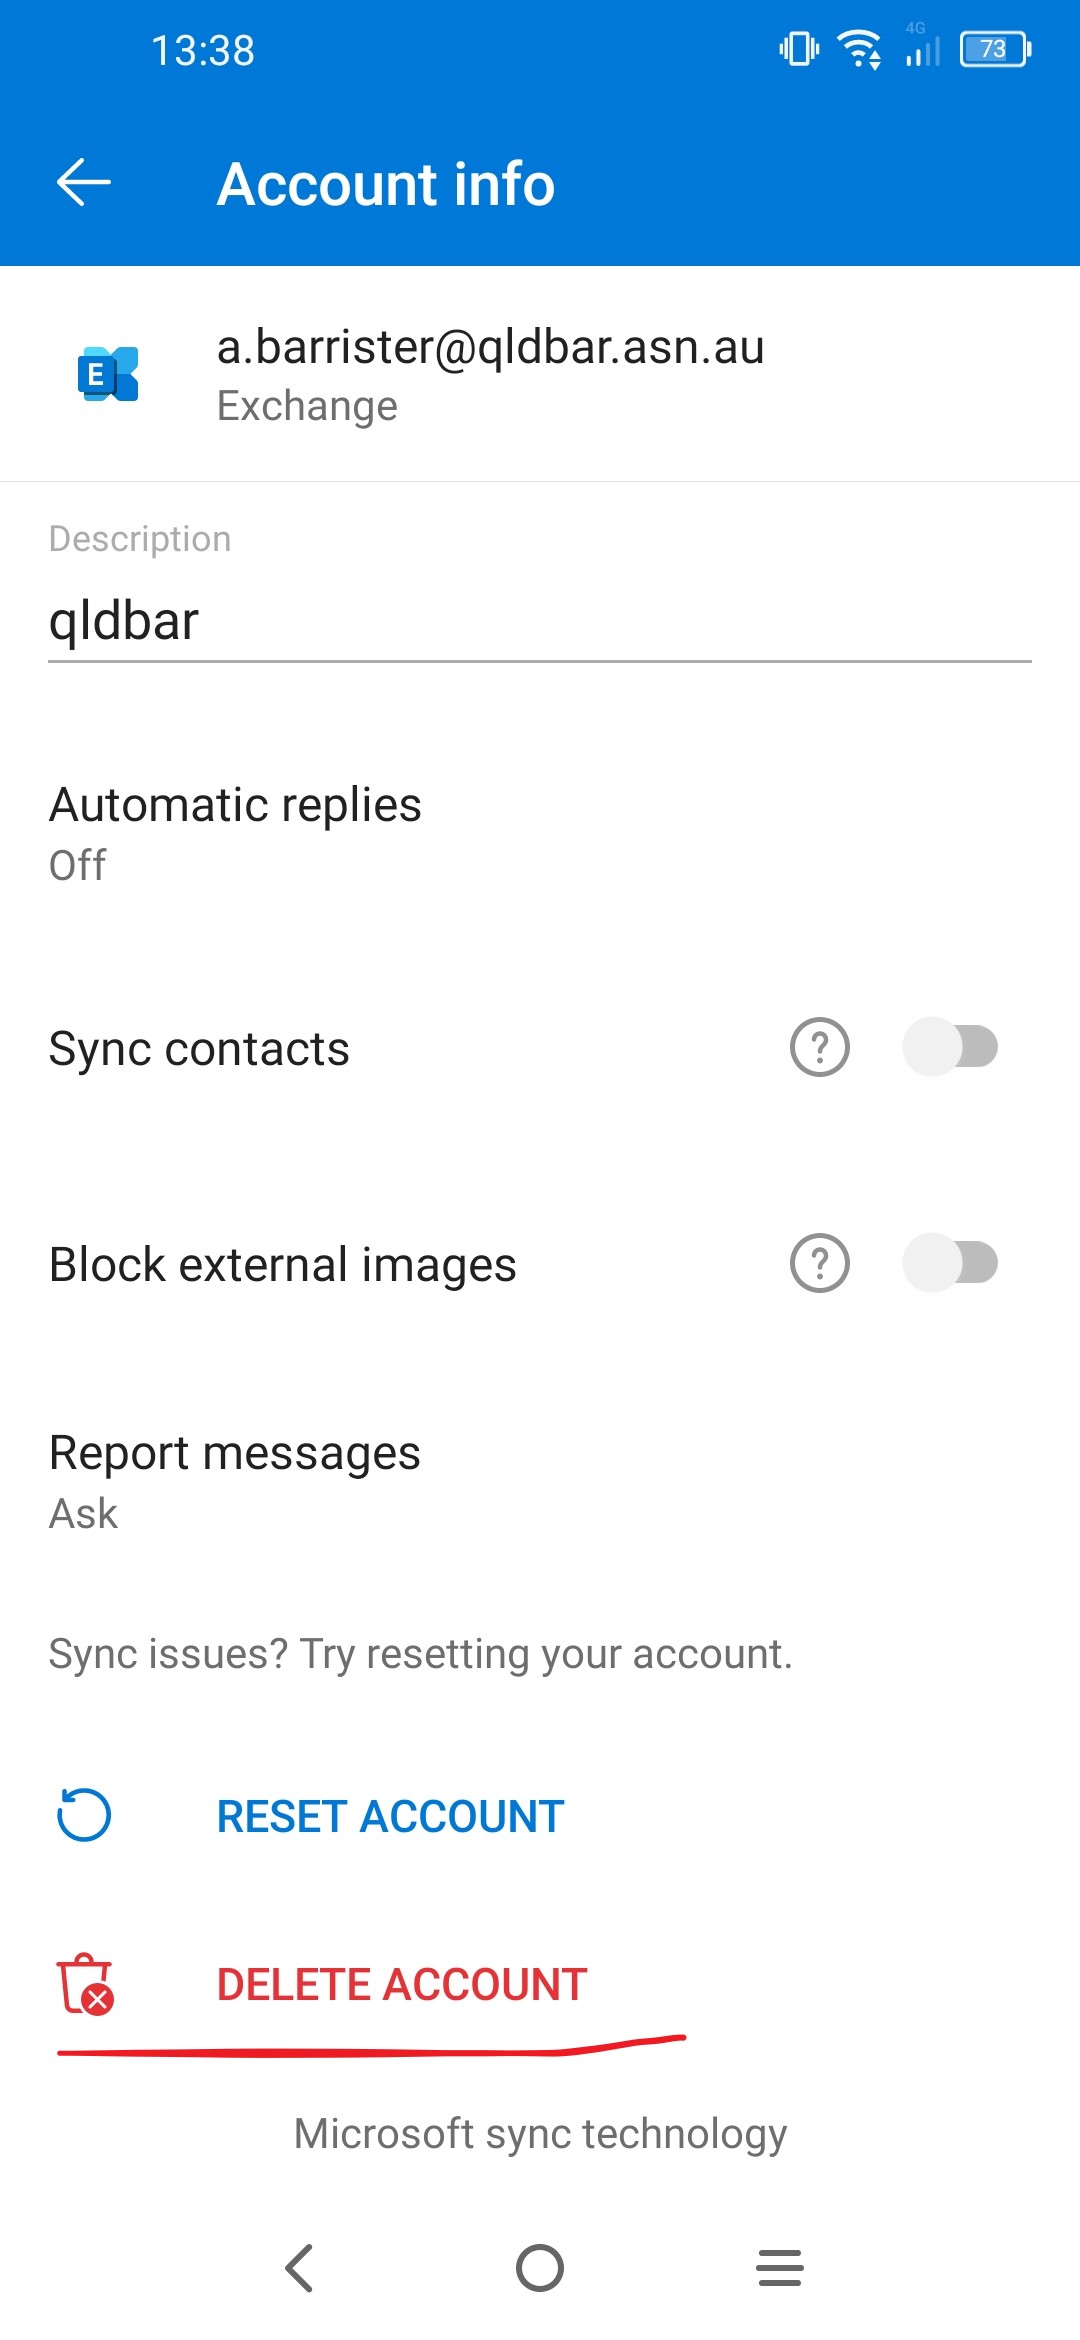
Then select Delete From This Device
2. After deleting the account you would be prompted to Add Account
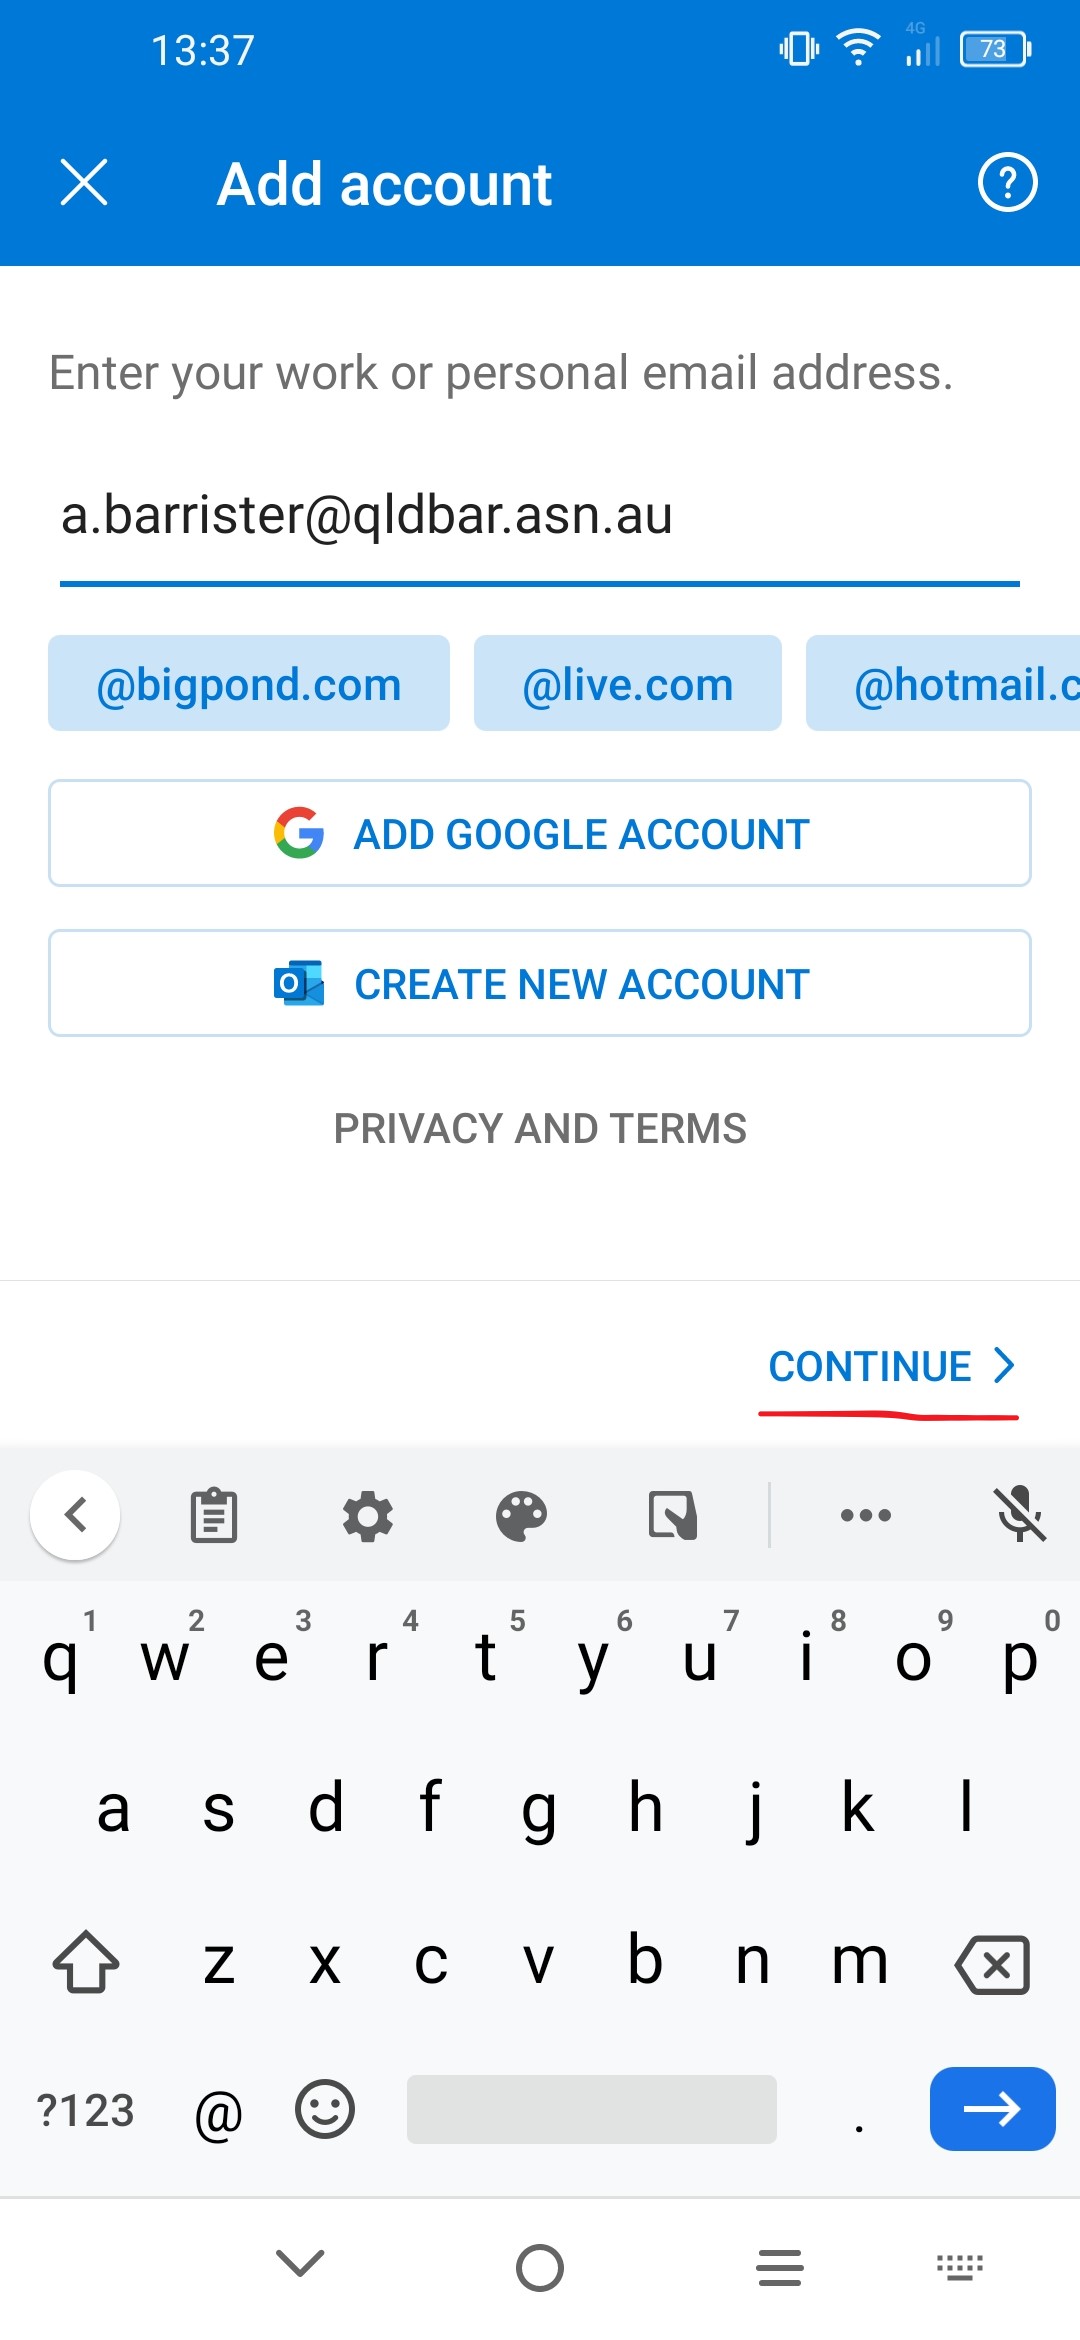
3. Enter your email address in the next screen and tap on CONTINUE
4. Fill in the following fields with the details below then top on ![]()
-
- Email Address: Your email address
- Server: hex.barweb.com.au
- Domain: leave it blank
- Username: Your email address
- Password: Your password
- Description: qldbar

5. After you added the account, the screen below will show.
Standard Email Accounts
Outlook 2016 / 2019 - Windows
- Click on File > Account Settings > Account Settings...
- Click New to add an email address to Outlook.
- Type in your email address and click Advanced Options and check Let me set up my account manually. Then click Connect.

- In the Choose Account Type window, click on POP

- Fill in the fields as per the details below:
- Incoming mail server: email.barweb.com.au
- Port: 995
- Check: This server requires an encrypted connection (SSL/TLS)
- Outgoing mail server (SMTP): email.barweb.com.au
- Port: 587
-
Encryption method: STARTTLS

- Click Connect.
- Fill in your password as you are prompted in the popup and click OK.

- Click OK on the account setup complete window and your BarWeb Mail account is now ready to use.

Outlook 2013 - Windows
- Open Outlook 2013
- Click on Next

- Select Yes and click on Next

- Select Manual setup or additional server types

- Select POP or IMAP

- Enter the following details
- Your Name - The name you want to appear on emails you send
- Email Address - Your email address
- Account Type - POP
- Incoming Mail Server - email.barweb.com.au
- Outgoing Mail Server - email.barweb.com.au
- Username - Your email address
-
Password - Your email account password

- Click on More Settings ...
- Select the Outgoing Server tab and select the following options
- My outgoing server (SMTP) requires authentication
- Use same settings as my incoming mail server

- While in the More Settings ... screen, select the Advanced tab and change the following settings
- Incoming server (POP3) to 995
- Tick the checkbox for This server requires an encrypted connection (SSL)
- Outgoing server (SMTP) to 587
- Use the following type of encrypted connection to Auto

- Click OK and then click on Next
- Tests will be performed to confirm settings are correct

- Click Close
- Click Finish and start using your email account

Outlook 2010 - Windows
- Click on File > Account Settings > Account Settings...
- Click New to add an email address to Outlook.
- If you are prompted with an Auto Account Setup window, select Manually configure server settings or additional server types and select Next to continue.

- Select Internet E-mail and click Next.

- Fill in the fields with the following details:
- Your Name: Your full name (This is the name that will appear with all outgoing emails)
- E-mail Address: Your full email address
- Incoming mail server: email.barweb.com.au
- Outgoing mail server (SMTP): email.barweb.com.au
- User Name: Your full email address
-
Password: Your account password

- Click More Settings
- In the Outgoing Server tab, select My outgoing server (SMTP) requires authentication

- In the Advanced tab, in the Outgoing server (SMTP) field, enter 587.
- Tick the checkbox (This server requires an encrypted connection (SSL/TLS)
- Change the Drop down Menu item to Auto for (Use the following type of encrypted connection)

- Click OK
- Click Next, a test will be performed to confirm your settings are correct, once the test is complete, click Close then click on Finish on the following screen
Windows Mail
- Open the Windows Mail app
- Click on Accounts on the left, then click on Add account on the right

- Scroll down and select Advanced setup

- Select Internet email

- Enter the following details
- Email Address - your email address
- Username - your email address
- Password - your email account password
- Account Name - this is for your reference (eg. work account)
- Send your messages using this name - name you want appearing on your send emails
- Incoming email server - email.barweb.com.au
- Account Type - POP3
- Outgoing (SMTP) email server - email.barweb.com.au
- Outgoing server requires authentication - enabled
- Use the same username and password for sending emails - enabled
- Require SSL for incoming emails - enabled
-
Require SSL for going emails - enabled

- Click Sign in
- Click Done

- Click on Go to inbox

iPhone/iPad
- From the Home Screen, tap Settings > Mail > Accounts
- Under the Accounts section, click Add Account.

- Click Other

- Click Add Mail Account

- Enter the following details into the fields that appear:
- Name: Your name (this is the name that will be attached to outgoing emails)
- Email: Your email address
- Password: Your account password
-
Description: Description of the account (Optional)

- In the following screen, be sure that "POP" at the top of the page is highlighted and enter the following details into the fields:
- Name: Your name (this field should already be filled)
- Email: Your email address (this field should already be filled)
-
Description: Account description (this field should already be filled)
-
Incoming Mail Server:
- Host Name: email.barweb.com.au
- User Name: Your full email address
- Password: Your account password
-
Outgoing Mail Server:
- Host Name: email.barweb.com.au
- User Name: Your full email address
-
Password: Your account password

- Click Save. Your iOS device is now configured to use your email address.
Apple Mail - MacOS
- Open Mail from the dock or from the Applications folder.
- If this is the first time opening the Mail application or the first account being added to the system, you may proceed to Step 4.
- Click Mail on the top left and select Preferences from the drop down menu (if Mail is not there, you may need to select the Mail icon in the dock to bring it to the top).
- Click the Accounts tab at the top of the new window, then click on the + icon at the bottom left-hand side of the window.

- On the following screen, choose Other Mail Account as the mail provider and click Continue.

- On the Add Account screen, enter the following details:
- Full name - This will appear on your emails
- Full QLD Bar email address
- Password for the account
- Click Sign In when all fields are filled in.

- On the following screen, configure the options to reflect the settings below:
- Email Address:Full QLD Bar email address
- User Name: Full QLD Bar email address
- Password: Password for the account
- Account Type: POP
- Incoming Mail Server: email.barweb.com.au
-
Outgoing Mail Server: email.barweb.com.au

- Click Sign in
- Check that all the details are correct in the Account Information window (ensure the new account is selected in the left bar).
- Click the drop-down button next to Outgoing Mail Server (SMTP).

- Select Edit SMTP Server List...

- In the following screen, make sure the email.barweb.com.au server name is highlighted, then click the Advanced tab.
- Uncheck the setting to Automatically detect account settings.
- Change the port number to 465 (and make sure Use SSL is ticked).
- Change Authentication to password by selecting it in the dropdown menu.
- Type in your username (Your Email Address) and the password (Your Email Password)

- Your BarWeb Mail account has now been successfully set up. You can begin to send and receive mail as per usual.
Outlook for Mac 2016 / 2019
- Open Outlook for Mac 2016 / 2019
- Enter your email address and click Continue

- Click on Choose the provider

- Select IMAP/POP

- Enter the following details
- Type - POP
- Email Address - your email address
- Username - your email address
- Incoming Server - email.barweb.com.au port 995
- Outgoing server - email.barweb.com.au port 587
- Use SSL to Connect- Ticked (enabled)

- Click Add Account
- Click Done

ChromeBook
To access your emails via your ChromeBook you will need to use the Standard Accounts Webmail which can be accessed using the link below
Please Note - Only emails stored on the server will be accessible via Webmail
Standard Webmail - https://email.barweb.com.au/mail
Windows Phone
- Open Settings
- Tap Email + Accounts

- Tap Add an account.

- Tap Advanced Setup.

- Enter your full email address and password and hit Next.

- Select Internet email.

- Fill in the fields with the following details:
- Account name: The name you would like to use to identify the account (for personal use)
- Your name: Your full name (This is the name that will appear with outgoing emails)
- Incoming email server: mail.barweb.com.au
- Account type: POP3

- Keep scrolling down and fill in the fields with the following details:
- User name: Your full email address
- Password: Your account password
- Outgoing (SMTP) email server: mail.barweb.com.au
- Outgoing server requires authentication: Tick
- Use the same user name and password for sending email: Tick

- Click Sign in. Your Windows Phone is now configured to use your email address.
Set up in Outlook for iOS
1. Launch Outlook for iOS, tap on "Add Account" button.
2. Enter your POP Qldbar email address, tap on "Add Account", there will be a new button "Setup Account Manually" appear on the screen, tap on it.
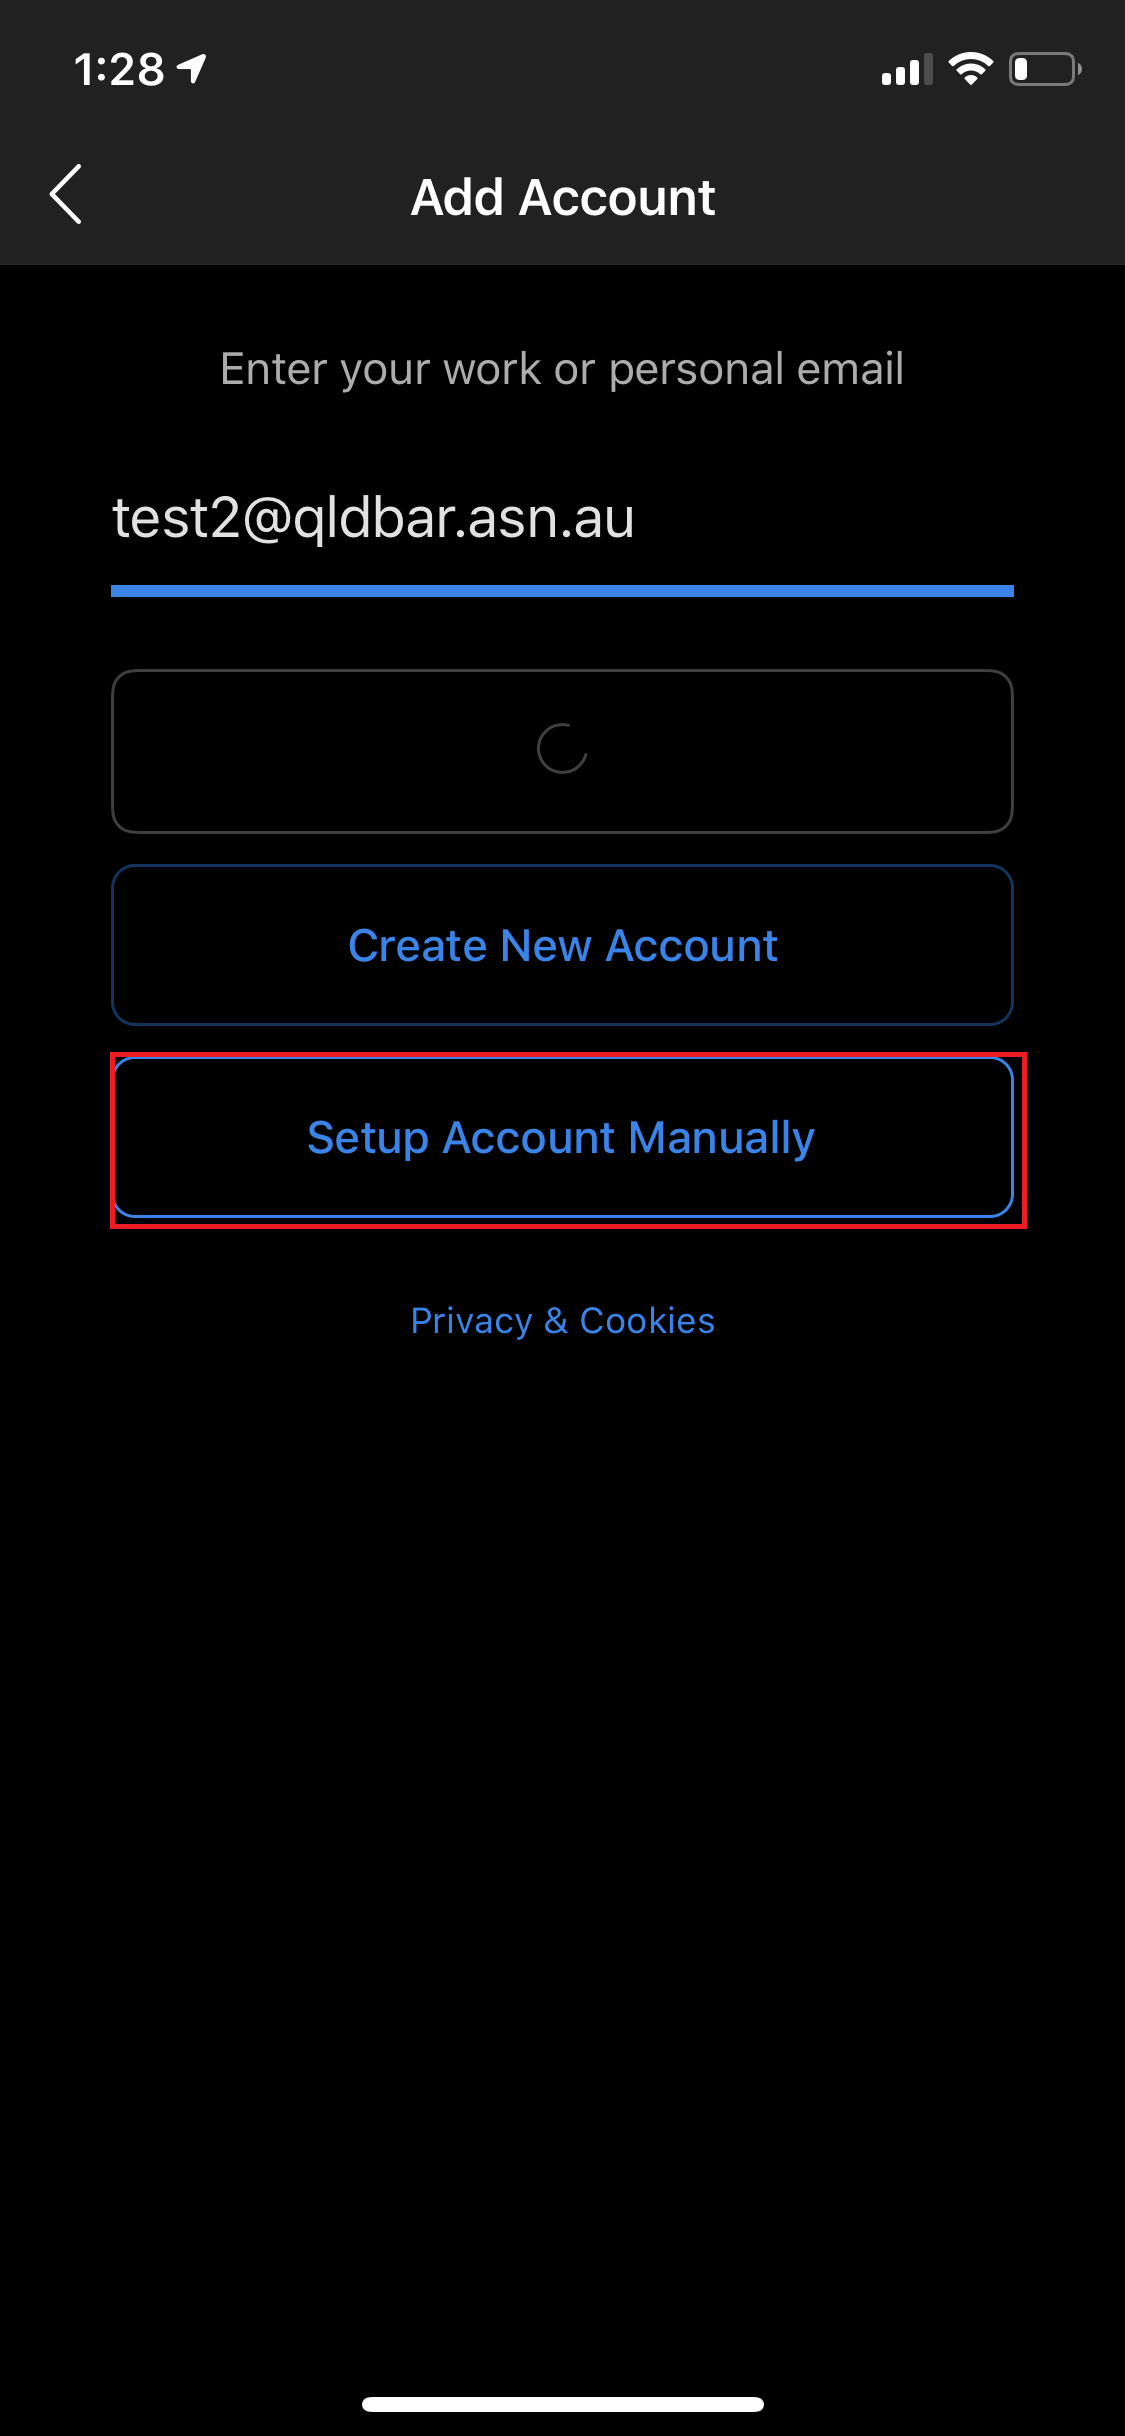
3. Tap on "IMAP" on the next screen.

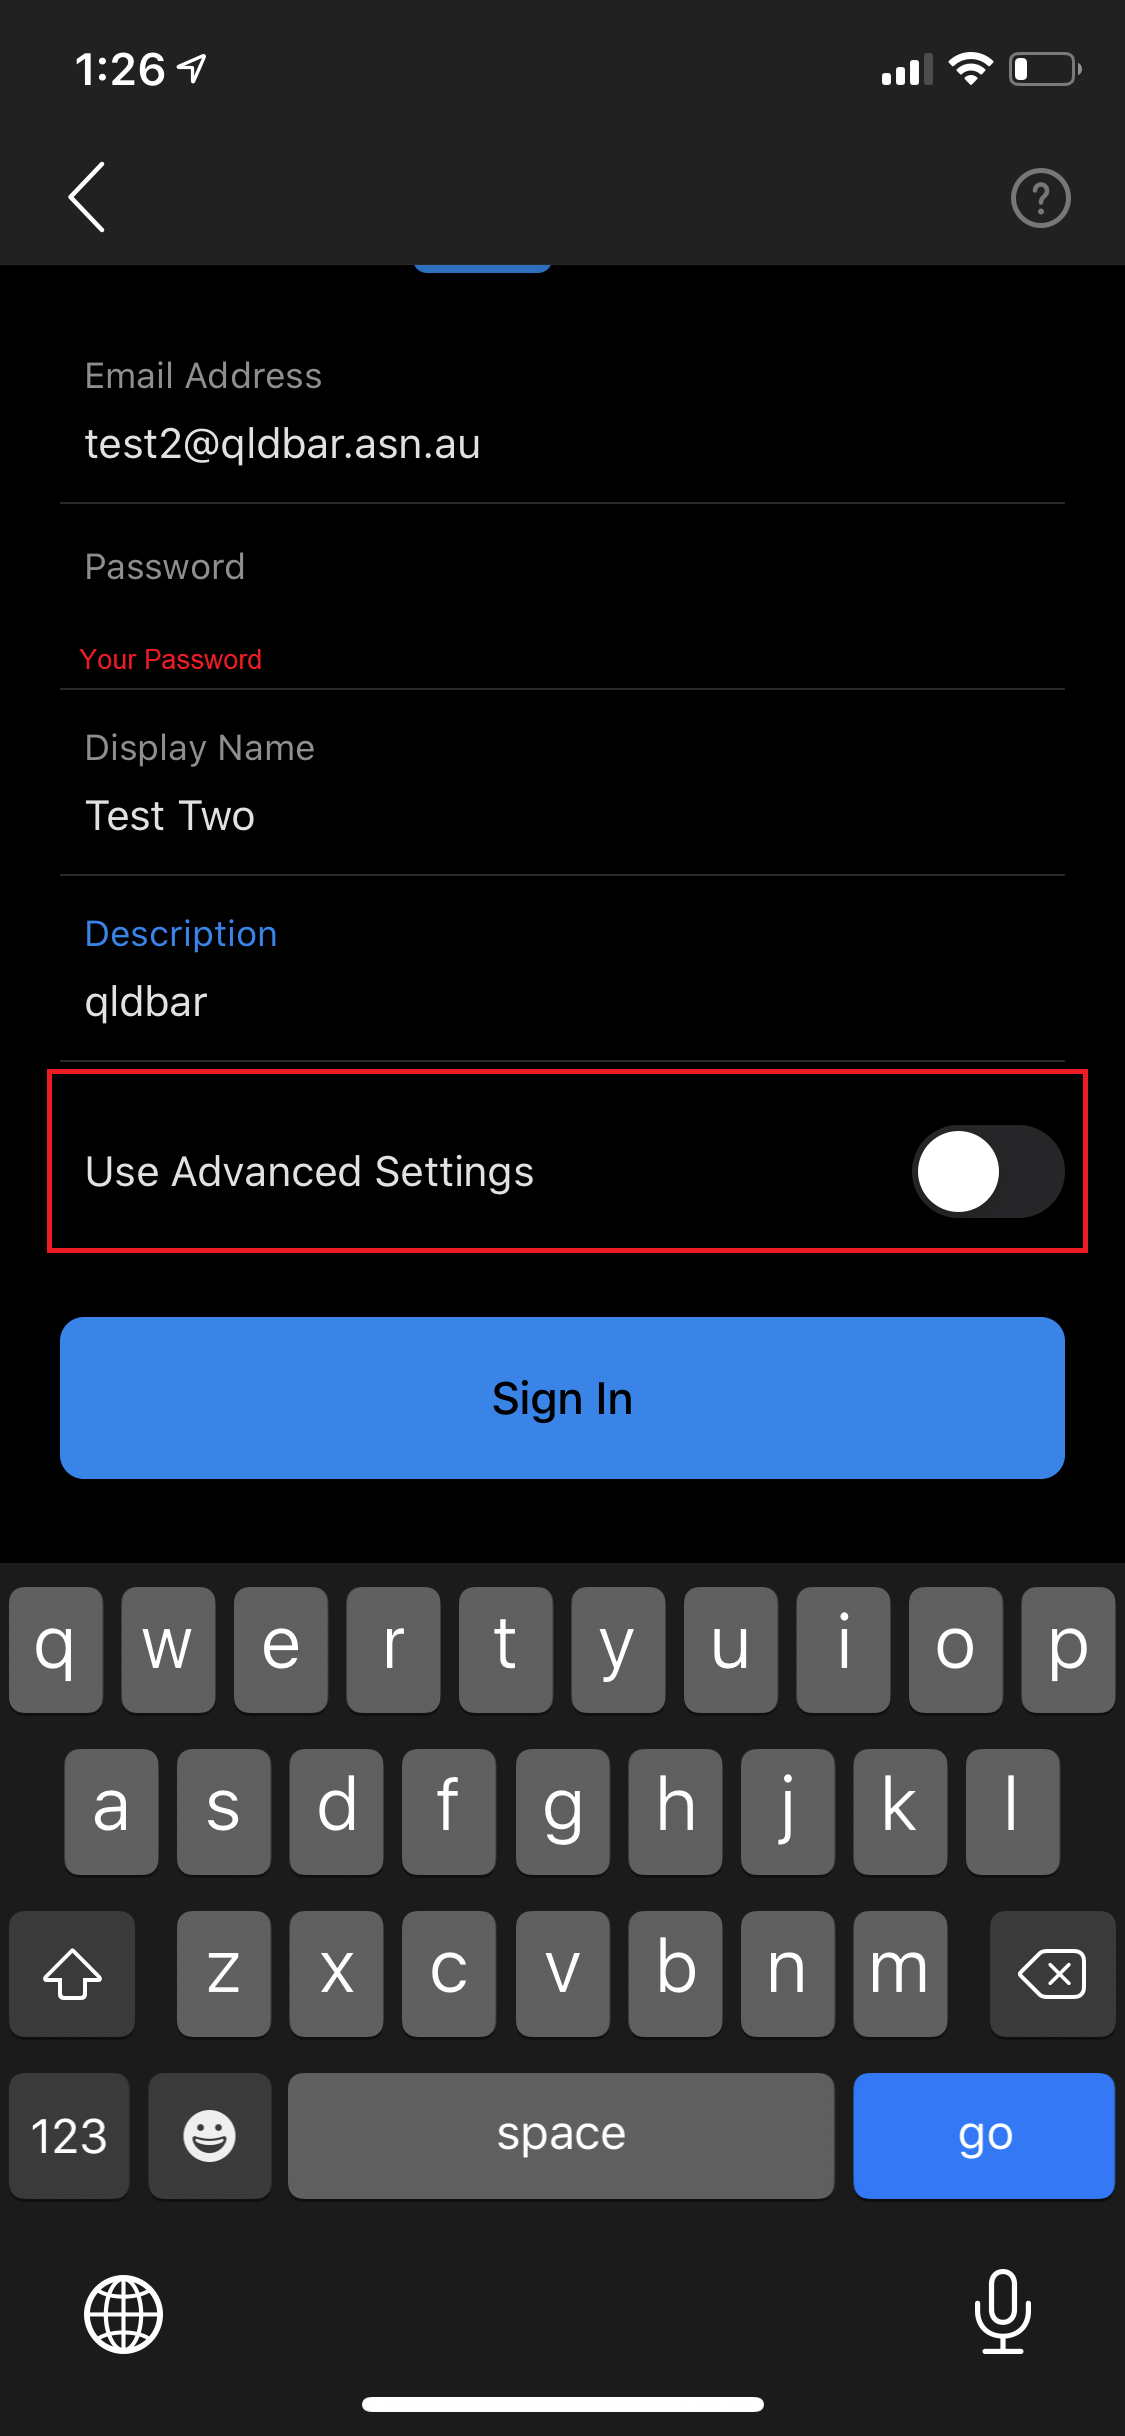
4. Enter your email details on the next screen, and switch on "Use Advanced Settings" toggle button.
- Email Address: Your email address
- Display Name: Your name.
- Description: Account description, e.g. Exchange, BAQ Email, etc.
5. In the following screen, enter the following details into the fields:
-
IMAP Incoming Mail Server:
- Hostname: email.barweb.com.au
- Username: Your full email address
- Password: Your account password
-
SMTP Outgoing Mail Server:
- Hostname: email.barweb.com.au
- Username: Your full email address
- Password: Your account password

6. Tap on "Sign In" button. Your Outlook app for iOS is now configured to use your email address.
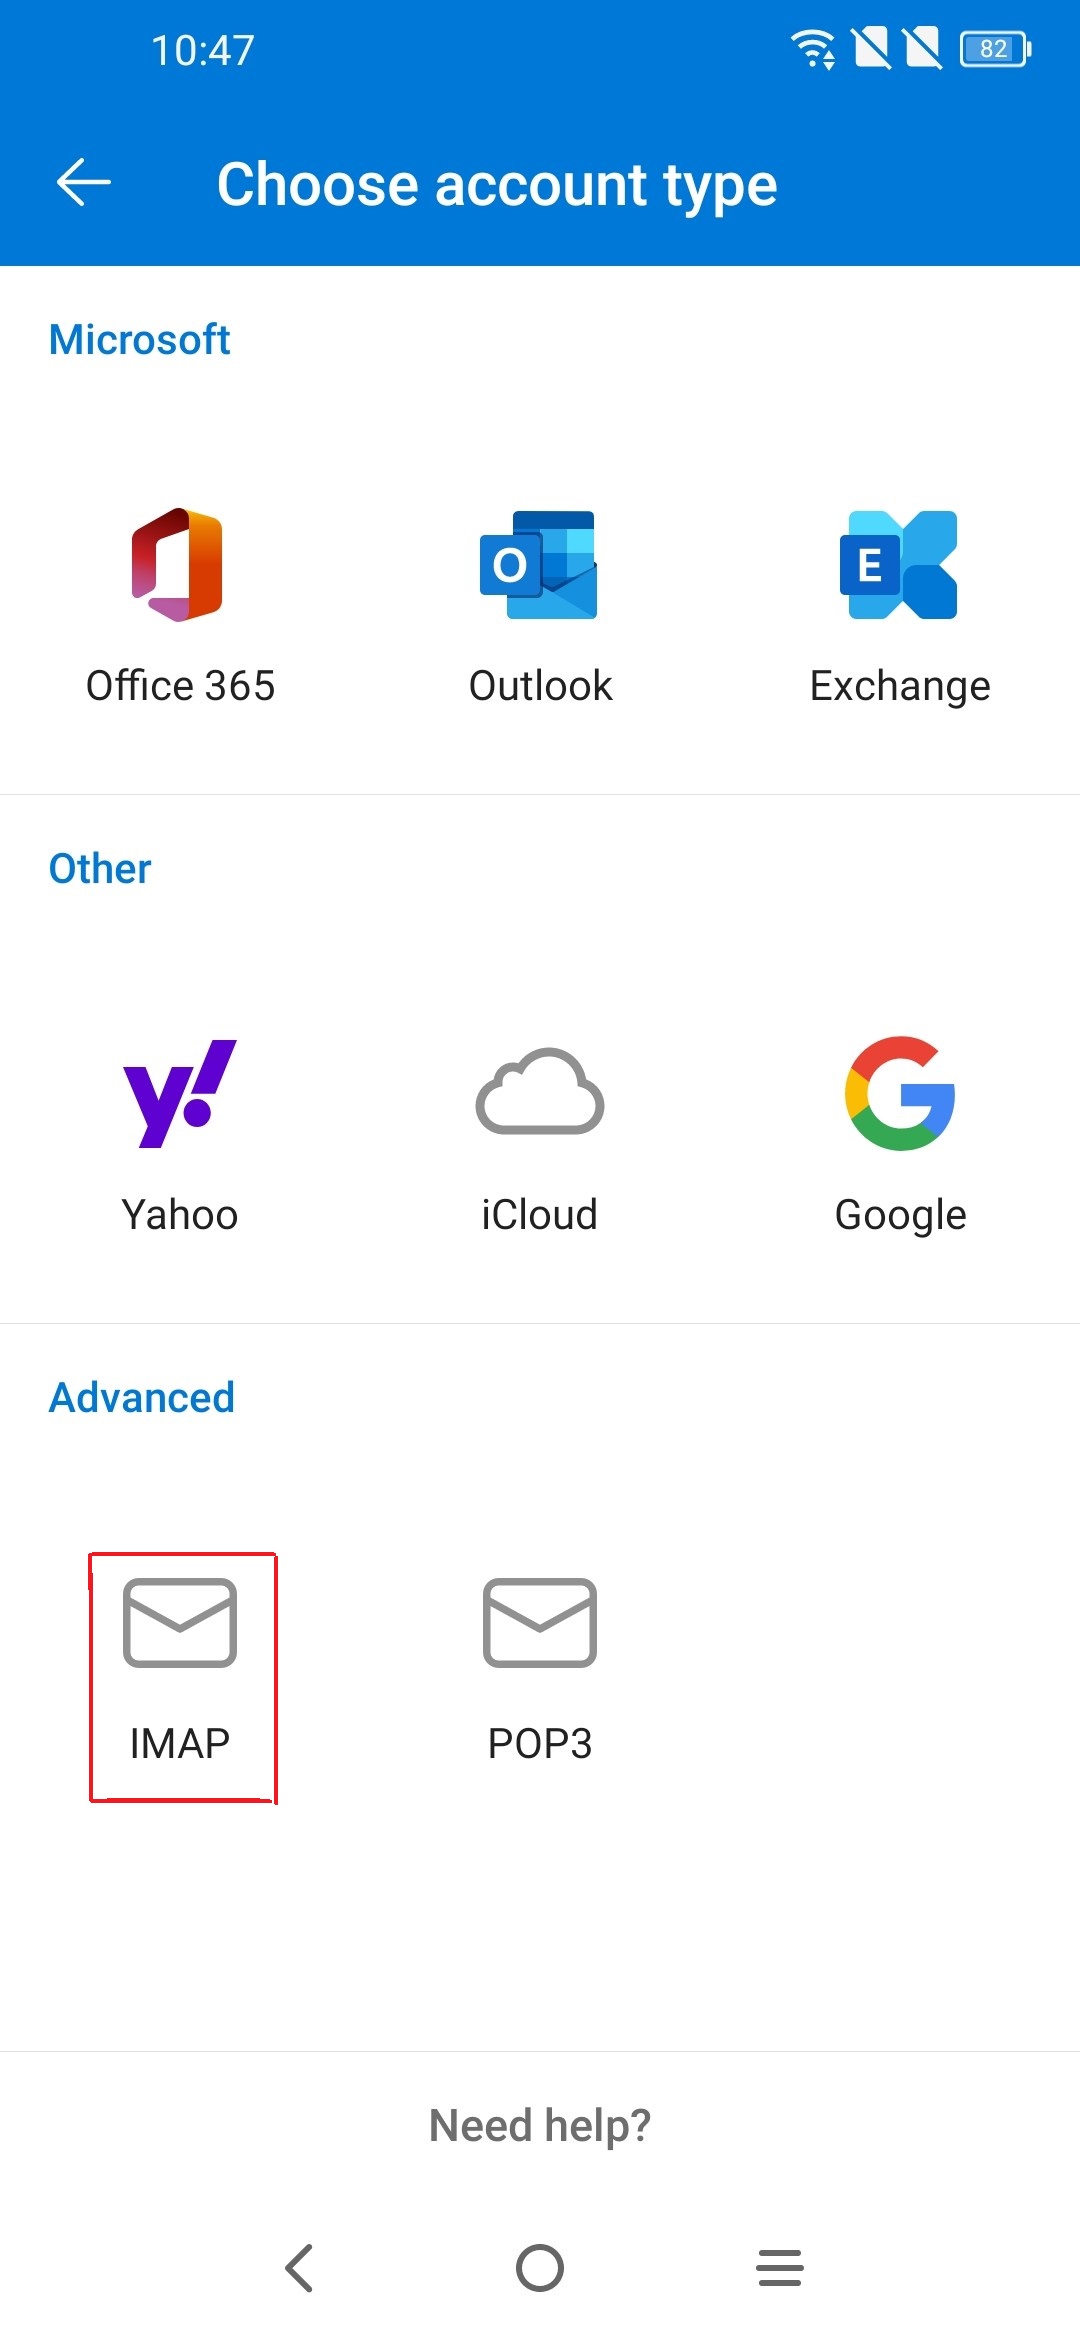
Set up in Outlook for Android
1. Launch Outlook for Android, tap on the "ADD ACCOUNT" button.
2. Enter your Qldbar email address, tap on "CONTINUE >", there will be a new button "SETUP ACCOUNT MANUALLY" appear on the screen, tap on it.

3. Tap on "IMAP" on the next screen.
4. Enter your email details on the next screen (The app prevents taking screenshot on this page, the image was taken on another phone.)
- Email Address: Your email address
- Display Name: Your name.
- Description: Account description, e.g. Exchange, BAQ Email, etc.
-
IMAP Incoming Mail Server:
- Hostname: email.barweb.com.au
- Port: 993
- Username: Your full email address
- Password: Your account password
-
SMTP Outgoing Mail Server:
- Hostname: email.barweb.com.au
- Port: 465
- Username: Your full email address
- Password: Your account password
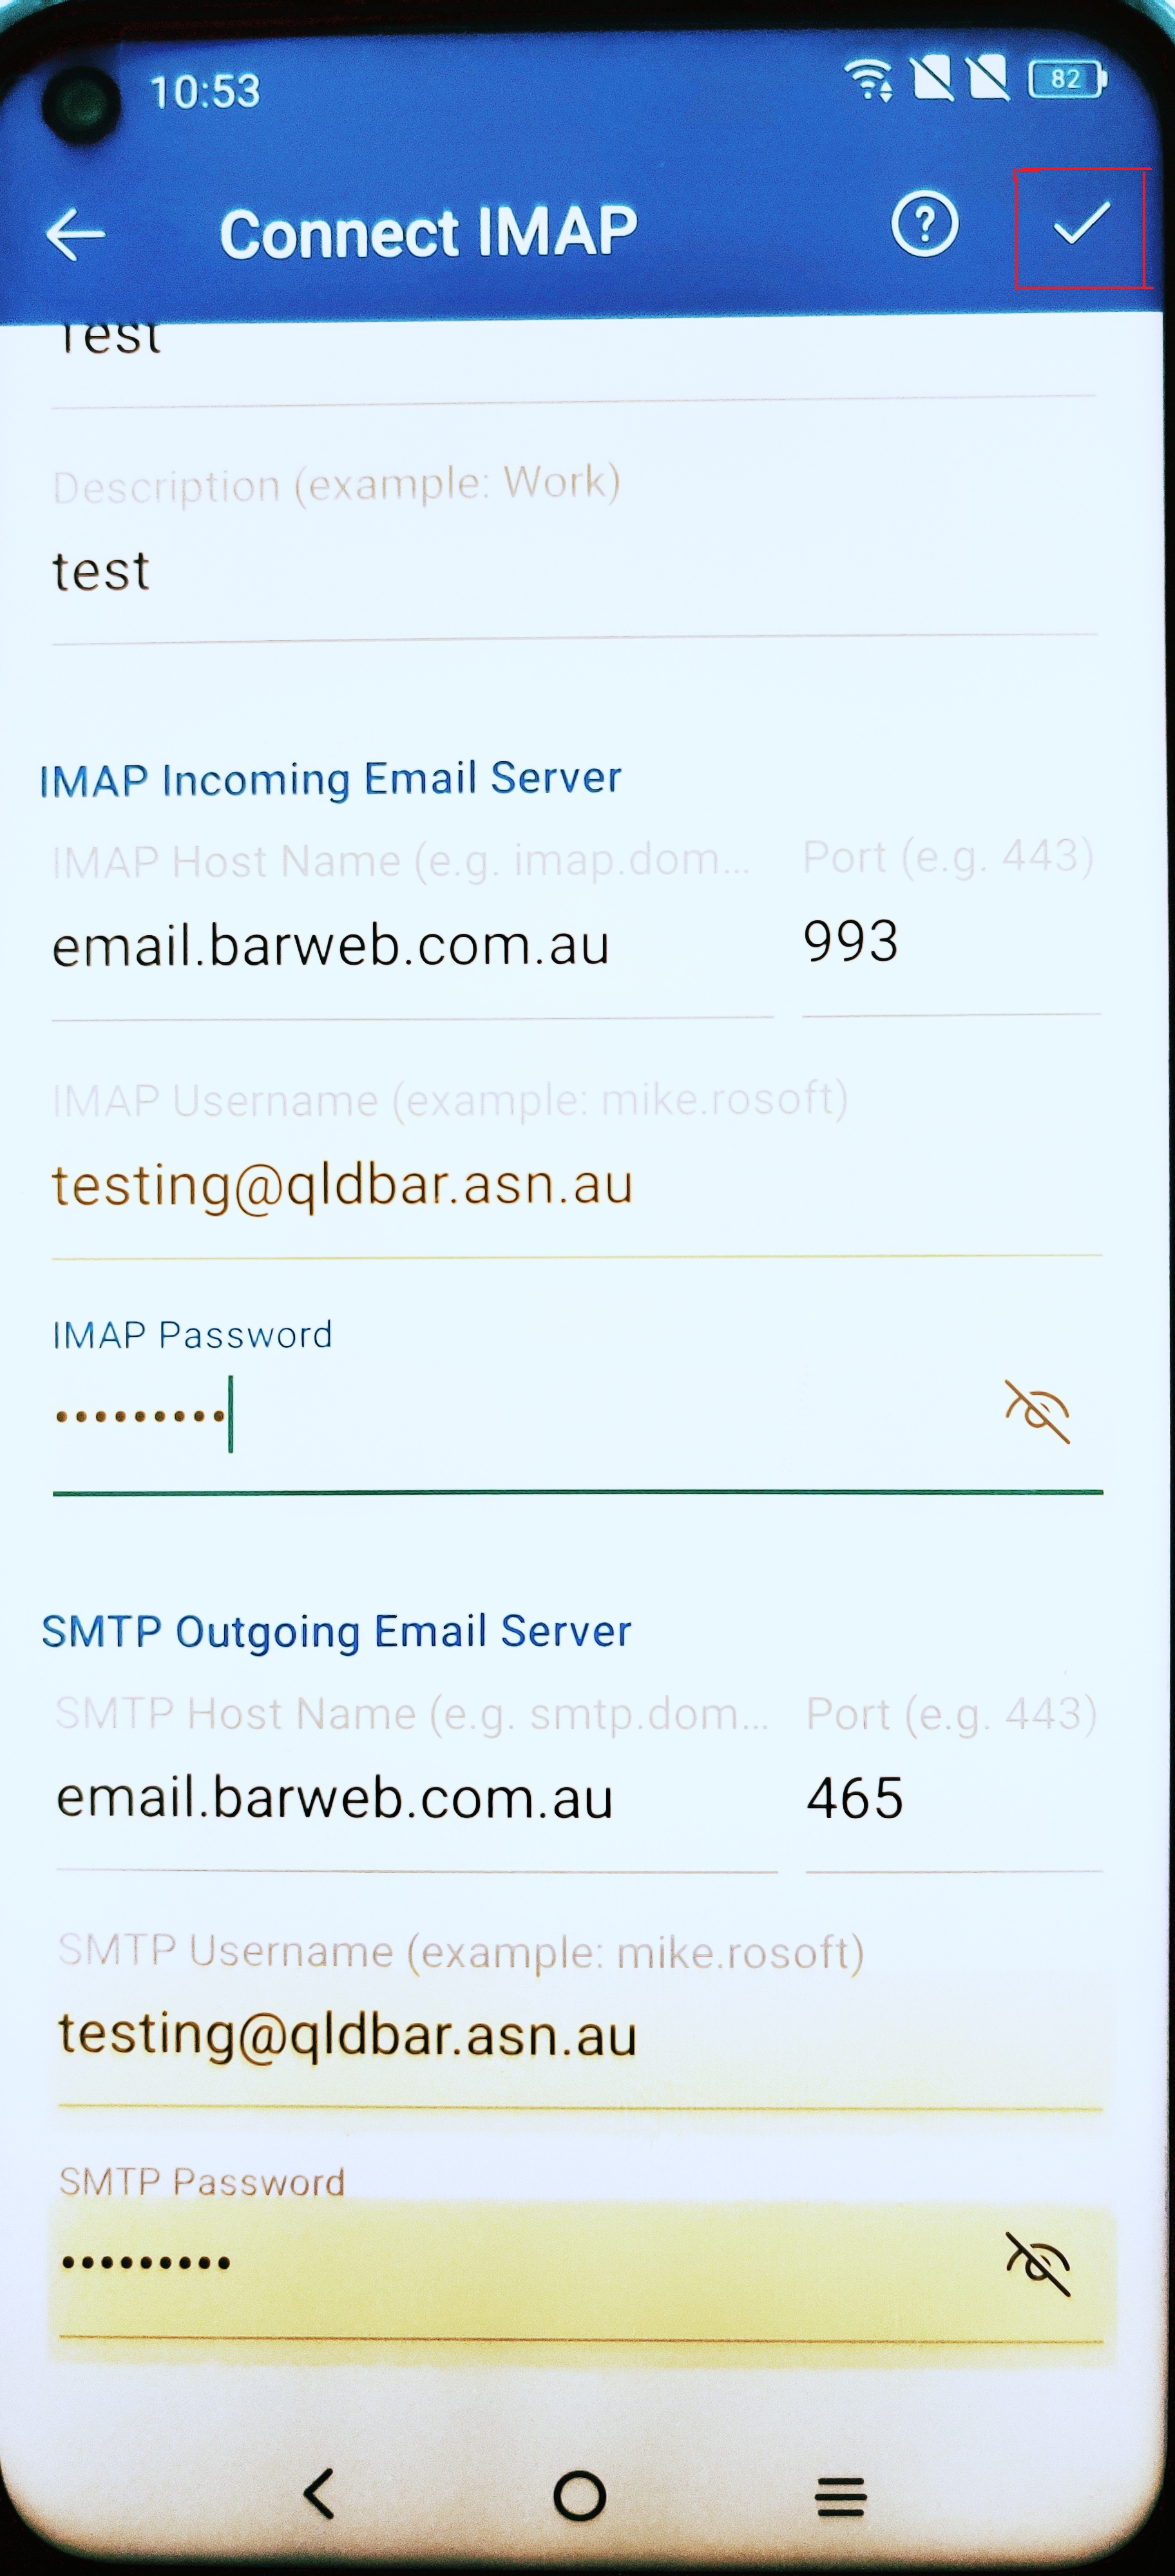
5. Tap on the tick button. Your Outlook app for Android is now configured to use your email address.
Microsoft 365 in Outlook
Microsoft 365 (Windows OS)
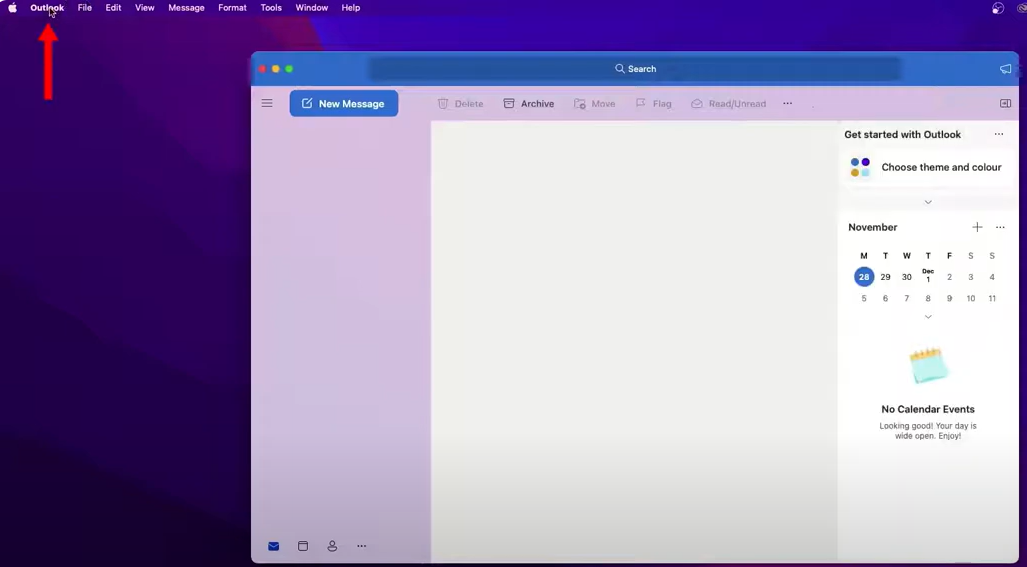
Open Outlook:
- Launch the Outlook application on your computer.
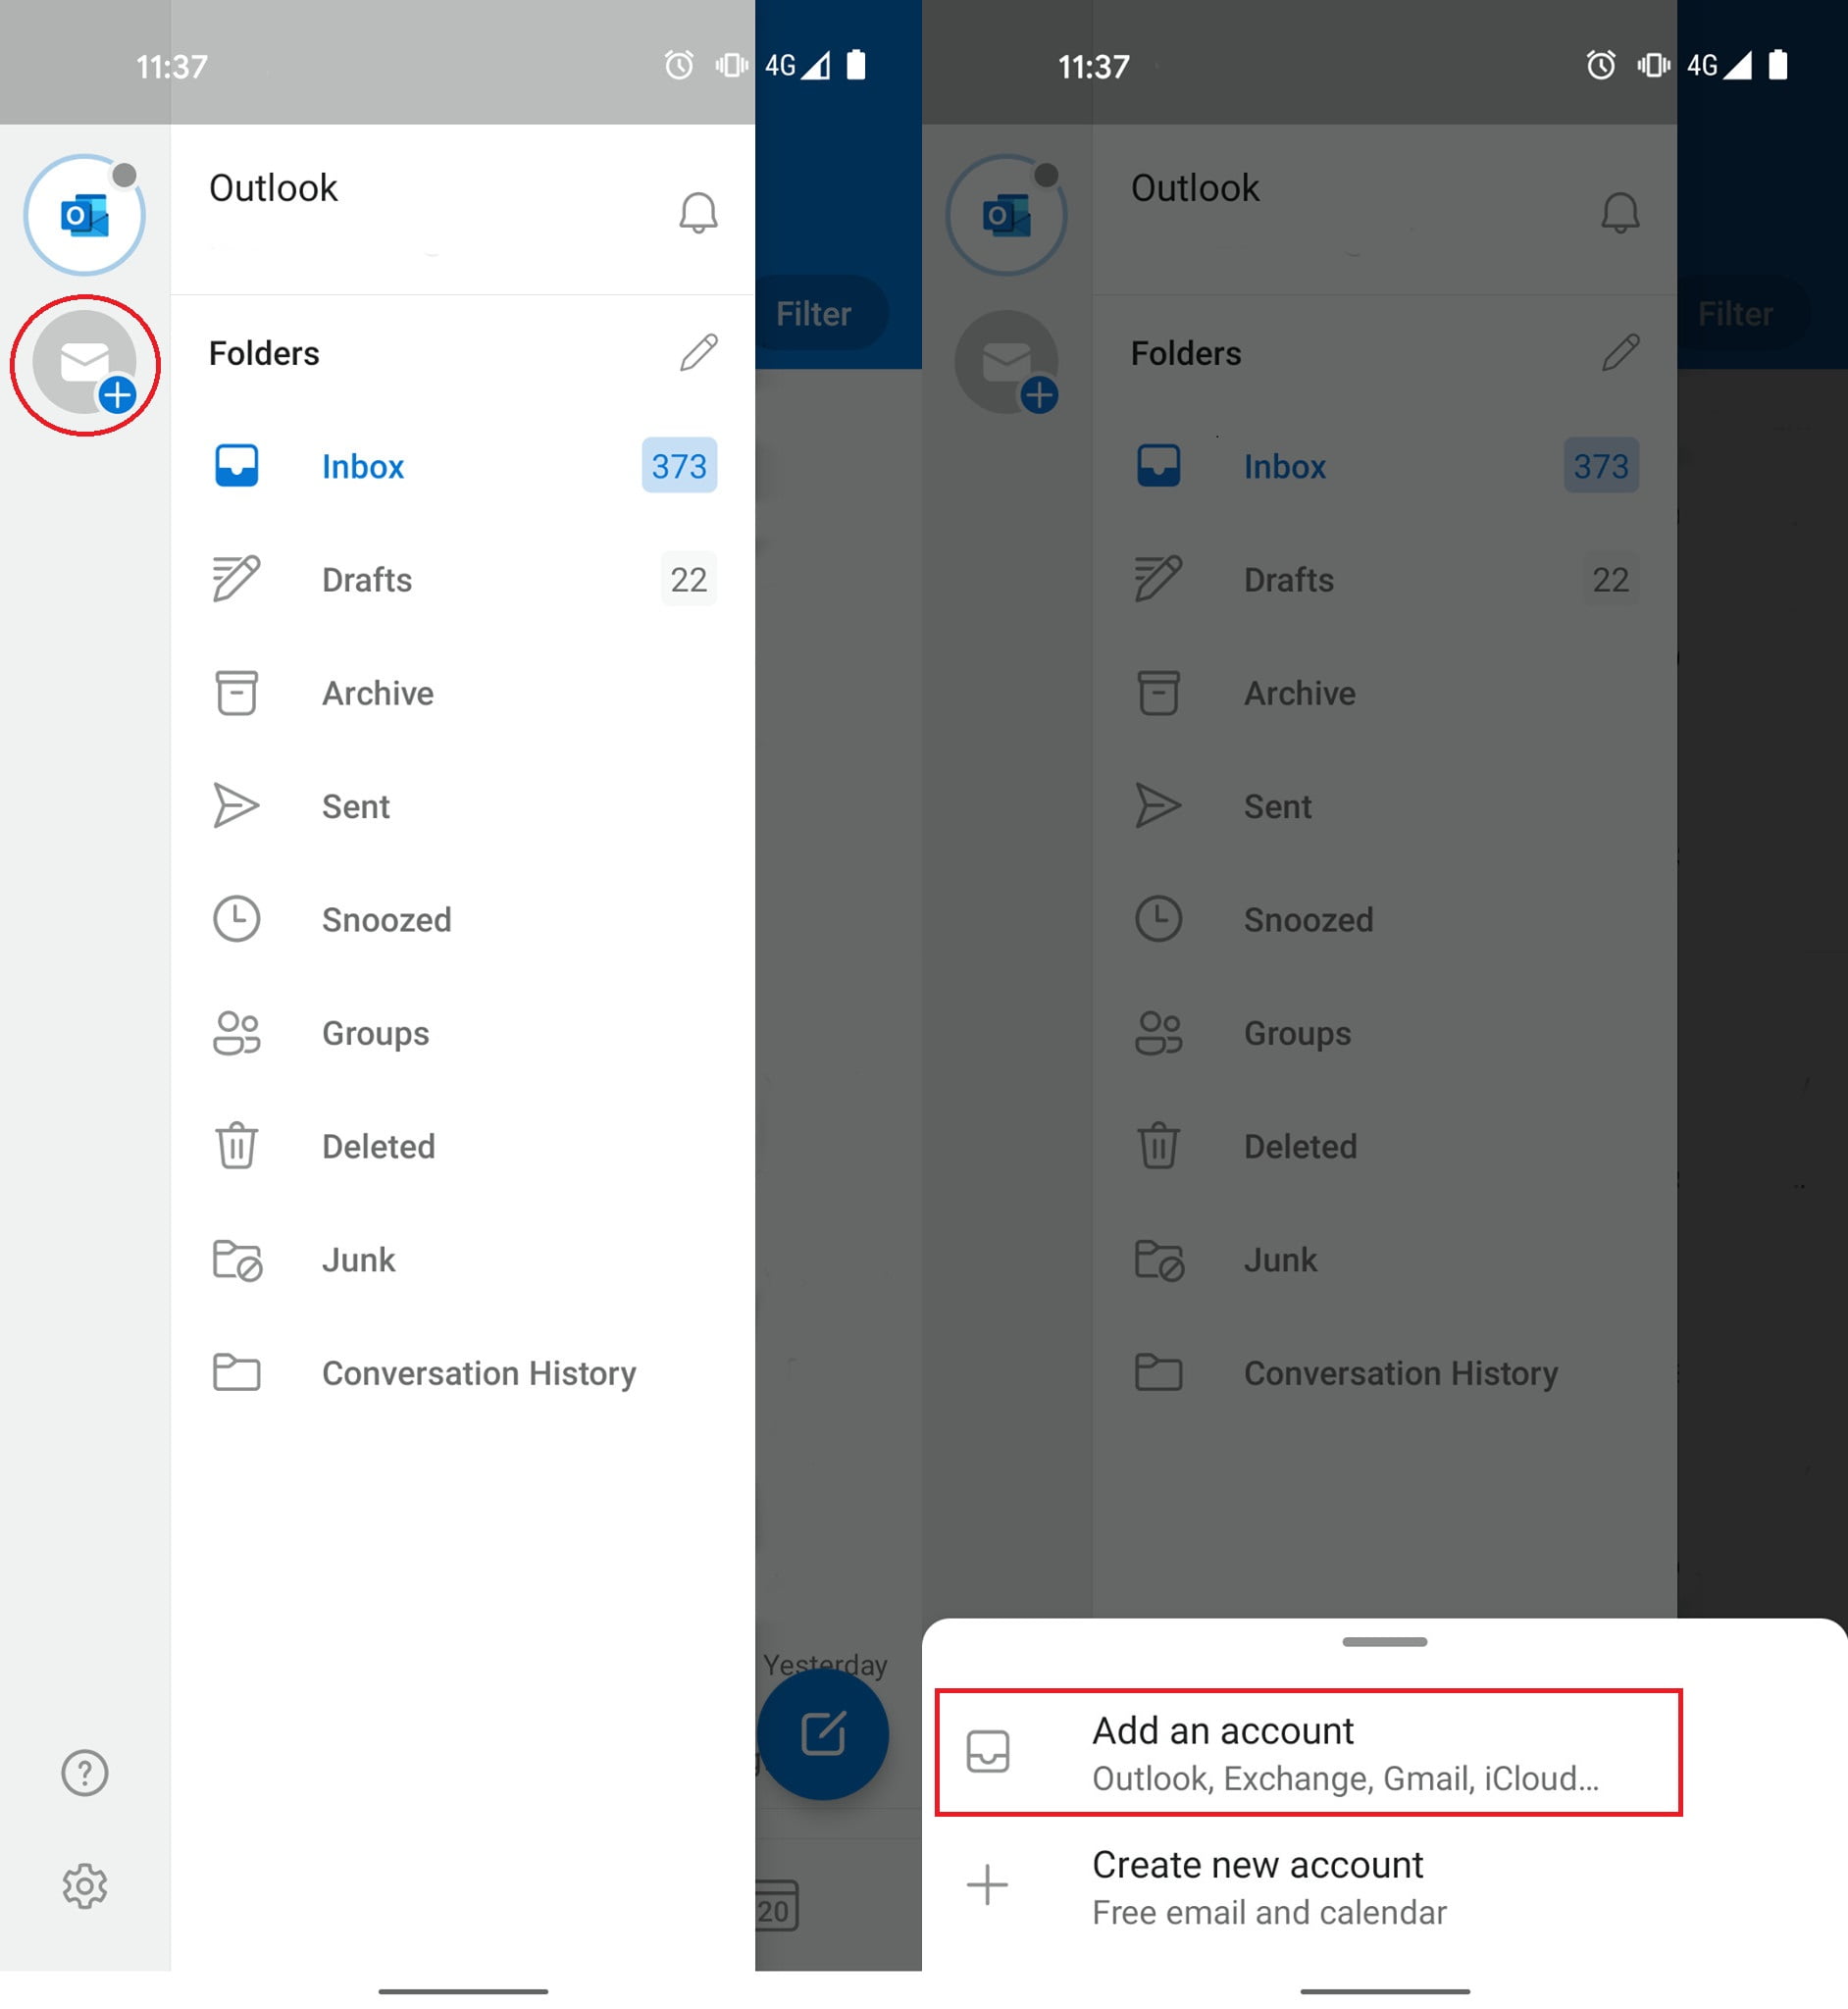
Add Account:
.png)
- In the new window, select Email Account and click Connect.
Enter Account Information:
- Enter your Name, Email Address (your Microsoft 365 email address), and Password.
- Click Next. Outlook will automatically try to configure the account.
Authenticate
- If prompted, enter your Microsoft 365 password and click OK.
- In some cases, you might be redirected to a Microsoft login page. Enter your email address and password there.
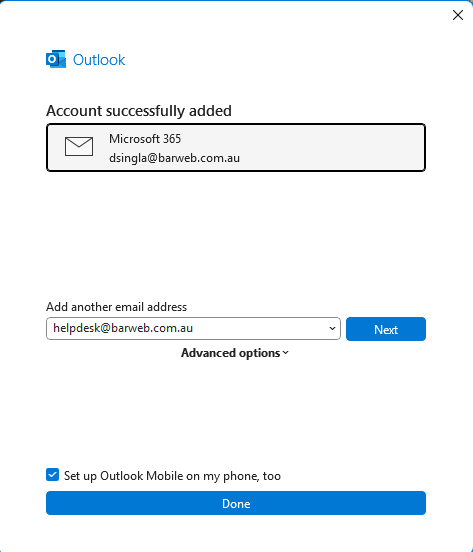
Finish Setup:
- Once Outlook has successfully configured your account, click Finish.
Restart Outlook (if necessary):
- If you don't see your emails immediately, restart Outlook. It should now sync with your Microsoft 365 account.
Microsoft 365 (Android)
Install Outlook App:
.jpg)
Sign In:
Tap on Add Account > Sign in with Microsoft 365 Account
- Enter your email address and tap Next.
- If prompted, enter your password
.jpg)
- Follow any additional verification steps (such as two-factor authentication if enabled).
.jpg)
Complete Setup:
- Once signed in, Outlook will automatically sync your emails, contacts, and calendar from the added account.
.jpg)
Microsoft 365 (iOS)
Open the Outlook App:
Sign In to Microsoft 365 > Get Started > Enter your Microsoft 365 email address
- Tap Add Account.
- Enter your password and tap Sign In.
Allow Permissions:
- You may be prompted to allow Outlook to access your contacts, calendar, and notifications. Tap Allow to grant these permissions.
- If you have Multi-Factor Authentication (MFA) enabled, you will be prompted to verify your identity through your preferred MFA method (e.g., Microsoft Authenticator app, SMS, or phone call).
Access Your Microsoft 365 Data:
- Once setup is complete, you'll see your Microsoft 365 email inbox and other folders in the Outlook app.
- You can access your calendar, contacts, and other features integrated into Microsoft 365 directly from the app.
Microsoft 365 (macOS)
Open Outlook:
- Once the app is installed, open Outlook from your Applications folder or Launchpad.

Open System Preferences:
- Click the Apple icon in the top-left corner of your screen.
- Select System Preferences from the dropdown menu.
Go to Internet Accounts:
- In the System Preferences window, click on Internet Accounts. This is where you manage email accounts and services like Google, Yahoo, Microsoft Exchange, and others.
Add a New Account > Select Outlook or Exchange:
Enter Your Outlook Email > Enter your Microsoft 365 email address > Enter Password
Complete Setup:
- After selecting the apps to sync, click Done.
- Your Outlook (Microsoft 365) account is now added to macOS and will sync with the Mail, Contacts, and Calendar apps.

Re-adding Microsoft 365 Account in Apple Mail After Migration MacOS
Re-Adding a Microsoft 365 Account in Apple Mail on macOS Video Tutorial Included.
In this tutorial, I will guide you through the steps of re-adding your Microsoft 365 account to Apple Mail on macOS. If you're experiencing issues or errors with your account, this step-by-step process should help you resolve the problem.
Helpful Video Tutorial
For a more detailed walkthrough, watch the tutorial video linked below: https://www.youtube.com/watch?v=Zp9RaWrXFD8
Please follow these instructions before reaching out for further assistance.
Step 1: Open Apple Mail
To begin, open the Apple Mail app on your Mac. This can be found in your Applications folder or via Spotlight search.
Step 2: Access Mail Preferences
Click on Mail in the top-left corner of your screen, then select Preferences from the drop-down menu.
Step 3: Go to the Accounts Tab
In the Preferences window, click the Accounts tab to see all the email accounts associated with Apple Mail.
Step 4: Remove the Existing Account
If your Exchange account is listed, select it, and click the minus (-) button to remove it from Apple Mail. Or click into it and click 'Remove Account'
Step 5: Re-add the Microsoft 365 Account
To add your Microsoft 365 account back, click the plus (+) button, then select Microsoft Exchange
Enter your email address and description; click Sign In.
You will then be asked if you want to 'Sign-In' or 'Configure Manually'. Click 'Sign-In'
It will then prompt you to follow to a Microsoft Page. Click Continue.
Follow through the steps, as it may ask to configure Multi-Factor Authentication.
Step 6: Complete Setup
Once your Microsoft 365 account has been successfully added it will ask if you want to sync contacts, calendar, Phone etc.. Make sure these are all highlighted green then click 'Save'. Apple Mail will begin syncing your emails, and you should start seeing your emails appear shortly - If you have a large mailbox it may take a small period of time to download all your emails. Please be patient.
Re-Adding a Microsoft 365 Account in Outlook on macOS
Re-Adding a Microsoft 365 Account in Outlook on macOS
In this tutorial, I’ll walk you through the steps of re-adding your Microsoft 365 account to Outlook on macOS. If you're encountering issues with your account, this guide will help you resolve them.
Helpful Video Tutorial
For a more detailed, step-by-step tutorial, please watch the video below
Please try these steps before contacting us for further assistance.
Step 1: Open Outlook
Start by opening Outlook on your Mac. You can find it in your Applications folder or search for it via Spotlight.
Step 2: Go to Preferences
Click on Outlook in the top menu bar, then select Preferences from the dropdown menu.
Step 3: Select Accounts
In the Preferences window, click on Accounts to manage your email accounts within Outlook.
Step 4: Remove the Existing Account
If your Microsoft 365 account is listed, select it and click the minus (-) button to remove it from Outlook. Or click into the account and click 'Remove'
Step 5: Add a New Account
To add your Microsoft 365 account again, click the plus (+) button. Select Microsoft 365 and enter your account details, including your email address and password.
Step 6: Complete the Setup
Once the account is added, Outlook will start syncing your emails and other data. Your inbox should populate shortly with all your messages.
How to re-add email account on iPhone (Apple Mail)
How to Re-add an Office 365 Account to Apple Mail on iPhone
If you need to re-add your Office 365 account to Apple Mail on your iPhone, follow these simple steps:
Step 1: Delete the Existing Exchange Account
-
Open the Settings app on your iPhone.
-
Scroll down and tap Mail.
-
Tap Accounts.
-
Select your Exchange account (the Office 365 account you want to remove).
-
Tap Delete Account at the bottom of the screen.
Step 2: Add Your Office 365 Account Back
-
After deleting the account, go back to the Accounts section and tap Add Account.
-
Choose Microsoft Exchange from the list of account types.
-
Enter your email address in the provided field.
-
For the Description field, you can type Exchange or leave it as is.
-
Tap Next to proceed.
Step 3: Sign In
-
When prompted with Configure Manually or Sign In, select Sign In.
-
A new window will appear asking you to Continue with Microsoft. Tap Continue.
-
Select Work or School Account when prompted.
-
Enter your Office 365 password.
Step 4: Enable Two-Factor Authentication (if needed)
-
If prompted to enable Two-Factor Authentication, tap Continue.
-
Follow the on-screen instructions to complete the authentication process.
Step 5: Configure Sync Settings
-
After successfully signing in, a confirmation screen will appear with Success.
-
You'll be prompted to select what you want to sync (Mail, Contacts, Calendars, etc.). Ensure all desired options are turned on (green).
-
Tap Save to complete the setup.
Step 6: Wait for Your Mailbox to Sync
-
Your inbox should start syncing with your Office 365 account. Depending on the size of your mailbox, this may take a little time.
-
Once synced, you will be able to access your emails in Apple Mail on your iPhone.